Creating with Batik Fabric

Creating with Batik Fabric

Hi Ya’ll, good to see you!

I hope you are well and staying out of the heat! It is definitely summer in Texas today!

The last time I wrote I hoped to inspire you to take a step or two out of your comfort zone and try some applique projects with a great tool called the AccuQuilt GO Fabric Cutter. I hope you checked them out here at SewingMachinesPlus.com for the one that would suit you the best.

Let us talk about my fabric obsession today. It is called Batik!

Let us talk about my fabric obsession today. It is called Batik!

The reason for my suggestion of trying “improvisational” quilting or one that you create yourself, is that it brings much satisfaction knowing that no one else has put together the fabric combinations that you love. the best.

Let us talk about my fabric obsession today!! It is called Batik!

What is Batik?

It is a hand dyed textile that is made using a wax resist technique to cover some parts of the fabric so they are not dyed with the color. Selected areas of the cloth are blocked out by drawing or brushing wax over them and the cloth then several colors are used to dye the fabric.*

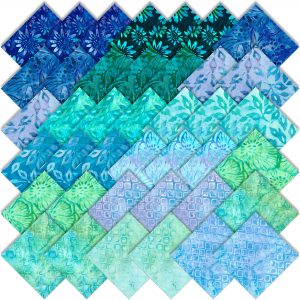
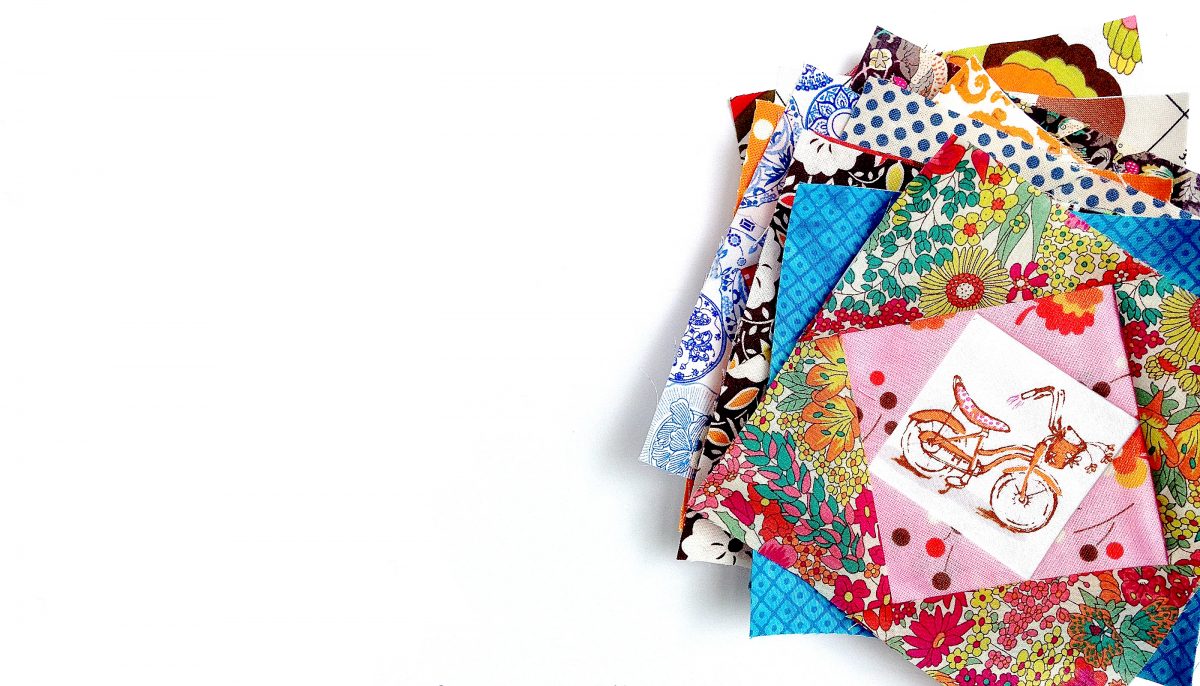
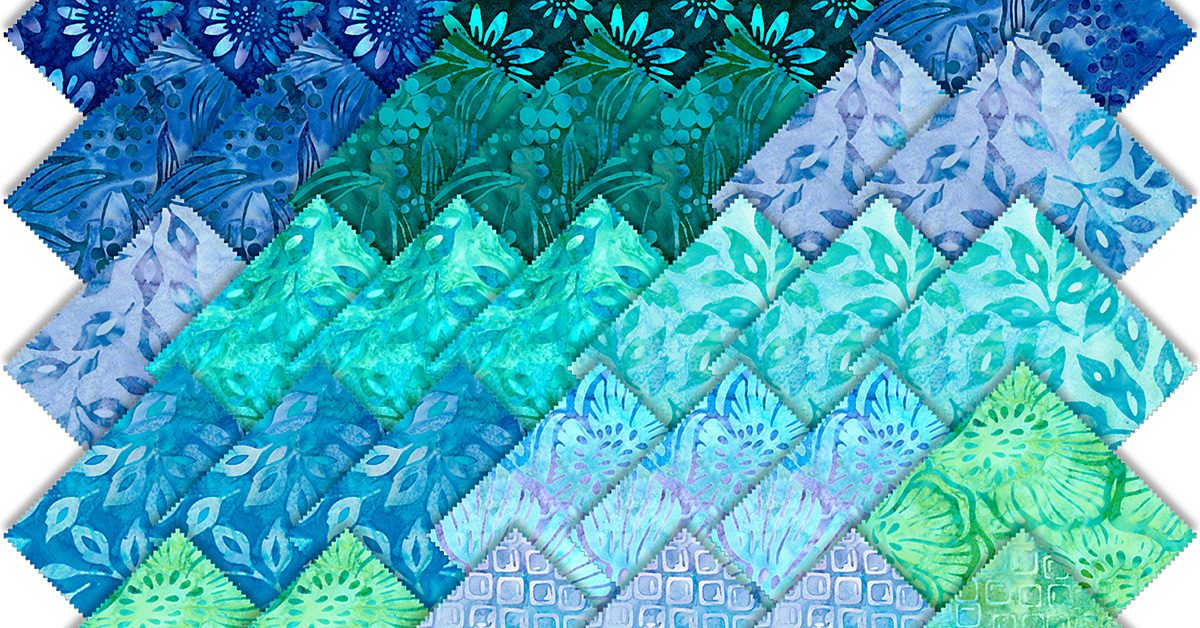
Contemporary batik, may have etching, stencils and different tools for waxing and dying and use things such as leather, paper, wood, silk or cotton to use in techniques to make the most expressive and subtle of wax resist projects. Note from the pictures above, some look like the fabrics tie dyed and others have small details. Using various amounts of colors, the textile looks printed, but in fact it is hand drawn places of wax resist, it becomes a unique piece of art.*

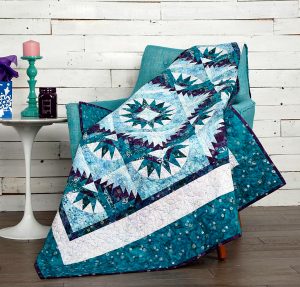
Today, keeping in line with those thoughts, I want to share with you some beautiful fabric that would be a great choice for these fabric cuts to design a beautiful quilt, utilizing the shapes you can make with the AccuQuilt Fabric Cutter. To keep it simple at first, just blocks or basic shapes or strips can be easy to cut and sew in patterns that you can replicate for your own taste.

Let’s go through the design stages. That’s the most fun!

  1. Check out the internet for new ideas about quilts
  2. Purchase magazines on quilting at the bookstores or online
  3. Many of the patterns look complicated, however don’t get discouraged. They are only for inspiration right now
  4. Depending on your quilting experience, play with paper and pencil and come up with a simple pattern using a few different basic shapes. Perhaps blocks and triangles or perhaps all strips
  5. Perhaps all squares or rectangles, it’s all your design
  6. Study the batik fabrics available in online fabric stores and curate your own choices on a design board. It is good to make notes on the particular fabrics so you can go back and order the ones you really like. Depending on where you live, you may be able to find fabric you love in the local fabric stores (I personally have purchased many yards of fabric and precuts online with no problems. It is like Christmas every time I order. Sometimes I get surprises!)
  7. Then play with how these colors look good together. There is no right or wrong. It is your creation, your taste
  8. Leave the palette alone and come back to it to see if your color choices still suit you. If not, play some more
  9. Cut out color combinations from magazines that you admire. Once you are happy with your plan, look for fabric, order online or purchase
Start a small project, a table runner, a pillow, a tote bag or go for a quilt.

Start a small project, a table runner, a pillow, a tote bag or go for a quilt.

Start a small project, a table runner, a pillow, a tote bag or go for a quilt. Any of things will be something beautiful using Batik.

Now would be a great time to check your sewing supplies!

Take a look at your rulers, scissors, pins, rotary cutter blades, and other tools you frequently use. SewingMachinesplus.com has everything you need to make your next project look precise and professional. Besides the AccuQuilt Go, I value my collection of acrylic rulers and cutters for time saving cutting and more time for designing and sewing. Having the necessary tools makes the project more enjoyable as well!

As I said last time, I believe that if I strive to keep an attitude of “I am proud to use this, because I made it with my own design and it shows a part of me”, my positive attitude brings positive results. Find your Happy Place in sewing!

Until next time, discover Batik fabric and let me know what you think! Would I ever love to try making my own Batik fabric and using them in sewing!
Mending Mabel

Mending Mabel

Hi! Good to see you. Hope you are having warm weather like here in Texas!

Today, I want to just give you a quick lesson for mending project.

My current task is to shorten a pair of my hubby’s leisure pants. They are a pair of soft flannel pants that he bought a while back, and they (uhhh) kind of surfaced as I was packing my sewing studio to move. I secretly panicked when he reminded me, he hasn’t seen them in a while! I sweetly said, “Oh yes, dear, I have them. They are on the mending list.”

That’s a call to action for me! So he went out to do his errands, and I scrambled in to find the buried pants.

So as quickly as possible, I found my also found a few necessary tools to accomplish this goal, hopefully in the time he was gone.

I assembled:

  1. Pins
  2. Olfa 45 mm Rotary Cutting mat, the one which is 18″ x 24″
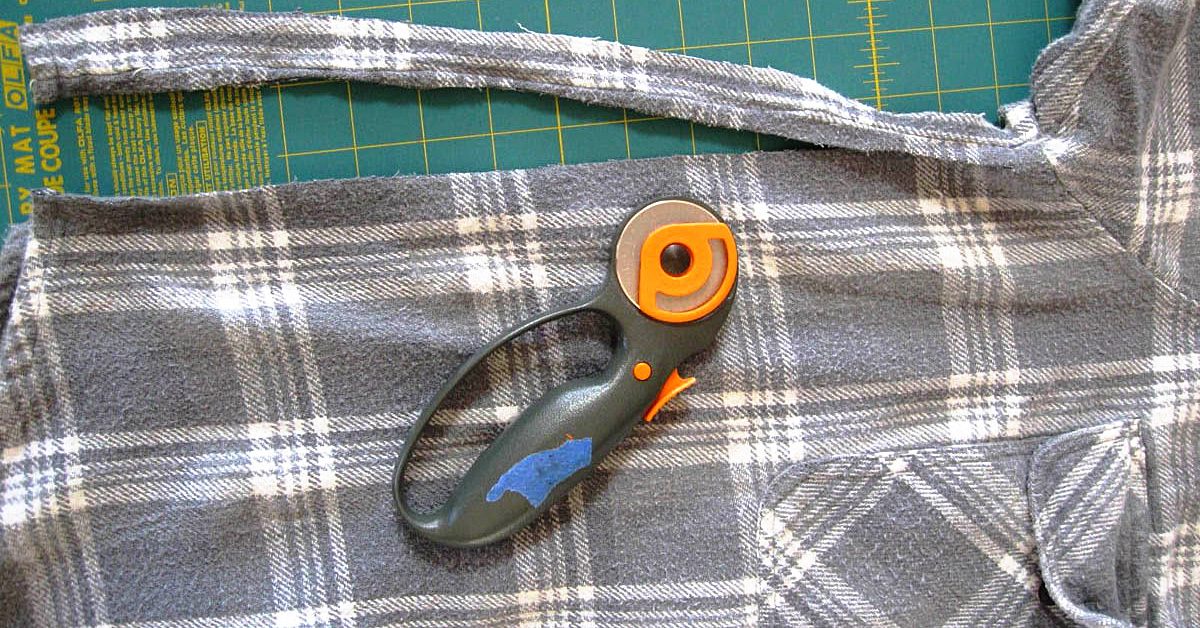
  3. Rotary Cutter
  4. Acrylic Ruler (these packages at SewingMachinesPlus.com come with everything you need all together – great deal!!)

I also keep on hand a few smaller rulers, such as the June Taylor Shape Cut/Sprint as well as the Handi Quilter Mini Ruler for smaller projects. SewingMacinesPlus.com has a great selection of rulers and other supplies for your sewing needs.

Back to the project, now

  1. The first step was shortening the pants which were about 4 inches too long. I turned the pants inside out so they were ready to measure and sew. I measured and cut the 4 inches off both legs.
  2. Turning the edge toward the top of the pants about ¼ inch, I pressed with my iron. They can be pinned first if you want to be precise, however, actually I just winged it, but hey, I was in a hurry.
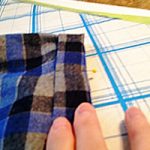
  3. Then turning again approximately an inch, (actually two finger widths) I measured a press a crease again.
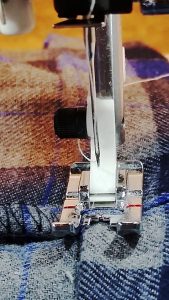
  4. I changed my bobbin thread to black since it would show on the right side, and carefully stitched a new hem very close to the fold.

Ta da!

Last, stitch very close to folded edge on both legs, press the hem flat & you are done!

Last, stitch very close to folded edge on both legs, press the hem flat & you are done!

Last, stitch very close to folded edge on both legs, press the hem flat, and you are done! Or you can also blind-hem stitch by hand. I find that hand-stitching is very relaxing and gratifying when the stitches come out nice and neat.

So, what kinds of project do you have waiting to be mended? It’s a rewarding thing to do when you compare the cost of new clothes to some time devoted to thinking through the best way to refurbish something that takes just a few minutes to fix. Please be assured, measurements with rulers are better than measuring with fingers, and results are more professional. Rushing never works for me without tearing out something.

Back to packing and discovering other projects waiting for me. Nope, maybe tomorrow. Hubby is home!

Happy Sewing until next time.

9 Cutting Tools for your Sewing Room

9 Cutting Tools for your Sewing Room

Do you know the difference between scissors and shears? I didn’t so I looked it up and now I can edify us all. Scissors usually have equal-sized finger holes and are under 6″ in length. Shears have one hole that is bigger than the other and their blade lengths are normally longer than 6″. The terms scissors and shears are often used interchangeably and for the purposes of this article, I flip back and forth between them.

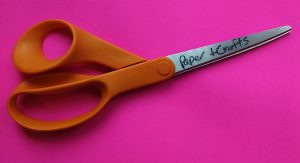
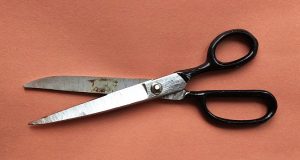
Fabric scissors

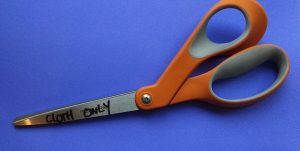
These are the scissors you hide. Or keep locked away. Or you write in Sharpie on them. DO NOT USE. CLOTH ONLY. MOVE AWAY FROM MY SCISSORS. If you haven’t convinced your family to stay away from your fabric scissors, then move to the second pair below.

These are the scissors you hide.

These are the scissors you hide.

All purpose scissors

THESE are the pair you hand people who want to use your fabric scissors. Keep them sharp so no one is ever tempted to grab the pair you keep for working on your stash.

THESE are the pair you hand people who want to use your fabric scissors.

THESE are the pair you hand people who want to use your fabric scissors.

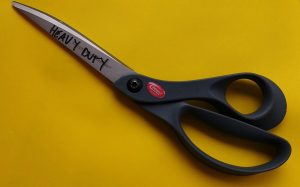
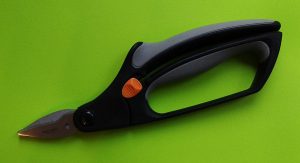
Heavy duty shears

When your regular fabric scissors won’t cut it. I’ve used these to cut canvas, Sunbrella, and leather. Don’t let your friends or family use these for everyday use. They’re heavy duty. Emphasize that by saying it in a low voice, “Sorry, these are heavy duty.”

Don't let your friends or family use these for everyday use.

Don’t let your friends or family use these for everyday use.

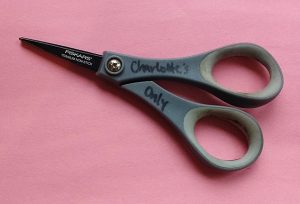
Snipping scissors

Snipping scissors, or scissors with very short, sharp blades are genius for cutting threads as you sew.

Snipping scissors, or scissors with very short, sharp blades are genius for cutting threads as you sew.

Snipping scissors, or scissors with very short, sharp blades are genius for cutting threads as you sew.

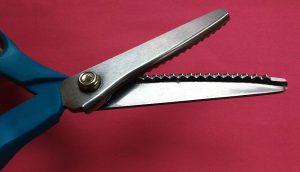
Pinking shears

Pinking shears are what you need if you are working with fabric that ravels or if you plan to leave a cut edge exposed. Pinking shears do what zig zag stitching or serging does, they stop fabric from unraveling. They are genius. You should get a pair.

You should get a pair.

You should get a pair.

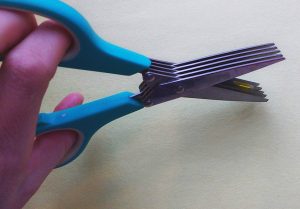
Herb cutters, fringe scissors

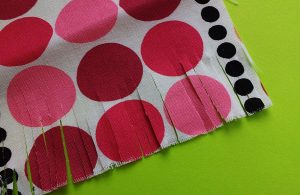
Yes, bring the kitchen into the sewing workshop. These scissors are frequently used to quickly chop up herbs, but in the sewing room they create fringe.

Bring the kitchen into the sewing workshop.

Bring the kitchen into the sewing workshop.

Perhaps you want to make some fringe-cut garland? These would be your tool. They work best when you put the fabric back towards the center of the scissors and stop cutting before you reach the tips. If you have a LOT of tiny snips like this to make, however, you’ll want to see the next pair of scissors.

If you have a LOT of tiny snips like this to make you'll want to see the next pair of scissors.

If you have a LOT of tiny snips like this to make you’ll want to see the next pair of scissors.

Rag quilt scissors

For when you aren’t messing around. Rag quilt scissors have short, sharp blades that let you snip through chunks of fabric to create the famous look of rag quilts.

For when you aren't messing around.

For when you aren’t messing around.

Pro Tip: If you get a pair, make sure to get them spring loaded. Your hands will thank you!

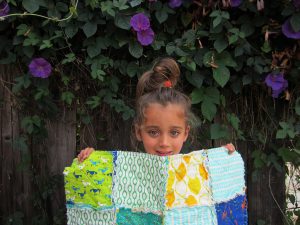
My oldest made this rag quilt with and I snipped it right up with rag quilt scissors. Just put on a TV show you can zone out to and start clipping.

My oldest made this rag quilt with and I snipped it right up with rag quilt scissors.

My oldest made this rag quilt with and I snipped it right up with rag quilt scissors.

Rotary cutter

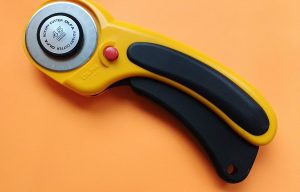
Rotary cutters are becoming more and more popular. Once you learn how to cut fabric with them, your fabric scissors may start to see a lot less use.

Goodbye fabric scissors!

Goodbye fabric scissors!

Ye olde kitchen drawer scissors

Also known as ‘household scissors’ or ‘the scissors you can do just about anything with and mom won’t get mad.’ They are the unsung hero of your scissors quiver because they keep the rest of your tools safe.

The scissors you can do just about anything with and mom won't get mad.

The scissors you can do just about anything with and mom won’t get mad.

What types of cutting tools do you use in your sewing room? Let us know in comments!

—————————–
Charlotte Kaufman is a writer and sewist in Mammoth Lakes, California. She specializes in marine and home interiors and continues to fall more and more in love with quilting. You can follow her at charlottekaufman.com.
Sew It Straight and Square

Sew It Straight and Square

I wanted to take an opportunity to tell you about something I learned very early in my sewing experience. Hopefully, it will help when you have to square off fabric for blocks or other things.

When I resumed by sewing hobby after being away for several years, I found many things have changed. Well, me for one, because I started out thinking I would make a few things, have a sewing machine available for mending, and leave it at that. I wanted to make a shirt or two.

But, never, in my wildest dreams, I thought I would have an interest in quilting. Being able to buy many different fabrics, mix them up, find harmony between them, and create an awesome piece of art was exciting!

So my first fabric obsession started with “fat quarters”. You know, they are bundles of one designer’s collection, or curated by someone else mostly sold in online fabric stores offering 10, 15, 20 or more pieces that have the same colors or coordinating fabrics! Oh… shopping online!! A whole other obsession!! Sorry. I got distracted!

But, I knew right off, I couldn’t cut them with fabric shears or pinking shears. It would take years off my life.

So, today I want to share how I learned to share how to cut “ fat quarters” for multiple precise pieces all at once.

Three tools necessary for straight and square pieces:

  1. Rotary cutter
  2. Acrylic ruler – my favorite 24 x 6 inches, but I also love 14 x 8 inches. Another handy one is 12 x 6 inches. I use them all.
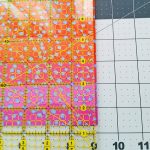
  3. A self-healing cutting mat, measured in centimeters and inches. One with measurements is the KEY here.

Most Important!

RULE #1 – Never Cut Toward Yourself or Sideways with a Rotary Cutter – Always Away from Your Body

RULE #2 – Measure Twice and Cut Once

  1. Open 21 x 18 inch piece. Press with iron flattening fold creases. It makes a difference, you will see!
  2. Cut away selvage edge. You will have the longest part on the mat. Do not double the fabric and trim as close to the edge of the selvage as possible.
  3. Refold the length piece in half by taking the left side and match the edges on the right side where the selvage was.
  4. Square right hand edge with ruler and mat. Take off just a little sliver. Then trim the opposite side for threads. Not much to do there if it is square.
    • Now, the left has a fold, the top is folded two times giving you 4 layers of fabric. The top folded pieces have to be shaved too and the left side so you will still have exactly 9 inches on those two sides if you are careful.
    • Are you still here? Almost done!
  5. Line up the longer piece with the ruler, and trim off the small 2 inch piece to have 4 perfectly squared 9 x 9 pieces. The best part is you only lose about 1 ½” of the fabric by cutting it this way.

However, if you are feeling bold… and you put:

Beautiful 8 x 8 inch napkins ready for your next meal or party.

Beautiful 8 x 8 inch napkins ready for your next meal or party.

Right sides together, sew up the sides at ¼ inch leaving an inch or two (somewhere close to the end but not the corner) to turn them to their right sides, press seams, pin opening closed and top-stitch around all sides.

Then you have:

Beautiful 8 x 8 inch napkins ready for your next meal or party.

I would love to hear your comments or questions. Stop by and see me again soon!

Quitling is Not Baking

Quilting Is Not Baking

My mom was the type of cook who didn’t accurately measure ingredients, and to this day, if you ask her how much of an ingredient to put in food, she might say something like, “Until it looks like enough.”

Be exact. The “it’s good enough” mentality I might’ve had for baking doesn’t spill over so well into the world of sewing.I don’t always accurately measure things in the kitchen either. I might use a coffee cup when the recipe calls for a cup, but even then, I’ve been known to eye-ball the food and decide it needs more. I put baked goods in still pre-heating ovens, guesstimate about time, and haven’t owned a measuring cup or spoon in my adult life that I can recall.

This is how I bake, and I’ve come up with some tasty sweets.

This is, to some extent, how I’ve tried quilting, and the results are evidence of the title of this post.

Quilting is not baking…

I’m a bit of an amateur in the quilting/sewing department. I’m working on my second quilt (third if you count that one atrocity I never finished), and my overall products have been somewhat lacking.

Even with missing the mark on projects though, I still learned. As it turns out, a number of things I’ve learned for quilting are in opposition to habits that worked fine in my baking. See? It’s not baking!

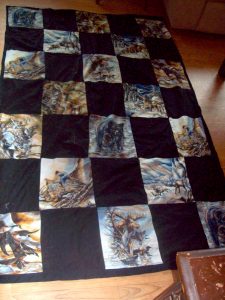
My first quilt.

My first quilt.

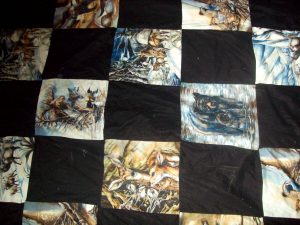
1) Less can be more. I’m not saying smaller quilts are better than bigger quilts, but — let’s connect this food-thing again — “portions” can be too big, and ruin the effect. For baking, if I put in too many ingredients, I might just get more cookies. Who doesn’t love more cookies? For quilting, if the sizing is too big, the best I can do is something that looks amateurish. Like my first quilt:

I hesitate to definitively label this a quilt because it’s so simplistic. The design made sense here, since the animal print was from a fabric I cut up, but imagine how much better this quilt could’ve looked if the panels on that fabric had been smaller. It still might’ve been lacking — hey, it was my first finished one! — but that smaller size of each block could’ve made the overall appearance more refined.

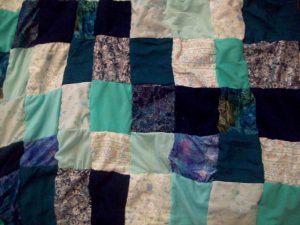
My latest quilt.

My latest quilt.

2) Be exact. The “it’s good enough” mentality I might’ve had for baking doesn’t spill over so well into the world of sewing. Want to see an example? Here’s part of what I have so far with my latest quilt:

These shapes were not all cut in the same sizes. Instead, my system was more general—like “it’s good enough” with baking. Spotting places where this work has issues isn’t too hard. Blocks are different sizes, and I’m not entirely sure the middle rows aren’t smaller than the ends. A reason these problems could’ve happened is because I wasn’t exact with my measurements. Here’s another example of the same flaw:

Crooked corners, but a great learning experience!

Crooked corners, but a great learning experience!

See how the corners don’t line up? Oops! Not good! More accurate measuring could’ve kept this from happening.

3) Have the right tools. I might not have measuring cups and spoons. I might not even use an oven mitt. And my baking could still turn out okay. But what I’ve discovered is that tools might be a key in quilting, especially for an early quilter/sewer like me, and I should look into equipping myself with utensils for the job. Currently, I want a rotary cutter and ruler. With those, getting the right measurements could be easier, which could in turn make my final products look more refined.

4) Have a plan. Going into the kitchen and deciding I’m going to experiment with ingredients might be fine. I’ve done that. And I got some pretty tasty banana cake out of the deal. But if I go into a quilt project without a plan, things could go wrong. For my latest quilt, I changed my technique for sewing after I’d started, which caused some let-downs. My quilt is smaller than I intended, holes showed up in my fabric, and my final row of material might’ve been decided by the fact that I didn’t have enough pieces of certain materials to continue my pattern (which I slightly messed up anyway). Basically, with quilting, I should potentially map out my strategy from start to finish. Otherwise, tasty banana cake might not be the end result.

Hopefully, I’ll learn from my mistakes though, and maybe someone else can, too! Like with just about anything, practice can lead to improvement.