Sewing Super Power: Stereoscopic Vision

Sewing Super Power: Stereoscopic Vision

Are you one of those people who knows what an inch looks like without measuring?

I am. I also know what a ½ inch looks like and two inches and, well, honestly, most units of measurement from an 1/8 of an inch to about eight or ten feet.

I can also look at a photo of someone and determine how many inches shorter (or longer) his or her pant, shirt, jacket, or dress hem needs to be. And I can take a picture or drawing of a garment and recreate it with only that image as a reference.

I bet a lot of people reading this blog can do these things too.

I never thought too much about the why. It was just something I was always good at.

3D vision – no Oculus Rift needed

3D vision - no Oculus Rift needed

3D vision – no Oculus Rift needed

Well, this past week, a new scientific study was published at the University of California at Berkeley about how dressmakers were found to have “needle sharp” 3D vision.

3D vision is also referred to as stereoscopic vision, which is the ability of the brain to take 2D information and translate it into 3D. Depth perception is part of this equation, meaning stereoscopic vision is what allows us to thread needles, catch balls, and park cars (among a myriad of other things.)

It also means that some of us, those with especially keen stereoscopic vision abilities, are able to look at the distance between things and immediately calculate a correct (and often freakishly accurate) measurement.

There have been countless occasions when I’ve looked at a fitting photo of an actor with a hem pinned up and said, “Oh, I need to shorten that an inch and ½,” (or whatever) and someone else has said, “Let’s measure to make sure.”

And so we do. And I’m always exactly right.

In the same way, I can often walk into a fitting room – or even just watch someone wander by – and say, “That needs to be lengthened ¾” and the waist taken in an inch.”

And then I do the alterations without pinning and its correct.

Batman’s got nothing on me

Batman's got nothing on me.

Batman’s got nothing on me.

I’ve always just thought of it as one of my super powers. I believe everyone has a couple or three superpowers. The trick, sometimes, though, is figuring out what they are.

Adrien Chopin, the neuroscience researcher who conducted the 3D vision study, says that they’re still trying to figure out if tailoring and sewing sharpens stereoscopic vision or, if tailors and the like are drawn to the profession because of their enhanced “stereo-acuity”.

I’m definitely not a scientific researcher but I think it’s both of these things. My brain has always been adept at moving between the 2 dimensional and 3 dimensional worlds. I just never knew it had a specific name. And because I use this ability many times a day, I’ve become better and better at it to the point where my accuracy percentage is probably 99.9999999%.

Or something like that

I can also go from 3D to 2D quite easily, meaning I can look at a 3 dimensional object, like a garment (on or off a person) and know what shape it would be as a flat 2 dimensional pattern.

Chopin’s study goes on to say that people like surgeons and dentists have normally been assumed to have superior stereovision but that dressmakers and tailors in general had even more precise 3D vision abilities that those in the medical fields.

Kind of crazy, huh?

Take care to use your powers for good.

Take care to use your powers for good.

Chopin intends to study more extensively the stereoscopic superpowers of dressmakers. He says that a better understanding of the ability will help in efforts to train those with visual impairments like “lazy eye” to strengthen their 3D vision. He also believes that improved stereoscopic vision could be tantamount in training people in occupations that require precise hand-eye coordination like military fighters or athletes.

On the other end of the spectrum, some vision scientists think that painters often have poorer stereovision which is what gives them an advantage when working in a 2 dimensional world. Rembrandt, the 17th century Dutch painter, is thought to have suffered from stereo blindness.

I find all this quite fascinating. If you do to and want to read more in depth information about the study, you can see the whole report here.

And don’t forget to spend some time celebrating your own super powers, which, if you’re a tailor or seamstress, very likely include stereoscopic vision. Yay us!

Five Sewing Tools that will take your Sewing to the Next Level

Five Sewing Tools that will take your Sewing to the Next Level

I love the feeling of getting sewing packages in the mail, don’t you? This particular box included a new tool that I’ve been excited to try. It is part of my top five sewing tools that will take your sewing to the next level, or at the very least, make your sewing more efficient and enjoyable.

I love the feeling of getting sewing packages in the mail, don’t you?

I love the feeling of getting sewing packages in the mail, don’t you?

1. A sewing mini iron

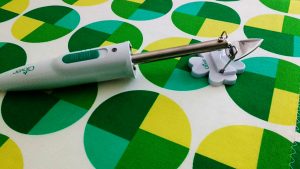
This is the Clover Mini-Iron. Isn’t it precious? I ordered it from SewingMachinesPlus.com and it is more than just an adorable accessory to your ironing board. A mini iron lets you iron hard-to-get-to seams or helps iron tiny seams on things like mini quilts.

It even comes with a little stand. Awwww.

It even comes with a little stand. Awwww.

It even comes with a little stand. Awwww.

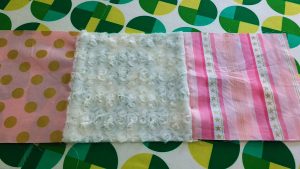
While I know I’ll have many opportunities to use this, I specifically bought it for this current project. My girls and I are working on BFF (best friends forever) quilts and the squares alternate with minky fabric.

My girls & I are working on BFF quilts with alternating minky blocks.

My girls & I are working on BFF quilts with alternating minky blocks.

Using a regular iron to iron over the seams would be a challenge. Hot irons can melt or destroy minky fabric. (For more on how to sew with minky, check out my post here).

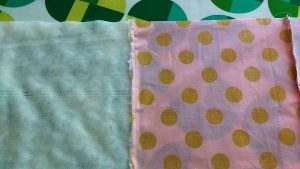
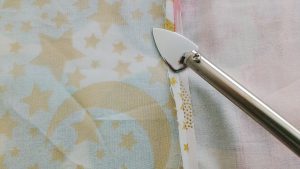
Here I folded the cotton fabric seam over the minky fabric and then placed a scrap of fabric over both. Then I ironed the seam down.

That’s what I’m talking about! This mini-iron is worth its weight in gold.

This mini-iron is worth its weight in gold.

This mini-iron is worth its weight in gold.

For fans of mini-quilts, or anyone who wants to iron their seams open, the mini-iron makes short work of it.

For fans of mini-quilts, or anyone who wants to iron their seams open, the mini-iron makes short work of it.

For fans of mini-quilts, or anyone who wants to iron their seams open, the mini-iron makes short work of it.

2. A rotating (rotary) cutting mat

Yep, you heard me correctly. This is a cutting board that rotates on its base. If you’ve ever had a pile of HSTs (half-square triangles) or any other type of project that involved a lot of trimming, you will never look back from making this purchase. SewingMachinesPlus.com sells several different sizes.

This is a cutting board that rotates on its base.

This is a cutting board that rotates on its base.

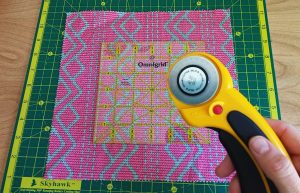
Here you can see I’ve cut one side of the fabric square. Prior to owning a rotary mat I would have had to move my body or the fabric and the ruler to make the subsequent cuts.

Here you can see I’ve cut one side of the fabric square.

Here you can see I’ve cut one side of the fabric square.

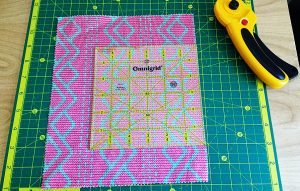
Not anymore. Look how it spins!! The base stays put while the cutting board goes for a walk.

The base stays put while the cutting board goes for a walk.

The base stays put while the cutting board goes for a walk.

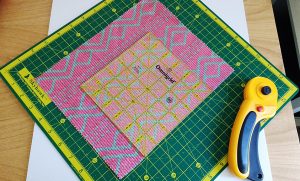
Here is my square fully cut. It’s a thing of beauty, no?

Here is my square fully cut.

Here is my square fully cut.

3. Rulers and grids

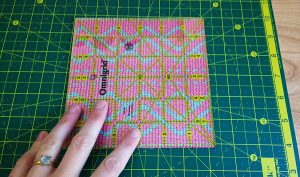
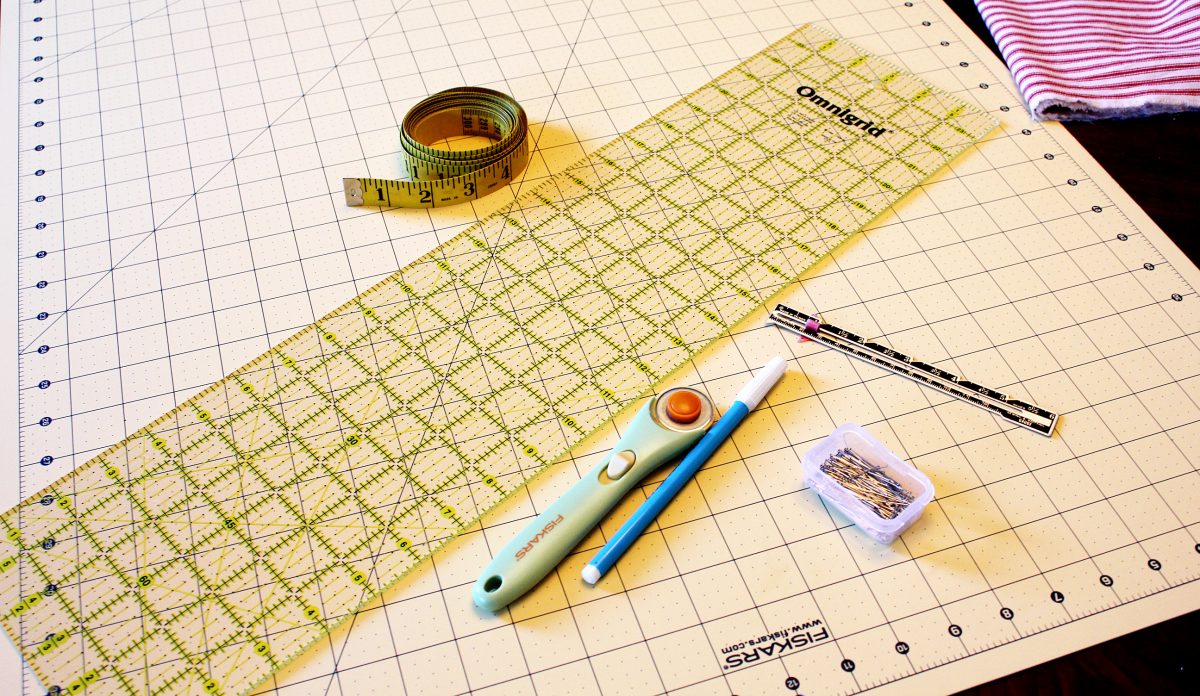
This is my assortment of rulers and grids. There is nothing like having the right tools for the job. The two square grids were purchases for projects whose final size HSTs needed to be trimmed exactly to the size of the grid.

The large grid on the bottom is 24” long and my primary ruler for measuring and cutting out my fabric. The 2” ruler is my workhorse, everyday ruler.

Lastly, I had to include a classic measuring tape. I have about seven floating around the house and in my backpack and car. You never know when you might need to measure something!

The small, black and silver ruler below the measuring tape is a seam gauge. It helps you mark precise seams at a variety of lengths.

SewingMachinesPlus.com has a wide assortment of rulers and grids: https://www.sewingmachinesplus.com/searchresults.php?search_field=omnigrid

SewingMachinesPlus.com has a wide assortment of rulers & grids.

SewingMachinesPlus.com has a wide assortment of rulers & grids.

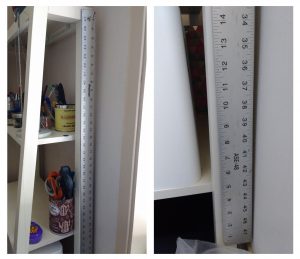
I also have this heavy, metal, 48” ruler that I use for canvas and large home interior projects, or when cutting very large lengths of fabric.

I also have this heavy, metal, 48” ruler.

I also have this heavy, metal, 48” ruler.

4. A walking foot

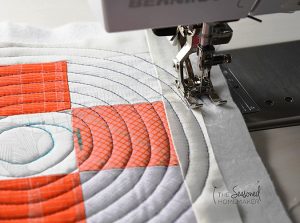
I mention my walking foot a lot in my posts here and that’s because I use it a lot. In fact as a rule, I have it installed as my go-to sewing foot and only switch out to other feet as needed. Your machine probably came with one and you tucked it away not knowing what the strange, Star Wars-like contraption was.

Get it out of the box and learn to use it! If you quilt or work with thicker fabric, your walking foot will be your best friend.

Get it out of the box & learn to use it!

Get it out of the box & learn to use it!

If your machine didn’t come with one, I guarantee the maker of your machine sells one as an accessory. Check out all the options available on SewingMachinesPlus.com here.

Image via The Seasoned Homemaker.

Image via The Seasoned Homemaker.

5. A bias tape maker

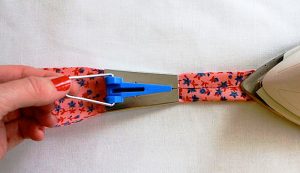
There will come a point in your sewing career when the pre-made bias tape available in stores and online just doesn’t meet your needs. When you get to that point, grab a bias tape maker, in fact, grab a few (they make different sizes of tape). With one of these humble tools you can make both single and double-fold bias tape and the sky is pretty much the limit as far as your creativity goes.

When you get to that point, grab a bias tape maker, in fact, grab a few (they make different sizes of tape).

When you get to that point, grab a bias tape maker, in fact, grab a few (they make different sizes of tape).

You can make coordinating, contrasting, or complimenting colors of bias tape to match your projects and the process is extremely quick. It won’t be as fast as using premade, but I promise it will be worth it.

Image via Made Everyday with Dana.

Image via Made Everyday with Dana.

Do you use any of these tools already in your sewing projects? What other tools would you add to a list like this? Let us know in comments!

———————————————————————————–
Charlotte Kaufman is a writer and sewist in Mammoth Lakes, California. She specializes in marine and home interiors and continues to fall more and more in love with quilting. You can follow her at charlottekaufman.com.
The Traveling Tailor

The Traveling Tailor

Sewing machines and supplies aren’t exactly the most portable things. Sometimes, when I’m not working fulltime on a show, I’ll get a one or two day job that requires me to schlep a machine and supplies to a work space. These are my least favorite kind of jobs – for no other reason than I have to transport my machine and a small kit of sewing supplies somewhere.

I live in New York City. I haven’t owned a car in over ten years.

What’s the big deal, you may ask, just throw it all in your car and go. Well, that’s the thing: I live in New York City. I haven’t owned a car in over ten years. The last time I drove was about two years ago. And I’m not a huge fan of Uber or even good old-fashioned yellow cabs. Cars are just not the most efficient way to get around the city. So, I’m usually dragging a sewing machine up and down the subway stairs to get to where I need to go.

On the go

I know I’ve recommended these machines before, but Brother makes some incredibly good and lightweight machines. I have two SC9500s. They are so lightweight that I carry them in a tote bag on my shoulder. I then use a backpack to carry my supplies: scissors, threads, rulers, chalk, a small collection of notions.

Other Brother machines that are very light weight are the CS5055 and the ES2000.

I also bike a lot, which is always the most efficient way to get around the city, and have been known to strap a machine (in a box) to the rear rack on my bicycle.

When going to a job that is only one or two days, sometimes it’s hard to figure out what to bring, especially if you’re trying to not lug your entire shop down the length of Manhattan and across the bridge to Brooklyn.

Here’s a list of what I usually bring to a short one-day job:

  • 1 pair of tailor’s points or small scissors
  • 1 pair of medium sized shears
  • 1 pair of pinking shears (because I’m certainly not bringing a serger along to finish seams.)
  • 1 gallon sized Ziploc of thread. Must have colors include black, grey, white, tan, a greeny-brown, nude, and a yellow-orange for topstitching on jeans.
  • 12” see through 2” wide ruler
  • 1 soft tape measure
  • Tailor’s chalk, red marking pencil, pencil, black disappearing ink pen
  • Seam ripper
  • Metal hem gauge ruler
  • Small container of straight pins
  • Extra bobbins for machine
  • Small collection of hand and machine needles (I always bring some leather needles and double needles, just in case.)
  • 1 gallon sized Ziploc of bias tape (black and white), elastics, twill tape, and hem tape.
  • Small containers of snaps and hook & eyes.
  • Muslin pressing cloth
  • Small collection of nude spandex and netting scraps and interfacings

Lighting is key

Sometimes it’s nice to bring along a small light of some kind. I often find myself sewing in inadequately lighted spaces. I tend not to bring a lamp because, well, the subway. I always make sure the light in the machine is working. And the flashlight on an iphone can be extremely helpful in especially dark circumstances.

Gear up

I’m not very high tech with my carrying cases but there are lots of really lovely ones out there if you’re not into backpacks and tote bags.

https://www.sewingmachinesplus.com/sewing-accessories-cases.php

The key is to keep everything super organized. And don’t worry about not having all the thread. Unless you’re topstitching, most things can be sewn with black, white, or tan. I know some tailors that only use those colors of thread. It really is ok if your thread doesn’t match exactly. And sometimes you just have to use what you have, especially if you are a traveling tailor.

Must Have Sewing Notions and Supplies

Must Have Sewing Notions and Supplies

Last week, I told you about my dream sewing room furniture. This week, I want to share with you my must have sewing supplies. And no, I don’t actually own all of them since I don’t yet have that dream sewing room. Call this my dream sewing supplies list, I guess.

Must Have Sewing Notions and Supplies

Dress Form

I adore making cute summer sundresses. Right now, I measure myself, cut along what I hope are the right lines in the pattern and hem it by hanging the dress on closet hanger. Not ideal, but so far at least, they’ve all come out fine. I’d love a dress form though so I could check the fit and make minor tweaks and modifications as I go. I’m kind of between dress form sizes right now, so I’d have to make a call on which size to get – or if money was really no object, just get both!

Amazing Sewing Scissors

Alright, so I do have a pair of fabric scissors. I couldn’t consider myself a sewer if I didn’t. But I don’t love them. The handles are hard plastic and someone (not naming any names) used them to cut paper at some point, which kind of screwed up the cutting surface. I’d really love a pair of fabric scissors with a softer handle, especially since breaking my right hand last year. Even better, the ones I linked to have a purple handle! That’s my favorite color. Definitely on my sewing supplies wish list.

How about you?

Long Ruler

I don’t necessarily need to cut long, straight lines making sundresses, but I do need to measure long stretches of fabric to line up pattern pieces. Right now, I use a soft measuring tape. I pin it down on one side and pull it taut to measure. It’s not ideal, but it gets the job done. A yard stick or long ruler would go a long way towards making measuring easier.

What’s on your sewing supplies wish list? Sewing Machines Plus probably has it! Check out the website and let yourself dream.

Sew It Straight and Square

Sew It Straight and Square

I wanted to take an opportunity to tell you about something I learned very early in my sewing experience. Hopefully, it will help when you have to square off fabric for blocks or other things.

When I resumed by sewing hobby after being away for several years, I found many things have changed. Well, me for one, because I started out thinking I would make a few things, have a sewing machine available for mending, and leave it at that. I wanted to make a shirt or two.

But, never, in my wildest dreams, I thought I would have an interest in quilting. Being able to buy many different fabrics, mix them up, find harmony between them, and create an awesome piece of art was exciting!

So my first fabric obsession started with “fat quarters”. You know, they are bundles of one designer’s collection, or curated by someone else mostly sold in online fabric stores offering 10, 15, 20 or more pieces that have the same colors or coordinating fabrics! Oh… shopping online!! A whole other obsession!! Sorry. I got distracted!

But, I knew right off, I couldn’t cut them with fabric shears or pinking shears. It would take years off my life.

So, today I want to share how I learned to share how to cut “ fat quarters” for multiple precise pieces all at once.

Three tools necessary for straight and square pieces:

  1. Rotary cutter
  2. Acrylic ruler – my favorite 24 x 6 inches, but I also love 14 x 8 inches. Another handy one is 12 x 6 inches. I use them all.
  3. A self-healing cutting mat, measured in centimeters and inches. One with measurements is the KEY here.

Most Important!

RULE #1 – Never Cut Toward Yourself or Sideways with a Rotary Cutter – Always Away from Your Body

RULE #2 – Measure Twice and Cut Once

  1. Open 21 x 18 inch piece. Press with iron flattening fold creases. It makes a difference, you will see!
  2. Cut away selvage edge. You will have the longest part on the mat. Do not double the fabric and trim as close to the edge of the selvage as possible.
  3. Refold the length piece in half by taking the left side and match the edges on the right side where the selvage was.
  4. Square right hand edge with ruler and mat. Take off just a little sliver. Then trim the opposite side for threads. Not much to do there if it is square.
    • Now, the left has a fold, the top is folded two times giving you 4 layers of fabric. The top folded pieces have to be shaved too and the left side so you will still have exactly 9 inches on those two sides if you are careful.
    • Are you still here? Almost done!
  5. Line up the longer piece with the ruler, and trim off the small 2 inch piece to have 4 perfectly squared 9 x 9 pieces. The best part is you only lose about 1 ½” of the fabric by cutting it this way.

However, if you are feeling bold… and you put:

Beautiful 8 x 8 inch napkins ready for your next meal or party.

Beautiful 8 x 8 inch napkins ready for your next meal or party.

Right sides together, sew up the sides at ¼ inch leaving an inch or two (somewhere close to the end but not the corner) to turn them to their right sides, press seams, pin opening closed and top-stitch around all sides.

Then you have:

Beautiful 8 x 8 inch napkins ready for your next meal or party.

I would love to hear your comments or questions. Stop by and see me again soon!

Cheating on the Measurements?

Cheating on the Measurements?

Sometimes, it’s easy to get wrapped up in the latest trends and technologies. That idea can be seen by anyone who rushes out to buy the latest phone, computer, or game system. I’m not saying having the most current examples of those things is bad, but the situation can lead to the mental debate of how much your phone/computer/gaming experience is actually bettered by having the latest in technology.

Believe it or not, this logic can be applied to the world of sewing as well. If you give a bit of thought to the sewing machines your grandma might have used, you could already see carbon dating, so to speak! It was a different world for sewing, and that world continues to change! In fact, not too long ago, I saw a sewing machine for sale that seemed to have digital buttons for the stitch types. Simple change, but kind of weird to me! Were we really that inconvenienced by turning a knob for different stitches?

Convention or Innovation

I’ve been giving this overall notion some serious thought, and I’ve come up with one area where simplicity can get the sewing job done in a world where technology keeps pushing farther. So, forget the glitz and glamour of modern technological advancements for a moment, and walk with me down Simplicity Lane for a block or two! The reason? We’re exploring not-so-technological options for that one area in particular: Measuring!

There are a number of options available for purchase in regard to measuring your material for your sewing projects, and far be it from me to say they’re all ridiculous and not worth the investment. I haven’t tried them all, and I can’t judge an entire category of sewing utensils on the small number of tools I have in my collection.

This fancy see-through ruler can definitely come in handy, but guys, you need one.

This fancy see-through ruler can definitely come in handy, but guys, you need one.

But the truth is that even if those advanced tools are worth the money and are worthy of being in your sewing collection, you still might not have any of them at your disposal next time you sew. This fancy see-through ruler can definitely come in handy, but guys, you need one. There are other (maybe less impressive-looking/sounding options) that can still get your measuring done!

For this reason, I will be exploring three options for measuring your fabrics that might be technologically lacking, but are logically accurate nonetheless. Let’s do this in a reverse good-better-best format as we scale it back farther and farther from the technological best, shall we?

The Steps

Using the flimsy roll of tape that can come with a general sewing kit can serve your fabric-measuring purposes.1) Reverse Equivalent of Good: Old school sewing tape is still an option! Sure, it might look outdated, and it likely won’t wow most people if you bring a roll of it out of your sewing case. But the bottom line is that it works!

I’m not saying more advanced methods of measuring don’t have their benefits, but when pressed, using the flimsy roll of tape that can come with a general sewing kit can serve your fabric-measuring purposes. If you have it and you’re in an economic pinch, you can still make your fabric measuring work!

2) Reverse Equivalent of Better: Honestly, we can take the idea of simplifying that measurement detail even farther, way back into elementary school days to reach for a general ruler that can also be bought here.
In fact, certain rulers come with the added bonus of being potentially more useful than sewing tape for tracing your line, assuming they have a smooth edge. All you have to do is hold the ruler in place and make your mark! Just like kindergarten, but maybe with more straight pins!

3) Reverse Equivalent of Best: Anything that’s geometrically okay works, too! This one though does come with a disclaimer because exact numbers could be a big deal in projects. If you’re working with a pattern, following its given numbers can allow you a polished final product, so this strategy won’t necessarily work out for you in that scenario. But for those of us who make patchwork things, that’s not the case!

Sure, a person might have a preference toward one measurement of block to use, but the fact is that if your blocks are more or less equal, you’re good to go! It doesn’t matter if they’re 10 x 10, 9 x 9 or 8.25 x 7.75. If they match and you make sure the longer sides all go in the same direction, your final product can still be polished. With that in mind, you don’t need an actual ruler. One specific object that’s used for an outline can do just as well — like a box or a frame. As long you can outline it and are more or less consistent with that shape, your blocks will match up in size.Oh, and if you use one certain block of fabric for your general pattern, make sure you mark it so you recognize it among the rest, then don’t forget and sew it into your quilt! Oops!

One more disclaimer though: This technique is not necessarily for the strictest of quilters and such who demand perfectly square blocks! Oh, and if you use one certain block of fabric for your general pattern, make sure you mark it so you recognize it among the rest, then don’t forget and sew it into your quilt! Oops!

So, there you go — moments when technology can be scaled back for measuring purposes, and the careful measurer can still get a finished product! Do you have any cheat strategies for your sewing? Leave a comment, and let me know!

Quitling is Not Baking

Quilting Is Not Baking

My mom was the type of cook who didn’t accurately measure ingredients, and to this day, if you ask her how much of an ingredient to put in food, she might say something like, “Until it looks like enough.”

Be exact. The “it’s good enough” mentality I might’ve had for baking doesn’t spill over so well into the world of sewing.I don’t always accurately measure things in the kitchen either. I might use a coffee cup when the recipe calls for a cup, but even then, I’ve been known to eye-ball the food and decide it needs more. I put baked goods in still pre-heating ovens, guesstimate about time, and haven’t owned a measuring cup or spoon in my adult life that I can recall.
This is how I bake, and I’ve come up with some tasty sweets.

This is, to some extent, how I’ve tried quilting, and the results are evidence of the title of this post.

Quilting is not baking…

I’m a bit of an amateur in the quilting/sewing department. I’m working on my second quilt (third if you count that one atrocity I never finished), and my overall products have been somewhat lacking.

Even with missing the mark on projects though, I still learned. As it turns out, a number of things I’ve learned for quilting are in opposition to habits that worked fine in my baking. See? It’s not baking!

My first quilt.

My first quilt.

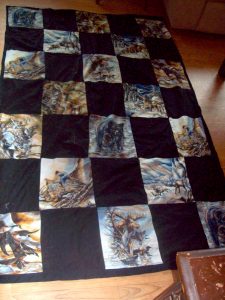
1) Less can be more. I’m not saying smaller quilts are better than bigger quilts, but — let’s connect this food-thing again — “portions” can be too big, and ruin the effect. For baking, if I put in too many ingredients, I might just get more cookies. Who doesn’t love more cookies? For quilting, if the sizing is too big, the best I can do is something that looks amateurish. Like my first quilt:
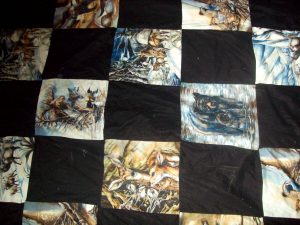
I hesitate to definitively label this a quilt because it’s so simplistic. The design made sense here, since the animal print was from a fabric I cut up, but imagine how much better this quilt could’ve looked if the panels on that fabric had been smaller. It still might’ve been lacking — hey, it was my first finished one! — but that smaller size of each block could’ve made the overall appearance more refined.

My latest quilt.

My latest quilt.

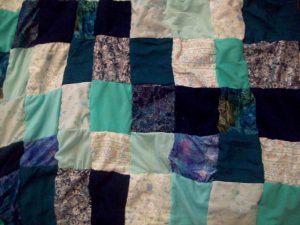
2) Be exact. The “it’s good enough” mentality I might’ve had for baking doesn’t spill over so well into the world of sewing. Want to see an example? Here’s part of what I have so far with my latest quilt:

These shapes were not all cut in the same sizes. Instead, my system was more general—like “it’s good enough” with baking. Spotting places where this work has issues isn’t too hard. Blocks are different sizes, and I’m not entirely sure the middle rows aren’t smaller than the ends. A reason these problems could’ve happened is because I wasn’t exact with my measurements. Here’s another example of the same flaw:

Crooked corners, but a great learning experience!

Crooked corners, but a great learning experience!

See how the corners don’t line up? Oops! Not good! More accurate measuring could’ve kept this from happening.

3) Have the right tools. I might not have measuring cups and spoons. I might not even use an oven mitt. And my baking could still turn out okay. But what I’ve discovered is that tools might be a key in quilting, especially for an early quilter/sewer like me, and I should look into equipping myself with utensils for the job. Currently, I want a rotary cutter and ruler. With those, getting the right measurements could be easier, which could in turn make my final products look more refined.

4) Have a plan. Going into the kitchen and deciding I’m going to experiment with ingredients might be fine. I’ve done that. And I got some pretty tasty banana cake out of the deal. But if I go into a quilt project without a plan, things could go wrong. For my latest quilt, I changed my technique for sewing after I’d started, which caused some let-downs. My quilt is smaller than I intended, holes showed up in my fabric, and my final row of material might’ve been decided by the fact that I didn’t have enough pieces of certain materials to continue my pattern (which I slightly messed up anyway). Basically, with quilting, I should potentially map out my strategy from start to finish. Otherwise, tasty banana cake might not be the end result.

Hopefully, I’ll learn from my mistakes though, and maybe someone else can, too! Like with just about anything, practice can lead to improvement.