The Final Touches (And Reinforced Lessons)

The Final Touches (And Reinforced Lessons)

Remember on my last blog post when I proclaimed that sewing isn’t baking? In the latest stages of my quilt, I’ve once again found myself facing similar details and thoughts as the ones I experienced earlier. Why? Because — as I said before — guesstimations and “until-it-looks-right” attitudes don’t necessarily spill over from the kitchen to the sewing area.

My homemade backing.

My homemade backing.

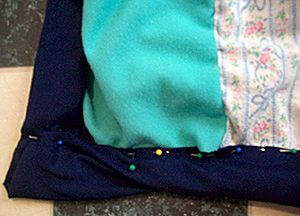
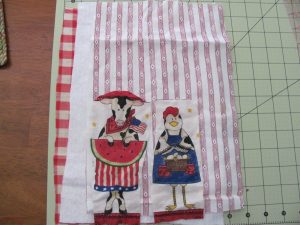
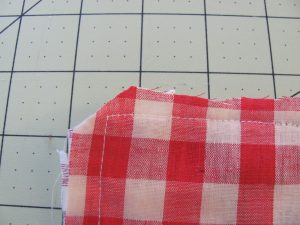
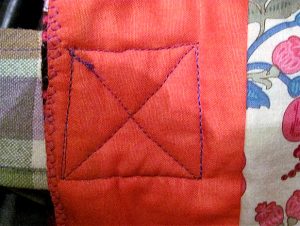
You see, I completed all the main lines of a nearly-finished quilt. What that meant, to me, was that it was time to sew on some kind of backing. My tactic for doing so? Getting a flat sheet, cutting it *very* generically around the exterior of the quilt, and trying to fold the excess material down in an appealing manner for the outer edges of the quilt. I ended up with a mess that looked something like this:

Not good, right? And I couldn’t seem to fix the issue with the backing/quilt this way. Whenever I would try to re-pin something so that the massive/slanted corner was more size-and-style-similar to the line leading up to it, the material would twist unpleasantly (like you can see). This blatant issue led me to undoing most of my pin-and-sew work connecting the backing to the actual quilt, in hopes that the lines and corners would better match up.

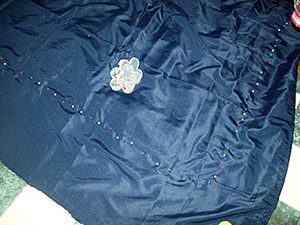
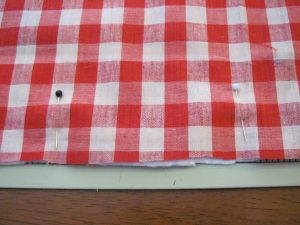
The process this go-round was a bit more precise, in that the original wrinkles in the sheet had fallen out, and the overall quilt was more carefully positioned under the sheet for more accurate results. That’s right. Under the sheet. Rather than focusing on exactly where the backing would overlap on the front, I concerned myself with making sure that the back portion was somewhat smooth against the quilt blocks. My rationale was that if I could get that territory as it should be, I could flip it over and fold over the ends with more confidence that what I couldn’t see on the back was proficient enough to allow my focus to safely fall on what I could see. Basically, if the backing was smooth, I could do things, like better decide how much material needed to be beyond the quilt blocks to fold over and work with, without worrying so much that the material on the underside was bunched or wrong in some way:

Pins, pins and more pins!

Pins, pins and more pins!

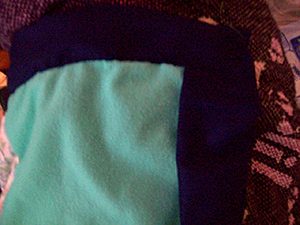
Once I flipped it over, I cut off a bit of the backing material, and I took out the pins from one side (and admittedly—accidentally—a number more!). Some of the quilt had already been sewn (I’m currently thinking of redoing that section, by the way), but beyond that stopping point, I could fold over the excess material, tuck it under itself, and pin it back down so it would create a more pleasing line and corner:

Progress is progress for an early quilter, right?

Progress is progress for an early quilter, right?

Perfect? Eh. But progress is progress for an early quilter, right? And, perfect or not, this strategy seems to have helped.

Still, knowing if the strategy will prove effective throughout the rest of the process might be something I judge later. After all, I’m less than one line into it, and there are over three sides to go (not to mention inner attachments).

In any event, this particular dilemma has led me to another tactic in learning to quilt better, and that’s to look for answers online. I’ve looked at a quilting video before, but a number of things that I’ve attempted to do are details I could’ve found assistance for online. There are charts, for instance, about how big to cut blocks, or how large a certain size of quilt should be. I might’ve literally been the girl who measured a bed with measuring tape (not sewing tape!) to see how big I should make a quilt, which I wouldn’t have had to do if I’d looked at a chart! I wouldn’t be too surprised if I took more of my sewing/quilting concerns online to try and find answers for them in the future!

Hopefully, this quilt will be finished soon, and I’ll be able to move on to another project with the skills and lessons I’ve learned up to this point. And maybe one day, I can become the quilter I want to be!

Sewing My Heart Out

Sewing My Heart Out

Sewing brings back the unique, the personalized, the imagination, the heart. Everything you can imagine is on the market now. When I was a kid, hand-made gifts were common, and often better than anything store-bought. Now, I see my kids wearing what every other kid is wearing, carrying around the same backpacks and purses with brand names. Nothing seems to be unique anymore.

My passion for sewing started the usual way. My mom sewed household items for our use when I was a kid. She taught me well. But I grew up, got busy, and my sewing machine collected dust for about a decade. When I became a stay-at-home mom, I started sewing again to save money. And I started sewing gifts to friends and family, again for the same reason. I discovered something amazing. They loved my gifts. Really loved them! Before I knew it requests started pouring in. They used them or wore them and someone would say, “Where did you get that?” Pretty soon I was swamped.

They feel loved and truly special because of the effort put into a home-made gift rather than store-bought generics.

Requests kept me busy for several years now. I still don’t sell any of my creations despite much encouragement to do so. Every item I make is designed by me, usually with a particular person or use in mind. Therefore, every single item gets my time, attention, and a lot of love for each person I create something for. My friends love what I do. They feel loved and truly special because of the effort put into a home-made gift rather than store-bought generics.

Sewing expresses an amazing amount of heart. Whether in a business or as a hobby, sewing is done with love. Love for sewing, love for imagination, love for creating something unique and special for unique and special people.

Sew your heart out, and you’ll be amazed by the results!

How Many Sewing Machines Do you Need?

How Many Sewing Machines Do you Need?

A subjective question, perhaps. In the cycling world, of which I am part, the number of bicycles is defined as x + 1 where x = the number of bikes you currently own. I suppose the same formula could be applied to sewing machine ownership. I’m continually fascinated by the scope and design of new machines and confess that, if I could, I would adopt one of virtually every machine I see.
Everyone I know in the film business owns at least one Bernina. For many, their Bernina is their prime machine, the one they use most often.

As a professional tailor and pattern maker in the film and television industry for about 25 years, I’m always on the lookout for a something that can make my job easier and more efficient. I, as I suspect most tailors do, have a small collection of machines that I consider my ‘go-to’s’, that I can’t imagine doing my job without.

1. Juki High Speed Single Needle Straight Lockstitch Industrial Sewing Machine

I have an old model of this machine, the DDL-555-4. The beauty of this machine is that it only does one thing: sew in a straight line. And it does it exceptionally well. Even my old model is smoother and more sensitive than many domestic machines. Five layers of denim or a single layer of chiffon emerge from the presser foot with no complaint and straight, even, stitches. I rarely even have to adjust the tension. And the Juki is fast. The newer models have a speed adjustment on the motors so if you want to start out a little slower you can.

Check out the current models, the DDL 8700 and the DDL 5550 N and go test drive one if you can. I think you’ll be able to tell right away that it’s a machine that will quickly pay for itself.

2. Brother lightweight Portable Machine

My SC 9500, which is similar to the CS-5055, is the most incredible inexpensive machine I’ve come across in my twenty some years of sewing. Not only is it lightweight enough to put in a tote bag and carry on your shoulder but it also sews like a champ. I use it most often for its pre programmed buttonholes and stretch stitching. In my experience, a lot of domestic machines produce less than ideal buttonholes. The Brother never falters: each buttonhole is perfect and akin in quality to those in manufactured clothing (where they use a machine that does nothing but buttonholes).

3. Bernina

Everyone I know in the film business owns at least one Bernina. For many, their Bernina is their prime machine, the one they use most often. I’ve yet to find a model, or hear of one, that doesn’t work well. I have an old mechanical model, which is still made in the form of a 1008. The advantages of a mechanical sewing machine lie in its durability and ease of use. I keep my old school Bernina mechanical on the wardrobe truck of whatever show I’m currently working on. I’ve had the same one for twenty years and its never ever failed me – despite years of being knocked around and asked to do impossible things like sewing through three layers of glued leather in an inordinate short amount of time.

4. Reliable Blind Hem Machine

A good blind hemmer that doesn’t snag or pull and is easily adjusted for varying fabric weights is essential to my tailoring work. The Reliable is just that, reliable. The setup is easy and the machine, though technically not a portable, does pack up nicely and can be transported to a work site.

5. Serger

There are so very many sergers to choose from. The first question to answer when choosing which one to buy is: what you will mainly be using the machine for? Do you need something to efficiently finish seams? Or will you be sewing entire garments with it? Do you want a machine that also does a cover stitch?

My favorite is the Juki Garnet Line MO-623 1 needle 2/3 thread Serger. The machine is dependable, smooth, easy to thread, and fast. The automatic rolled hem feature is game changing. As opposed to many machines where you need to change the presser foot, with the Juki, you manipulate the fabric with built in fingertip control.

Country Kitchen Mug Rug

DIY – Country Kitchen Mug Rug

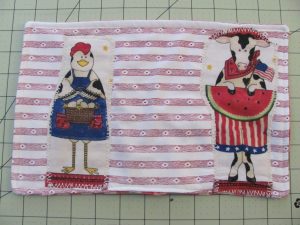
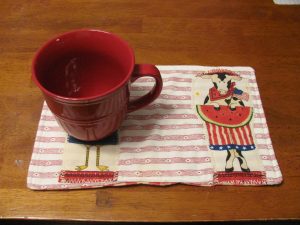
Country Kitchen Mug Rug.

Country Kitchen Mug Rug.

Mug rugs are extremely popular in the sewing world. They are usually fairly easy to sew and are generally easy to customize. Mug rugs make quick, easy, fabulous personalized gifts. I made a bunch of them personalized to the tastes and colors of each individual for friends and family. It wasn’t long before the requests for a second for work or for a child or friend of theirs came in. I absolutely love designing these. They don’t take long to make and I get to play with all sorts of fabric designs. They’re a wonderful project to add personality and flare to.

“Okay,” you say, “this sounds wonderful, fabulous, awesome. But what in the world is a mug rug?”

What is a Mug Rug? A Mug Rug is a cross between a full size place mat and a coaster. Smaller than a place mat, there is usually just enough room for a coffee or tea mug and a snack. They work perfectly for that breakfast coffee or an afternoon snack of tea and cookies. Typically the front side is the focus of designs and decals. The back is usually just one piece of decent fabric. The back fabric can match the colors or design on the front or can be completely different. If spills occur, just flip it over and finish your cup before tossing it in the dirty laundry.

Country Kitchen Mug Rug

Level: Beginner

Time to Complete: In an Hour

Sewn by: Machine-1/4 in. straight stitch except where indicated

**Tip** Wash all new materials prior to use to avoid shrinkage when you wash it later on.

**Tip** Iron cut pieces before sewing and in between each step. This helps in the sewing process and the end results will look more professional.

Country Kitchen Mug Rug.

Country Kitchen Mug Rug.

Materials:

  • 2 – 12″ L x 8″ W  Front/Back
  • 1 – 12″ L x 8″ W Cotton Batting
  • 2 –   7″ L x 2 1/2″ W Farm Animals

**Tip** I used material in my massive fabric collection. I always get new ideas every time I dig into my stash. It’s a great way to dream up new projects.

  1. Cut out fabric.
  2. Place front piece and batting together, right sides out.
  3. Pin farm animals to front and batting pieces and sew with 1/8 in. seam allowance. Any stitch is fine. I like to get creative and use the more decorative stitches when attaching smaller pieces to the overall product. I used a basic zig zag stitch.

    Panel of common stitches.

    Panel of common stitches.

  4. **Tip** I’ve been experimenting with decorative stitches I’ve never used. My Singer Advance has tons of decorative stitches. The owner’s manual describes the use of each stitch. I’ve also gone online to research stitches and to see how and for what projects others used them. Pay attention to the manual for any adjustments to stitch length or tension. Some stitches require adjustment changes. And, don’t forget to change settings back to auto when moving back to a straight stitch.  
  5. I used a basic zig zag stitch.
  6. Place front and back right sides together. Make sure to mark a 3 in. to 4 in. opening to pull the fabric right side out. I place pins vertical instead of horizontal pins at the opening so I know where to stop.

    Mark area to be left open.

    Mark area to be left open.

  7.  At this stage the cotton batting should be on the outside. We need it inside when we pull the fabric right side out.
  8. Sew with 1/4 in. seam allowance, leaving the open space.
  9. Cut corners. Turn fabric right side out. Shape mug rug and push out       corners.
  10. ** Tip** Cutting a small amount off the corners before turning material right side out allows for better-shaped corners when turned right side out. I use a pencil to shape the corners.

    Cut corners close to stitching.

    Cut corners close to stitching.

  11. Iron. Ironing at this stage is important to flatten material and inside seams before top stitching.
  12. Top stitch with 1/8 in. allowance around entire front side to give it a finished look as well as hold down your seams on the inside. Also make sure to stitch over the opening used to pull the fabric right side out. Iron.
  13. Viola! Finished!

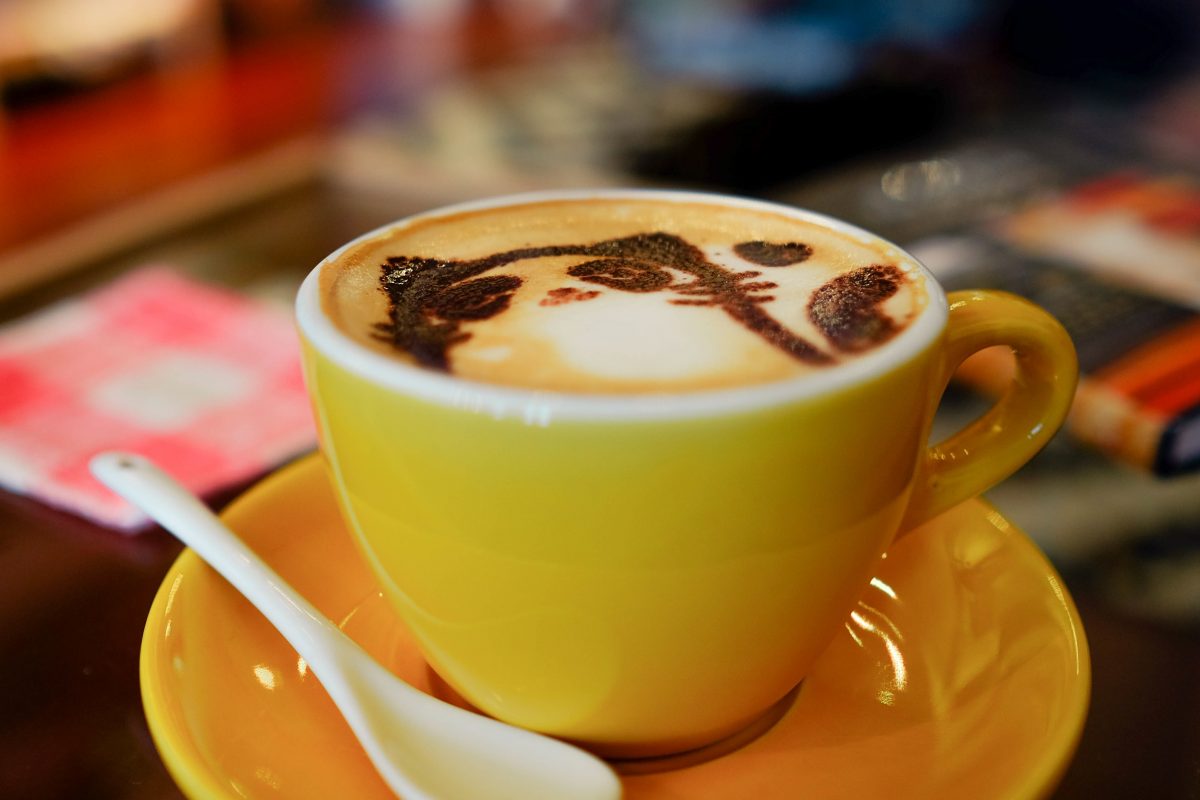
Time to celebrate. Take a well-deserved break, make some coffee or tea, sit back and ENJOY!

Coffee break!

Coffee break!

I hope you enjoyed this project. If you have any questions or comments, please share! Any ideas, shortcuts, or other contributions are welcome.
I would love receiving picture posts showcasing your Country Kitchen Mug Rug creations 🙂

You are more than welcome to suggest project ideas. What would you like to see and learn? Let’s journey together!
Dashing Dish Mat

DIY – Dashing Dish Mat

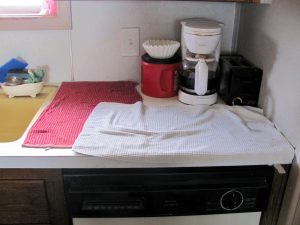
Dishes everywhere! I’ve been learning how to cook from scratch. I also made the wonderful journey into the world of baking bread. Yay, so much fun! Boo, so many dishes that must be hand-washed. Oh no, can’t just throw them in the dishwasher!  My beloved husband’s coffee pot may only be moved upon threat of death, so I created a dish mat to fit our small, unique space.

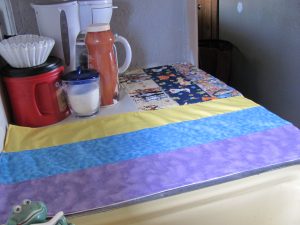
Viola! The Dashing Dish Mat!

Before:

Impossible dish counter space.

Impossible dish counter space.

After:

Beautiful organization, bright space.

Beautiful organization, bright space.

Level: Beginner

Time to Complete: In an hour

Sewn By Machine: 1/4 in. straight stitch except where indicated

**Tip: Wash all new materials prior to use to avoid shrinkage when you wash it later on.

**Tip: Iron cut pieces before sewing and in between each step. This helps in the sewing process and the end results will look more professional.

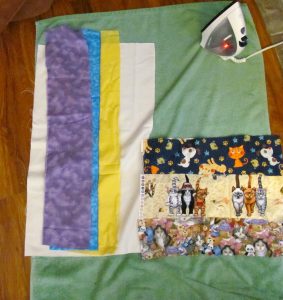
Materials.

Materials.

Materials:

1 – 26 1/2″ L x 14 1/2″ W     Terry Cloth long part of L- for back side

1 – 13″ L x 17″ W                 Terry Cloth short part of L- for back side

3 – 27″ L x  5″ W                  Colorful fabric strips

3 – 5″ L x 17″ W                   Colorful fabric strips

  1. Measure the area where the dish mat will be. My dish mat will be L-shaped so I had to take measurements for each side. Final measurements – For lengthwise section, 26 1/2″ L x 14 1/2″ W. For L piece, 13″ L x 17″ W. I always use measuring tape instead of a ruler when measuring spaces. Measuring tape is flexible and much longer than most rulers. I add an 1/2″ to 1″ in. depending on the project to account for the material that will be used for seams. Otherwise the end project will be shorter than I want.
  2. Cut the terry cloth for the back side. Cut fabric strips.
  3. Sew two pieces of terry cloth together, right side together 1/4″ with regular straight stitch.
    • **Tip: Make sure you have the smaller L portion of the terry cloth on the correct side. This can be tricky. When you match right side together with terry cloth and fabric sides, make sure they are both on the correct side. I had to rip stitches and sew the terry cloth on the other side. I use a seam ripper with a safety ball so I cut only what I want and don’t end up ripping other areas of the fabric. 
    • **Tip: Don’t let mistakes discourage you. I make mistakes all the time, as is obvious with my terry cloth L error. Rip stitches, go back a step, start from scratch. Sewing is an adventure, and sometimes those mistakes turn into great ideas!

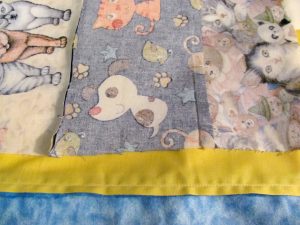
      Example of strip stitching.

      Example of strip stitching.

  4. Sew the vertical strips together, right sides together. Sew the horizontal strips together, right sides together. Then sew the vertical strips and horizontal strips together, on the right side.
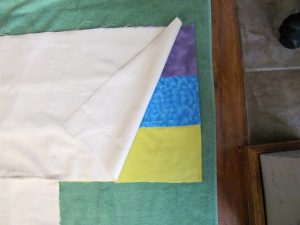
  5. Sew the terry cloth back and the striped front together right sides together. Leave one end open to pull the fabric through.

    Outside pieces facing together.

    Outside pieces facing together.

  6. Cut off the corners before pulling the fabric through.
  7. Pull the fabric through. Iron.
  8. Top stitch all the seams for the strips. This adds a professional look as well as making sure the seams don’t cause problems later. Iron.
  9. Top stitch all around the outside. Make sure to sew the side that was left open to pull the fabric through. Iron.
    Top stitching seams.

    Top stitching seams.

    • **Tip: A creative use of thread colors can really make a project pop. Top stitching any of the seams in different colors or in a color that would really stand out against the fabric can be that “extra touch” that makes everyone say “Wow, you made that? Could you make one for me?”
    • Place on your kitchen counter and enjoy washing dishes!

I hope you enjoyed this project. If you have any questions or comments, please share! Any ideas, shortcuts, or other contributions are welcome.

I would love receiving picture posts from you showcasing your dish mat creations 🙂

Oui, Oui – A Sheer Evening Bolero With French Seams

Oui, Oui – A Sheer Evening Bolero With French Seams

When the weather gets warmer, weddings and graduation party announcements arrive. This means strapless dresses, tanks, low necklines and open backs that get chilly in air conditioning and cool nights. An evening bolero or cropped jacket sewn with sheer fabric is a terrific solution: Small and light, you can fold it into your purse when the dance floor calls and pull it out again for a walk in the moonlight. Plus you can brag about your sewing skills to anyone who compliments your look.

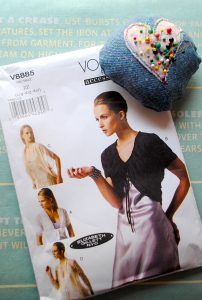
What could be more evening elegant than a bolero by Vogue?

What could be more evening elegant than a bolero by Vogue?

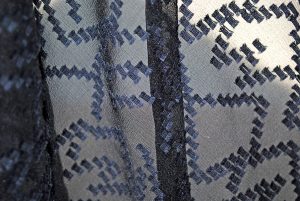
Lace, chiffon, silk voile, and layered tulle are good choices for an evening jacket, but working with delicate fabric often requires French seaming, a couture technique that hides ragged edges and stray threads that would otherwise show through and destroy the elegant effect. The pattern I chose for my bolero, Vogue 8885/View C, required only one French seam (and only one big piece to cut), so I dared give it a try. In my sewing stash I found a few yards of black chiffon from Mood Fabrics. I’d fallen in love with its zigzagging details on a January evening when I’d been strolling their aisles. In retrospect, black wasn’t a good color choice for a first French seam attempt. A light color would have been easier to see and sew precisely.

After cutting the pattern piece – a gigantic parallelogram – with a one-half inch seam allowance and transferring marks with white tracing paper, I was ready to attempt my début French seam. Here’s how it works:

  1. The first step in sewing a French seam is to put the wrong sides of the fabric together. You must disregard the worry you’re sewing on the incorrect side. You are sewing on the incorrect side. Sew just one-quarter inch from the cutting line, then trim close to stitching.

    French seams hide ragged edges and stray threads.

    French seams hide ragged edges and stray threads.

  2. With low heat, press the seam to one side. Then flip to the wrong side. You will see the “right” side of the seam on the wrong side. This is normal, so don’t panic.
  3. Fold the fabric along the seam and stitch again at one-half inch. This hides the seam inside another seam. The new seam is on the wrong side as it should be. Press the French seam to one side. That’s all there is to it!
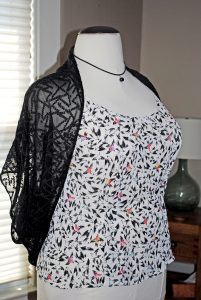
A sheer black bolero compliments a camisole.

A sheer black bolero compliments a camisole.

With the French seam complete, I had to finish other aspects of the bolero such as stitching a narrow hem along the edges. For this I used a rolled hem foot that came with my Singer Quantum Stylist. Rolling the hem is fun once you get the hang of it and the results are astonishingly professional. If you don’t have a rolled hem foot, you can buy one at sewing shops or online at Sewingmachinesplus.com. I also had to stitch along the back of the bolero and gather a section by pulling along the bobbin thread. The chiffon was uncooperative – I should have used a longer stitch length to make it easier. As a last step, I joined the center back section together to create “sleeves.” Doing this caused the French seam to present itself in a diagonal direction through the back, which looks pretty cool.

As the final step, I tried it on! The loose fit looks a little better on my dress form (her name is Aretha) than it does on me, so here’s Aretha:

I’m happy with the bolero, but I’m curious about some of the other views included with Vogue 8885. It looks like a few yards of lace and more French seams are in my future. Here’s to Paris . . .

DIY - Bias Tape with a Bias Tape Maker Tool

10 Steps to Making & Sewing Bias Tape

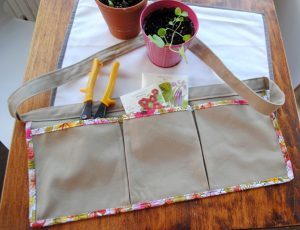
Gardening Apron, pattern from “Sewing for All Seasons” by Susan Beal.

Gardening Apron, pattern from “Sewing for All Seasons” by Susan Beal.

You might appreciate a well-stocked sewing shop, but don’t you get bored with the limited choices for bias and binding tape? The standard spectrum of hues leaves little room for imaginative and interesting ideas.

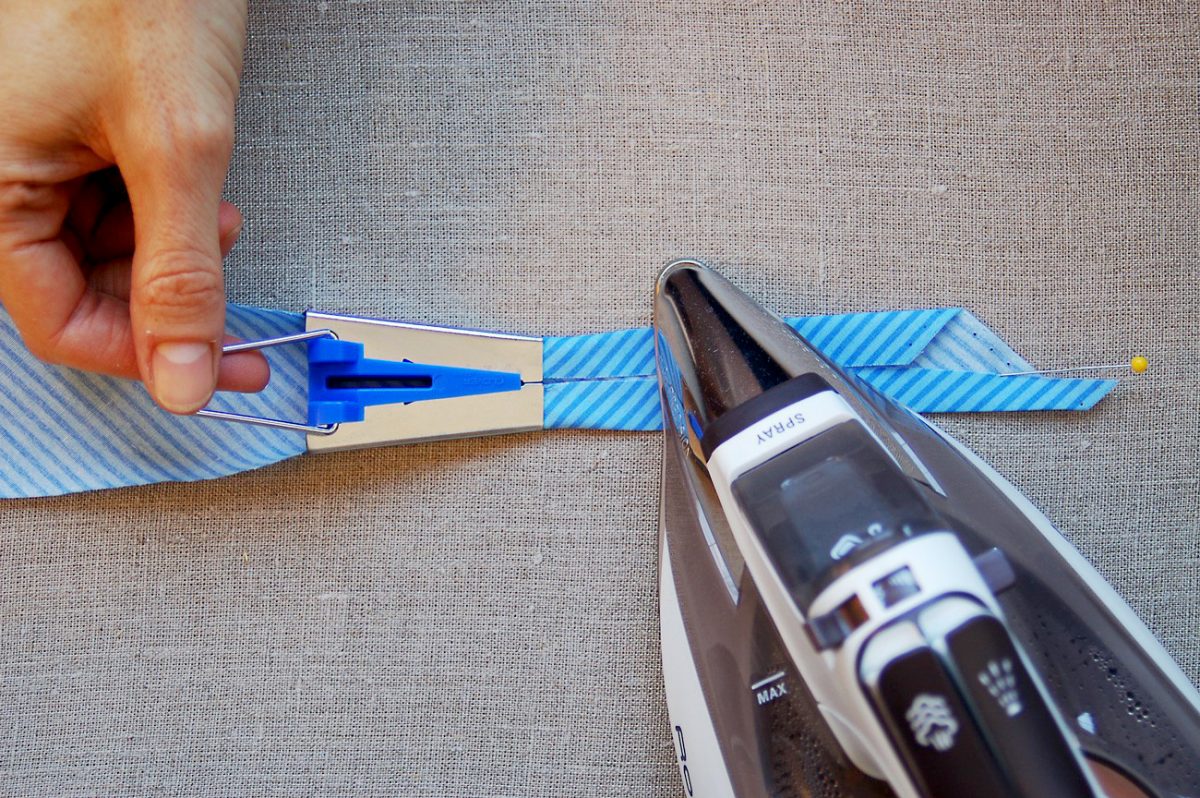
If you’re sure the best binding for your project isn’t on the notions shelf, consider making it yourself. Although it’s possible to create tape with only an iron and your fingers, the process will go more smoothly and be more fun with a special tool called a bias tape maker. These little aluminum color-coded gadgets are sold at most sewing shops, including Sewingmachinesplus.com. They come in widths ranging from two inches all the way down to one-quarter inch and can be purchased individually or as a set. Save the instructions that come with the tool—you’ll need its measurement guide when cutting strips.

With a small tool that costs under $10, you can conquer the bias tape bores.

My curiosity about homemade tape led me to Susan Beal’s book “Sewing for All Seasons,” where I found a pattern for a canvas gardening apron made with DIY binding tape. My tape edging was folded from a poplin just slighter lighter than the canvas used for the apron body. I used a three-quarter-inch bias tape maker by Clover, and I even have some tape left over for a matching hat.

When making your own projects with DIY tape,
follow these 10 steps:

  1. Select similar fabrics. Cut swatches from your stash and consider how each would work as either the tape or the body fabric. As a general rule, your tape should be the same weight or just slightly lighter than the body fabric. Avoid using silky fabrics because you’ll have trouble keeping the tape in place when sewing. Also avoid transparent or translucent material that will show seams and frayed edges.
  2. Determine measurements. Refer to your pattern’s specifications – what size bias or binding is required? Use the guide that comes with your tool to determine how wide your strips should be in order to achieve the proper finished size. For example, if you need three-quarter-inch binding, your strip width (for medium weight fabric) would be one and three-eights. Make sure you have the right size bias-making tool for the size you need.
  3. Measure and cut your strips. If your tape will be sewn around curved edges, such as with a circle-shaped potholder or Christmas tree skirt, your strips should be cut on the bias (at a 45-degree angle against the fabric grain). If your project is made of only straight lines like the gardening apron in the photos, you can cut strips horizontally from selvage to selvage.
  4. Prepare the strips. If your pattern requires many yards of tape, you can sew long strips together with a three-quarter-inch seam allowance. Open and gently press the seam before using the tool.

    Run the strips through the tool to create perfectly folded tape.

    Run the strips through the tool to create perfectly folded tape.

  5. Press perfectly. Use an iron at the appropriate setting for your fabric to flatten the tape as you pull it though the tool. Take your time and use your fingers to hold the tape in position before applying steam. Store the finished tape so it doesn’t lose shape when you’re working on other aspects of the project.
  6. Check your machine’s needle and thread. You’ll be sewing through many layers, so make sure your needle is up to the challenge. Likewise, consider your thread color. A thread that looks good with the body fabric might not look as good when sewn into your bias tape.
  7. Pin the tape into position. Use plenty of pins with the head accessible in the direction you plan to sew. Use small pins that won’t distort the shape of your project. The flatter, the better. In some cases, you might want to baste the tape into place.

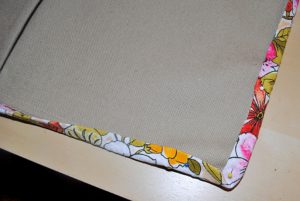
    Create a folded angle at corners.

    Create a folded angle at corners.

  8. Be careful at corners. Fold the tape at an angle, making sure it doesn’t slip. When sewing on the machine, sew one half of the corner and stop to pivot the project to the other direction before beginning again. Do not rush—take your time and concentrate on keeping the tape in place.
  9. Cut with caution. If your pattern asks you to cut the tape at particular points, don’t cut exactly flush to the body fabric. Leave a millimeter or two in case the next part of the process pulls your tape more taut than expected.
  10. Press gently. Resist the temptation to vigorously iron the tape after it’s sewn on. Give the project some time to settle into its seams, then use light steam to gently coax out lumps and wrinkles.

With a small tool that costs under $10, you can conquer the bias tape bores. New doors open with tape made from abstract prints, solids, florals, and plaids. A fancy or patterned bias edge against a plain fabric is a fun and interesting take on cosmetic bags, T-shirts, placemats, table runners or blanket edges. Make your own tape and take your project from OK to extraordinary.


DIY Tutorial - Striped Tote

DIY Tutorial – Striped Tote

Stacey’s Stitches

DIY - The Striped Tote

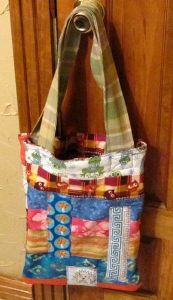
DIY – The Striped Tote

Level: Beginner
Time to Complete: In A Weekend
Machine: Singer Advance
Sewn By Machine – 1/4 in. straight stitch

I’ve suddenly found myself traipsing to multiple appointments on a regular basis. After dropping an important file in the middle of a parking lot on a windy day, I decided I needed one simple tote for carrying any and everything. Thus the Striped Tote was born 🙂

Let your imagination breathe personality into every stitch!

Materials:

  • 2 — 19 in. x 15 in. Inside fabric lining
  • 2 — 19 in. x 15 in. Cotton Batting
  • 14 — 15 in. x 4 in. Misc. horizontal fabric strips (amount is flexible depending on size and position of strips)
  • 4 — 3 in. x 6 in. Vertical fabric strips
  • 2 — 4in. x 30 in. Handles, preferably strong, durable fabric
  • 2 — Accent pieces, any size or shape

    Hi all! I'm Stacey Martinez :)

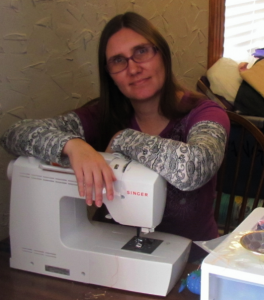
    Hi all! I’m Stacey Martinez 🙂 I love to design fun, imaginative custom items for my active, crazy family. Bright colors and beautiful fabrics sing “Stacey, Stitch Me!”

IMPORTANT:
**Wash all fabric prior to sewing to avoid shrinkage of the finished product.
**Ironing recommended before sewing and after each step. Makes fabric easier to sew and adds a professional look to the end product.

  1. Measure and cut all fabric and batting. I used Warm White batting but thin fusible works just as well.
  2. Pin and sew (1/4 in. with regular straight stitch) inside lining and batting insides together. Side shouldn’t matter for batting but make sure lining is facing inside. Leave a gap in the top for pulling fabric right side out. Repeat for other side of bag as well. Pull fabric right side out for both sides. Leave top holes open, they will be stitched later.
    • **Tip** Cut off the corners before turning right side out. This makes the corners easier to form.
  3. Pin and sew at 1/4″ all fabric strips together for each side of the bag. Iron all seams.
  4. Pin and sew with the front side (strip side) and the inside lining together for both sides of the bag. Make sure front sides are right side together. Leave an opening on the top of both sides to pull the material through. Leave top holes open, they will be stitched later.
  5. Pull the fabric out to right side out on both sides. Iron.
  6. Fold and sew 1/8 in. around four vertical strips and two accent pieces with regular straight stitch.
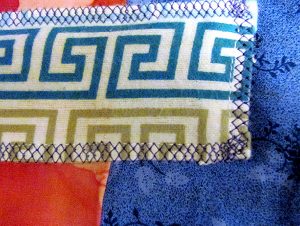
  7. Pin two vertical strips and one accent piece on each side of bag. Sew with any fancy stitch of choice, with any thread color of choice. I used the Honeycomb stitch since it looks intricate and can be used for edging. I used purple as my accent stitch because I wanted the stitching to stand out, not blend in.
    Sew accent stripes and other pieces after all side layers have been sewn together and pulled right side out.

    Sew accent stripes and other pieces after all side layers have been sewn together and pulled right side out.

    • **Tip** Sewing accent stripes and other pieces after all side layers have been sewn together and pulled right side out accomplishes one important feature: This ensures that all 3 layers are stitched together more thoroughly and prevent material slippage during constant use or after a few washes. This simple step helps the tote keep shape and strength much longer.
  8. Sew the top edge of each bag side with the same accent stitch and thread color.
  9. Pin the two sides outside facing together. Iron. The material will be much thicker with so many layers coming together. Ironing helps flatten down all the layers for easier sewing. I also switched to a 100/16 denim needle to handle the extra thickness.
  10. Sew three sides together, leaving the open. Pull right side out.
  11. Fold tote handles in half, sew right sides together (using straight stitch). Sew only one end. Leave the other end open. Pull the handles right side out using the open end.
  12. Iron handles and sew around all four sides, sewing the open end closed in the process.

    Attach handles to tote, using this X design.

    Attach handles to tote, using this X design.

  13. Attach handles to tote, using this X design. The X design creates a stronger stitch often used so handles on totes and purses easily handle more weight.

Throw what you need in your new tote and take off!

Fabric Fever and Color Crazy

Fabric Fever and Color Crazy

Have you been exposed to the illness that is taking over so many people these days? If not you, maybe someone you know?

Let me tell you about the symptoms. I know because I have it, and it won’t go away. It actually gets worse!

I have Fabric Fever and I am Color Crazy! Yes, it’s true!

It seems every time I pick up my note or my phone, or sit at my computer, my hands type a search for FABRIC! And the more colorful the better. It has become truly a passion, an addiction. I wish I could show you my fabric “stash”. And each piece I bought, I was thinking about a project for it. My project schedule is outrageous!

I have to share with you how it started. After not sewing for many years, I purchased a beautiful sewing machine. It was a Husqvarna Viking. It was so easy to make a nice straight seam and my machine just purred along. I loved it.

The gentlemen that sold it to me asked, “Why don’t you consider this upgrade.” It is the same good machine, a little more features and computerized, and the work is easier.” (And quite a bit more expensive, I was thinking.) “It’s a great machine for quilting” he said.

I replied with a belly laugh, “No this will do just fine.”
The moral here is think about how it would be to show your family and friends things that are as unique as you are. It takes thought, planning, sewing, ripping, sewing and desire to feed a hobby which I know you will enjoy!
He said, “I bet you will want it in maybe three months or so.” I thought to myself, this is all the machine I will ever need, and I don’t have an interest in quilting.

Well, not EVEN three months later, I purchased the upgrade, started learning about the different methods and supplies needed for quilting and as I said…….. Now, I’m am addicted.

The moral here is think about how it would be to show your family and friends things that are as unique as you are. It takes thought, planning, sewing, ripping, sewing and desire to feed a hobby which I know you will enjoy!

Did you know sewing is an art form? With so many different ways to express your inner soul with creativity, and a productive way to show it, sewing has many different faces.

So now, I want to share my excitement about what I have designed with my Husqvarna Viking 670.

My husband, with the help of his brother, remodeled a bedroom into my sewing room. That alone was enough to do some serious sewing. I painted the room, made Boho curtains and set everything up nice and organized. Such a retreat! I tend to make things that come to me rather than follow patterns most of the time. Although, I do follow quilt block suggestions just for uniformity.

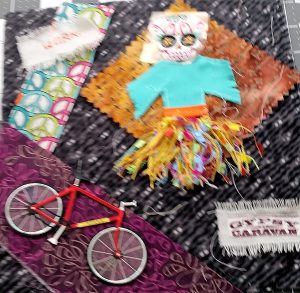
Mixed media customized Christmas gifts.

Mixed media customized Christmas gifts.

I made this for a gift last Christmas. Mixed media perhaps, each item has a meaning for whom it was made. She loved it, because she related to all the items!

Actually, one of my first baby blankets, and quilt as you go is so easy to do! I used similar blocks on the back of the quilt as well. Here is a quilt I made to display some extra stitching types on my machine. It was fun to personalize the quilt in this way. Simple, but very appreciated by the recipient. I particularly love making soft little things for sweet little boys and girls! Pink and blue are my favorite colors!

Just a couple things for now, but in the meantime, I am anxious to hear your comments on what motivates you to sew. I know you can do it. It just takes practice!

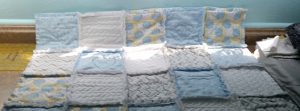
Soft baby blue rag quilt.

Soft baby blue rag quilt.

Especially, I am inviting experienced quilters to tell about their methods for fabric collecting. When my mother was living, she used to tell me, don’t start a project before you finish the first. Oh my, I am so guilty of not doing that! But from what I hear, that is pretty common for quilters. Quilting is a process, and many options to choose from is half the fun! At least, I will believe that!

Find a fabric store or look online this week. What can you make from all the options you saw! Look around and make a list of all things FABRIC! It is the thread of our lives!!

A new way of thinking, a new creative side of you! Welcome or welcome back to Sewing… The art form that never gets old!

Learning to Sew with Mom

Learning to Sew with Mom

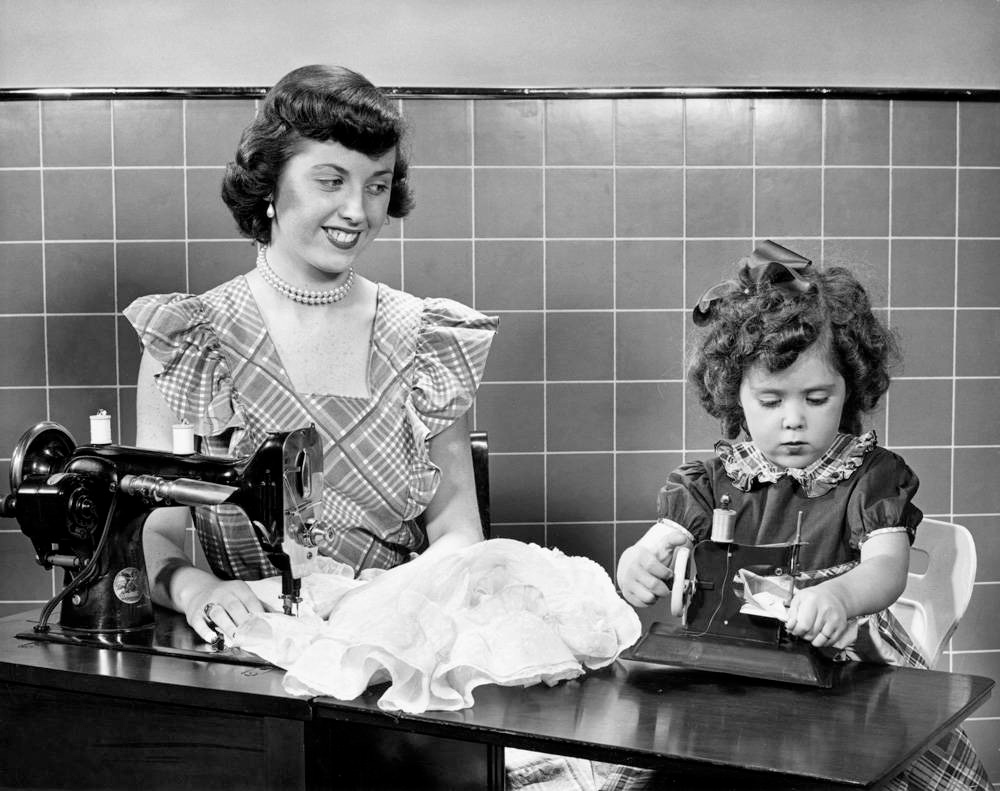
I remember watching my mom make clothes, doll clothes, and other items on the Singer sewing machine. Pins in her mouth, scissors in hand, she’d pin, trace, and cut a pattern and then magically sew it into something spectacular. I don’t remember how many times I asked, or how old I was when she finally agreed, but one day I finally got to learn how.

We went to the store and I got to pick out an easy pattern. Mom showed me how to read the back to figure out how much material I’d need as we browsed through bolt after bolt of fabric. I couldn’t get enough of all the colors and textures, but finally settled on something. Then it was off to pick out thread, zippers, and other necessary notions. I had no idea so much happened before even starting the project.

I had no idea so much happened before even starting the project.

Once home with the loot, Mom helped me fold the fabric so that the pattern would line up correctly. She supervised while I carefully cut out the tissue paper pieces of the pattern and helped me line them up correctly on the fabric. I was so ready to start cutting them out, but Mom said I had to pin the tissue paper to the fabric first. My small fingers weren’t overly dexterous, still aren’t, but I managed to get it done. And then, finally, it was time to cut!

Mom supervised while I carefully cut out each piece on the appropriate line for my size, being careful not to cut through the pins. I felt so grown up being allowed to use the special fabric scissors. When each piece was cut, it was time to learn to read the pattern instructions on pinning it all together and what the heck “right side to right side” meant. Turns out, that’s actually pretty important, but I still think “pretty side to pretty side” would be less confusing.

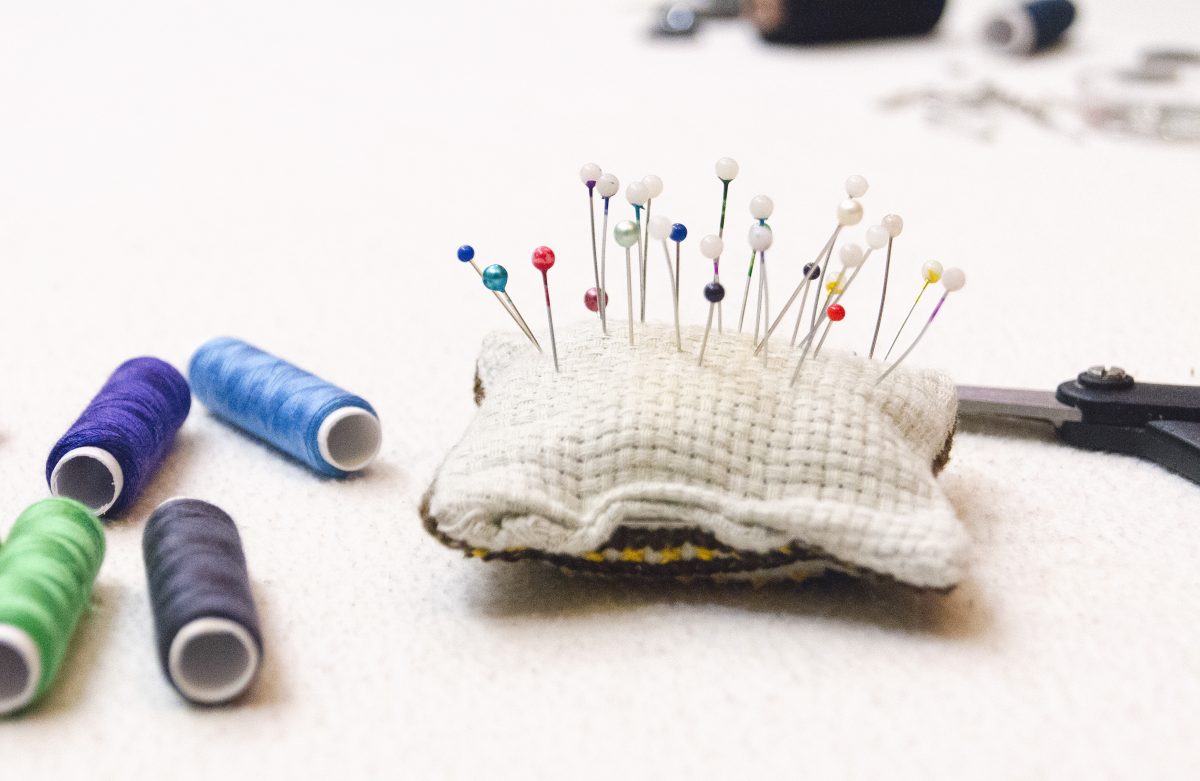
I quickly realized that the pinning part is not a lot of fun, but Mom told me it was necessary or it wouldn’t sew up right on the machine. So, I suffered through it one pin at a time. It wasn’t until years later I figured out how to do the pins in the mouth thing I always saw Mom doing, so I also got poked a lot messing around with the pin cushion.

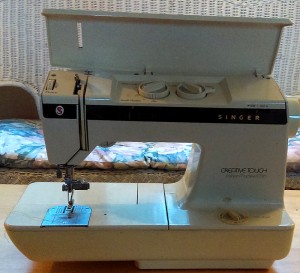
Finally, though, the pinning for the first part was done and I got to sew…or so I thought. But Mom was worried I might be a little young to use the machine on my own, so at first, we did it like we had when she came to my nursery school class to make beanbags, and she sewed while I watched. After some pleading, she finally relented to let me use the Singer under her supervision. I managed to refrain from twirling around in excitement, but I sure wanted to!

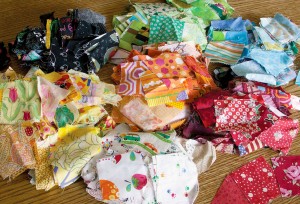
Scraps, pieces and extras. These spare parts will make a lovely quilt someday!

Scraps, pieces and extras. These spare parts will make a lovely quilt someday!

Before I was allowed to sew my project, Mom pulled out some spare scraps from her ever-growing scrap bag and gave me a lesson on the presser foot, going forward and backward, keeping constant pressure on the pedal, and keeping my fingers out of the way. I’m pretty sure there were parts were I was sticking my tongue out with the effort of concentrating, but I finally sewed the scrap to Mom’s satisfaction and was allowed to sew part of my very first project!

'Old Reliable' mom's Singer Creative Touch takes a lickin' and keeps on stitchin'!

‘Old Reliable’ mom’s Singer Creative Touch takes a lickin’ and keeps on stitchin’!

We continued this way, pinning per the pattern instructions and sewing it together. It took far longer than it would’ve taken Mom to do the project herself, but we both have fond memories
of sharing this time while I learned a life skill. I don’t remember what the first project was, but it certainly laid the foundation for a lot that came later. I loved to make my own clothes, dresses and skirts particularly. And when I got married (the first time) I even made my gown.

I don’t use it as much as I’d like to, but I’ve still got that trusty old Singer and I periodically have the opportunity to teach the sewing craft to others. Plus, I can repair and alter clothes that would otherwise become unwearable or have to be brought to a tailor. None of this would’ve happened without that first lesson from Mom.