How to Sew Faster

How to Sew Faster

My job as a tailor on a television show often requires me to complete an alteration in a seemingly impossible amount of time. Not to be overly cocky or self-congratulating but, I can be pretty fast when needed. People frequently ask me how I’m able to do something so quickly.

Don’t hesitate. Just, do.

Honestly, I don’t think so much about it anymore: its pretty much second nature at this point. But, I suppose if I were to break it down, the process would go something like this:

First, don’t panic. Whatever you do, don’t panic. If you do, you could find that suddenly you’re unable to thread a needle, or your needle breaks, or the thread tangles.

Second, don’t hesitate. Just, do.

As you’re working, think about the next step. Plan ahead.

Concentrate fully on what you’re doing. Don’t listen to the conversations going on around you. Pay no mind to whatever random chaos might be happening in another part of the room. Just focus your full attention on the one thing you are doing. That is all that is important.

Whatever you do, don’t thread mark. I know that’s what they teach in sewing school but there is no reason to have to thread mark a pant hem.

A few tips on how to sew faster:

Do as much as you can without stopping to iron.

If I’m really pressed for time, I tend to leave all the ironing until the very end (pun intended).

Learn how to eyeball measurements. Think about it, if you’ve been sewing long enough, you know what a ½” looks like. You honestly do not need to mark every single little line. If you want to measure, go ahead, put use your pins to mark the line. I often work with a metal seam gauge but rarely actually draw a new stitching line. One exception is if I’m re-mitering a suit jacket sleeve corner though I know lots of tailors that do not need to draw that line either.

Whatever you do, don’t thread mark. I know that’s what they teach in sewing school but there is no reason to have to thread mark a pant hem. I once had an additional tailor helping me on a show who insisted on thread marking the fold line on hems for cop pants. Buy some tailor’s chalk and use that to mark your hemline. It’ll disappear when ironed.

Unless you’re topstitching, you really don’t have to have your thread match exactly. Believe me. Whatever thread is in your machine is just fine. I cannot begin to tell you how many black garments I’ve altered quickly with red or yellow or whatever happened to be in the machine colored thread.

Learn how to undo a chain stitch. A lot of manufacturers use chain stitches in clothing construction. This makes it super easy to take them apart when needed. You can only unravel a chain stitch in one direction, the direction it was sewn in. Most of the time, all you need to do is insert a seam ripper and pull in that direction and all the stitching will come undone. The center back seam of men’s pants, often will have two rows of stitching so you’ll need to pull each row separately.

A couple other seam deconstruction tips:

To take apart a serged seam, use a nice sharp seam ripper and run it through the threads that wraps around the edge of a seam. After you do this, the rest of the threads will usually come apart rather quickly. Some serged seams are on a chain as well and you can undo them by pulling the thread on the straight stitch.

One of the fastest ways of taking apart a seam is to, again, use an extremely sharp seam ripper and insert it into the seam from the right side and just pull upwards through the seam. This technique takes a bit of practice (and bravery) though as the potential to accidentally slice through the fabric is ever present. There’s a knack to getting the angle of the seam ripper just right though and once you figure that out, you’re golden.

In the end, the one sure way of becoming a faster tailor is by practice. The more often you repeat the same task, the more efficient at it you become.

As you do an alteration, try to think of ways you could save time: do you really need to flip everything back right side out then inside out then right side out again? Probably not. If you sew this first, will it make it easier to sew this? Or visa versa? Experiment and try things multiple ways until you’ve figured out the quickest sequence of steps for yourself.

I love discovering a new, faster way of doing something I’ve done a million times. Sewing is kind of cool like that: there’s always something more to learn and fresh tactics to uncover.

Zentangle Quilting

Zentangle Quilting

Zentangle design flows free like a river of creativity.

Zentangle design flows free like a river of creativity.

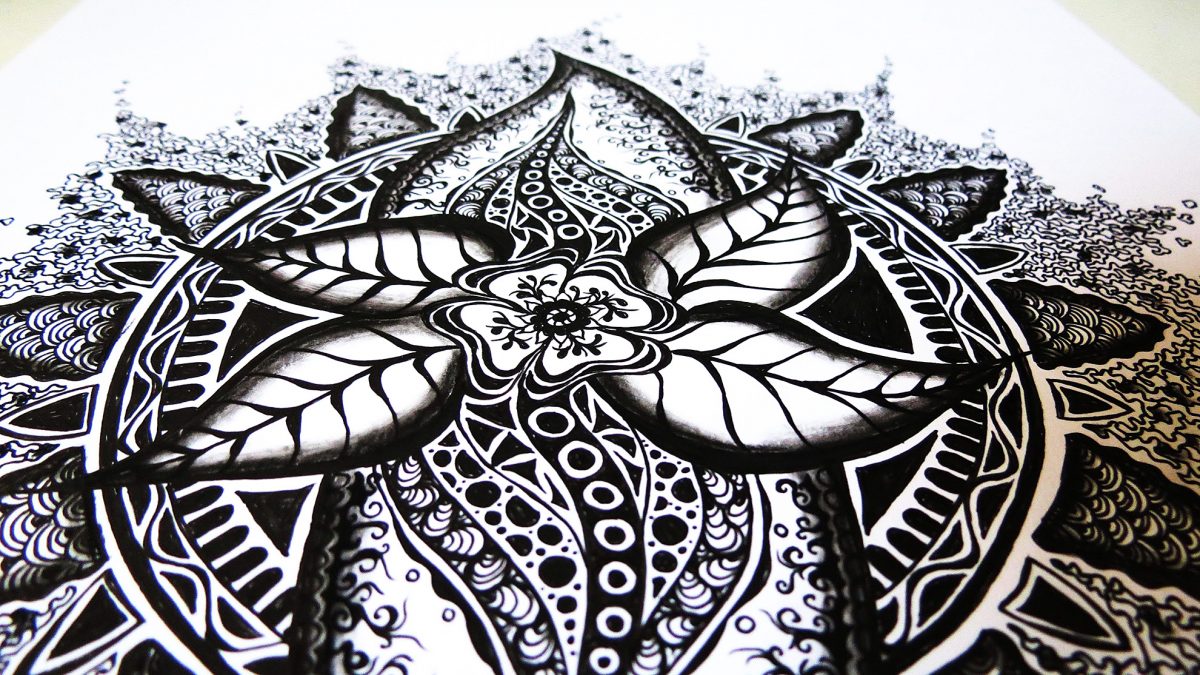
Have you heard about the cool art/meditation craze that’s gaining popularity? It’s called Zentangle. The basic concept is using basic shapes in a repeated fashion to create pictures. In doing so, the mind disconnects and enters a meditative state.

Although I enjoy Zentangle and find it fun and relaxing, I also find that my hand cramps holding the necessary pens and pencils for an extended period of time. Instead, I think the same concepts can be used to create gorgeous quilts.

Plain Fabrics

Instead of using fabrics with cool, cute or funky patterns, choose plain fabrics and allow the Zentangle concept of basic shapes in repetition to give your quilt its pattern and character. Instead of a quilt with one pattern repeated throughout, your quilt will be a masterpiece of many patterns that combine to create a unique, gorgeous quilt anyone would be proud to own.

Pick Your Tangles

There are hundreds of Zentangle patterns (tangles) to choose from, with more being created all the time. You can do an image search, or for those of who need a little more instruction try http://tanglepatterns.com/ to find several tangles that appeal to you and that you think would combine well together to make a quilt. Depending on the size of the finished quilt, pick at least seven different tangles. The more tangles you choose, the more interesting your finished quilt will be.

Chart It

You’ve likely got dimensions in mind for your quilt project. To ensure that your Zentangle quilt comes out the right size, draw it out on graph paper first. That will help you know how much fabric you need for each of the different patterns as well as help you know where to stop on each of the patterns to wind up with a rectangular quilt with crisp edges. Plus you get to experience doing a Zentangle drawing.

Templates

Once you’ve gotten this far, and to help you ensure that your quilt comes out as you envision in, create templates for each of the Zentangle shapes (and the varying sizes of them) you plan to use. A manila folder or empty cereal box work well for creating the template shapes.

Cut, Cut, and More Cut

From this point on, the process is pretty much like making any other quilt. Cut out all the tangle shapes and sizes on the appropriate fabrics. If you don’t usually do a dry fit, it may be wise to do so with a Zentangle quilt since they’re more freeform.

Stitch, Quilt, Go

When you’ve got all your tangle pieces cut out and dry fit together, sew them up as you would any other quilt pattern; stopping to check for fit after each pattern section. For the back, depending on the look you’re going for either a solid color or a fabric that combines the colors used in your Zentangle quilt can be used. Complete your Zentangle quilt as you would any other quilt.

A Zentangle quilt may be a bit tougher than other quilts you’ve made, but it also produces a quilt that is more unique and original. Zentangle quilts make great gifts and are sure to be conversation starters in any home.

Have you tried it? Take pictures and share!

I Didn’t Think It Would Look Like This

I Didn’t Think It Would Look Like This

Oops!We’ve all been there. You spend hours, days even, working on a sewing project. In your mind, you’ve got this image in your head of the gorgeous completed project, but when it’s finally done it doesn’t look anything like you thought it would. You thought it would be a simple one, so you didn’t bother with a muslin mock up, but it’s not at all what you expected or wanted. So now what?

Grumble

If you’re like me, you spend a fair amount of time grumbling and cursing about the “messed up” project or worrying about what you’re going to wear to the event instead. This is helpful short-term. It lets off the stress and and can be cathartic, but it doesn’t really solve anything.

Alter

Once you’ve finished grumbling and worrying, try the piece on again. Take a careful look at the seams. Can you alter them to change the fit so it’ll more closely match your vision? Maybe adding some darts or a tuck at the waist would help?

Accessorize

Often the picture on the front of the pattern package shows people wearing shoes or jewelry. Can you add your own accessories or shoes to make the item more closely match your imagined outcome? Maybe a shawl or scarf would help?

Change it Up

Sometimes, when choosing a fabric, you might choose one that turns out not to flow the expected when it’s all sewn up. In these cases, rather than remaking the entire project, add sections of another fabric in areas that will help the flow. It’s nerve wracking to cut apart a completed project, but since you’re not going to wear it the way it is anyway you don’t have much to lose.

Embellish It

Try adding a little pizazz to change the look of your sewing project. Patches, lace work, embroidery, beading, or other fancy details can completely alter the look of your project and provide it with a touch of class or color that may help it more closely match the vision in your head.

Combine It

Depending on how different your vision is from the completed project, combining two or more of these techniques may be necessary. In most cases, though, it’s possible to save the project and make it work for you – sometimes in ways you didn’t expect.

What other techniques have you tried to make your project work?

Methods to Conquer Half-Square Triangles (HSTs)

Methods to Conquer Half-Square Triangles (HSTs)

If you plan on diving into the world of quilting, you will soon run head first into half-square triangles, or HSTs in common quilting parlance.

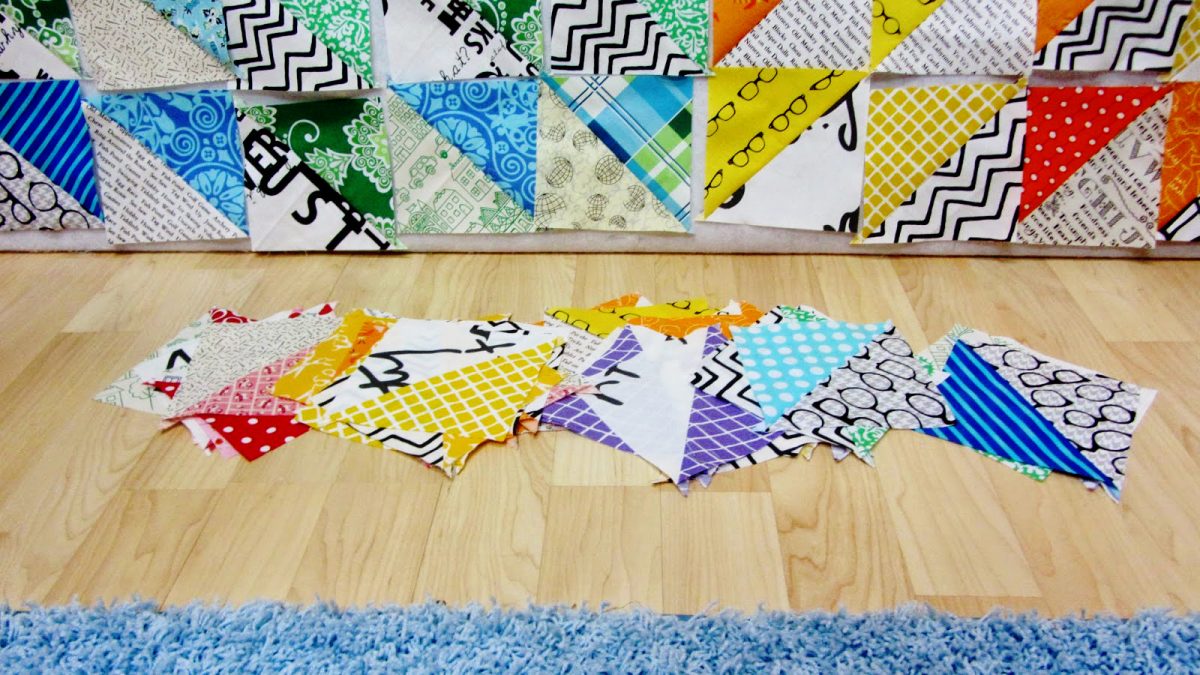
These deceptively simple looking squares can be arranged innumerable ways to make an unending canvas of lovely. When you decide to tackle HSTs you are going to need figure out the best method for you. The most important thing to understand about HSTs is the math behind the size you want. This post does not cover that math. There are many, many charts available online to help you figure out what size triangles & squares to cut and sew in order to get the finished size you want.

Once you know your math, you’ll need to figure out your method. Here are a few to consider:

1. Tried and true

The most basic way for creating a HST is taking two squares of fabric, placing them right-sides-together (RST), drawing a line down the diagonal, and then sewing a scant ¼” on either side of the link. Cut the fabric along the center diagonal line, open and press.

Square that puppy up and before you know it…

…voilà, lovely HSTs, just for you.

Works best: when you need to only do a few HSTs or when each HST you need to do is unique.

2. Make the Magic 8

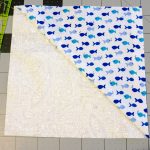
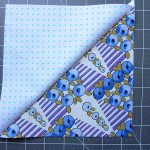
When I sewed these together both squares were evenly on top of each other.

When I sewed these together both squares were evenly on top of each other.

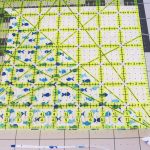
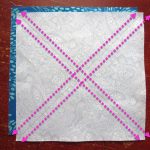
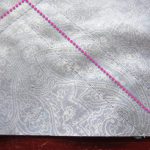
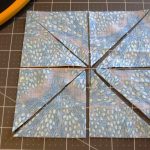
As soon as you see the visual on this you’ll get why they call it magic. Take two large squares, right sides together and draw lines down each diagonal. Sew a scant ¼” on both sides of each line for a total of 4 seams.

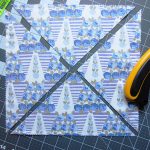
Start by cutting first along the two diagonal lines.

Start by cutting first along the two diagonal lines.

(For this tutorial I placed the two squares off center to show you the two fabrics. When I sewed these together both squares were evenly on top of each other.)

Carefully start cutting. Start by cutting first along the two diagonal lines.

Next cut down the center line of each side of the square.

Next cut down the center line of each side of the square.

Next cut down the center line of each side of the square. This will give you your magic 8!

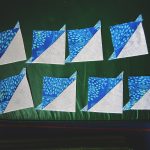
8 lovely matching HSTs

8 lovely matching HSTs

You’ll need to open, press, and square them up, but in no time flat you’ll have 8 lovely matching HSTs.

Works best: when you need more than a few. Some people can really churn out a lot of HSTs this way. If you have a bunch you need to make with the same fabrics, try this method.

3. Tube Method (Tube Quilting)

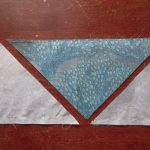
Use your ruler to cut out the size triangle you need.

Use your ruler to cut out the size triangle you need.

Sew two long strips together on the top and bottom edges. Then use your ruler to cut out the size triangle you need. Here I’ve shown you the tube I sewed and the triangles I cut (I flipped the top triangles over to show you the contrasting fabric).

Works best: when you need multiples of the same type of HST, this method is a production machine!
Note: it really helps to have the exact sized ruler you’ll need for cutting out the triangles.

4. Sewn Strips (Bias Strips)

Create a massive amount of HSTs in a short time!

Create a massive amount of HSTs in a short time!

I found this the most challenging of all the techniques I’ve tried, but I’ve never been pro at cutting on the bias. There is incredible potential here, however, to create a massive amount of HSTs in a short time so I’m keeping this method tucked away for the next time I want to attempt it.

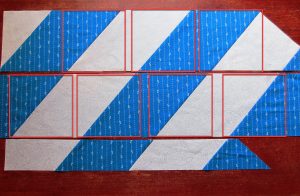
The concept is simple: take two large pieces of fabric and place them RST. Cut the fabric into bias strips (in the correct size you’ll need) and then sew the alternating colors together to create two pieces of fabric with bias strips in the colors you need.

If you did your math right, you can then cut strips of fabric that will have the HSTs already sewn together. As you can see above, I completely botched the math on this, but you live and you learn and like I said, POTENTIAL. This method has so much potential if I can just get right next time.

Works Best: when you need to make HSTs on a massive scale.
Note: take your time to get the measurements just right. If not, you’ll have a whole lot of messed up fabric on your hands. Additionally, there is fabric waste as you cut out the squares. Make sure to account for that when you buy the amount you may need.

Sew the Square

Sew the Square

5. Jenny Doan Method (Sew the Square)

I’m not sure if this method has an official name but I know it has become popularized by Jenny Doan of the Missouri Quilt Company. I consider this a cousin to the Magic 8 method. Perhaps we could even call it the Magic 4.

The Magic 4!

The Magic 4!

Take two pieces of fabric RST and sew a scant ¼” hem all the way around.

Carefully cut down the diagonals of the square and you’ll get four perfect HSTs.

You get four perfect HSTs.

You get four perfect HSTs.

Works best: this is a quick and easy method that could be easily mass produced especially when using pre-cuts.
Note: some don’t like this method means you are working on the bias. I haven’t found this to be a problem. Press carefully when you iron sew your HSTs together, without unnecessary stress or tugging, and you’ll be fine.

I hope you’ve found these methods useful. How about you? Do you use one of these methods already or do you have a different technique you prefer? Let us know in the comments!

Charlotte Kaufman is a writer and sewist in San Diego, California. She specializes in marine and home interiors and continues to fall more and more in love with quilting. You can follow her at charlottekaufman.com
Sharpen Your Scissors and Rotary Cutters

Sharpen Your Scissors and Rotary Cutters

I keep my blades wicked sharp with my favorite technique: cutting aluminum foil.

I keep my blades wicked sharp with my favorite technique: cutting aluminum foil.

There is a man who comes to my local grocery store once a month and offers his services to sharpen your scissors and kitchen knives. I have never managed to make it to the store when he is there. When I kept missing his dates, I looked up ways to sharpen scissors myself. There are some surprising methods that are quite easy to do at home. Maybe one day I’ll get a professional to get these babies sharpened but until I do, I keep my blades wicked sharp with my favorite technique: cutting aluminum foil.

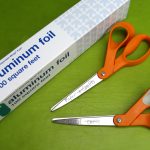
All you need is a piece of aluminum (tin) foil.

All you need is a piece of aluminum (tin) foil.

Cutting Aluminum Foil

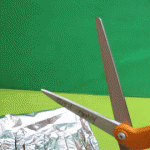
Cut thin strips with the scissors, making sure to cut from the tip of the blade all the way to the pivot points.

Cut thin strips with the scissors.

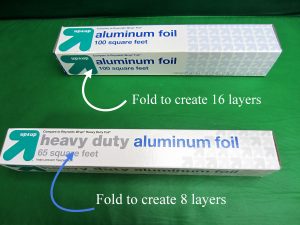
All you need is a piece of aluminum (tin) foil. Fold the foil up into 8 layers for heavy duty tin foil and 16 layers if you have regular weight.

Next, cut thin strips with the scissors, making sure to cut from the tip of the blade all the way to the pivot points. Use nice, open, broad cuts. This method also works for rotary cutters. Just run the blades over folded tin foil.

When you’ve finished cutting the tin foil, open your scissors all the way and then swiftly snap them shut.

When you’ve finished, open your scissors all the way and then swiftly snap them shut.

When you’ve finished cutting the tin foil, open your scissors all the way and then swiftly snap them shut. This will help to smooth out any tiny burs. I’ve been using the tin foil method for years now and my scissors are razor sharp after I do this.Keep your precious fabric scissors far away from children and partners who don’t understand how serious you are about your scissors.

Pro Tip: Always keep one pair of scissors reserved for paper only (so your fabric scissors don’t go dull too quickly.) Second pro tip: Keep your precious fabric scissors far away from children and partners who don’t understand how serious you are about your scissors.

Roll the foil into a ball and you now have a perfect scrubber for pots and pans.

Roll the foil into a ball and you now have a perfect scrubber for pots and pans.

Waste Not, Want Not: What to do with the tin foil you have just chopped into strips? Roll it up into a ball and you now have a perfect scrubber for pots and pans (not your non-stick, of course). You can also bring these along on camping trips for scouring out cast iron or other camping dishes.

Alternate Methods

Have a different method of scissor sharpening? Let us know your techniques.

Have a different method of scissor sharpening? Let us know!

Out of tin foil but still need to sharpen your scissors? You can use the same method with sand paper (the finer the grit, the smoother the blades). Or, you can cut up steel wool, though it will be considerably messier than the tin foil or sand paper methods.

Do you have a different method of scissor sharpening? Let us know your techniques in the comments below.

Charlotte Kaufman is a writer and sewist in San Diego, California. She specializes in marine and home interiors and continues to fall more and more in love with quilting. You can follow her at charlottekaufman.com
Learning Re-Learning

Learning & Re-Learning

Generally speaking, I can be more of a hand-sewer than a machine-sewer. Getting frustrated with a machine, to me, isn’t the most difficult task, so stepping back from one can be a fairly easy decision. What I’ve found in stepping away is that I actually like hand-sewing. Sure, the process might take longer, but there’s something relaxing about going one stitch at a time with my own hands.

And, believe it or not, I might actually be more likely to sew a straight-ish line by hand than I am with a machine! Weird? Maybe!

But stepping away from the machine has led to me trying to re-acquaint myself with my sewing machine, and what I found is that the time away caused me to potentially forget things—maybe keep me from fully learning all things—about my machine. Had I had (or kept) those things in mind, I suspect my sewing-machine-experiences might’ve gone a bit better—and a bit quicker.

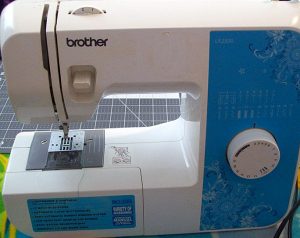
Brother LX2500

Brother LX2500

Now, don’t get me wrong! I’ve completed projects on my sewing machine. But I was potentially setting myself up for frustration by not really understanding or memorizing the details of this machine (Brother LX2500):

Imagine how far I could be with machine-sewing if I would’ve taken the time to learn more details and commit them to memory! So, for today, I’m going to give you that bit of information: Get to know your sewing machine! Even something as simple as realizing the thread-holder lifts higher could prevent grief, since you might not have as much issue with the thread falling off while you’re sewing or threading your bobbin. And, yes! That happened to me!

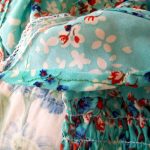
For me, figuring out the need-to-know details and letting the rest go might’ve been tempting. Do yourself a favor, and don’t keep that thought process. There might be aspects of your machine that make for easier sewing, or that advance your capabilities in a way that a basic “Hey! I can thread the needle and bobbin!” don’t quite cover. Possible examples: Apparently, I have a reverse button on my machine I maybe never knew about, and a way to alter the tension. Who knew?! And if you don’t get to know your machine, by the way, don’t be surprised if you come out with stitches that look like these:

If you buy your sewing machine brand new, check out any instruction manual that comes with it. The reading might seem tedious, but that tedious task could be worth it when you don’t hate your sewing machine, like, twelve times per use (Am I exaggerating??? You decide!). If you buy yours used, don’t have a manual, or lose the manual, try looking online. I think I threw mine away (don’t do that!), but luckily there are videos available on Youtube that show the basics of running my model. I can’t encourage you enough to look into such information to learn what you can about your sewing machine! Doing so could extend your possibilities and preserve your nerves!

Your sewing machine is only as good as your ability to use it, so don’t hold yourself back by not learning about it properly.

And even if you did know all there is to know about your machine, forgetting details after a limited amount of use isn’t out of the realm of possibility. Think about all the math classes you had over the years. Even though you might’ve had formulas in your head for a time—like, for an exam—how many do you still remember? After a while, your sewing machine’s details might be so burrowed into your thought process that you can be away for a time and remember them, but don’t be too embarrassed to rediscover those details if you can’t bring them to mind. Something like which way your bobbin’s thread goes could be so small that you don’t remember it, but not knowing could complicate your sewing.

So that’s lesson number two, one I had to learn when I came back to my sewing machine after time away: Don’t be afraid to admit you don’t remember, or be too proud to look into how to do these things again. Your sewing machine is only as good as your ability to use it, so don’t hold yourself back by not learning about it properly—even if it isn’t the first time you’re learning about it! Don’t stop until you know what every button, knob, or contraption does!