Tutorial: 3 Ideas for Using Japanese Bento Bags

Tutorial: 3 Ways to Sew Japanese Bento Bags

Bento bags, AKA azuma bukuro

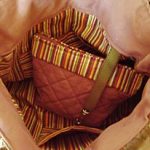
Bento bags are a popular Japanese style of bag, more properly called azuma bukuro (or fukuro. Bukuro and fukuru are different pronunciations of the same word, which is a blend of two words that translate to “good fortune” and “bag.” Azuma is the historical name for the eastern region in Japan now known as Kanto and Tohoku).

These are also sometimes called Japanese market bags, triangle bags, even origami bags, although there are other styles called origami bags, too.

I discovered bento bags a few weeks ago myself, and I am so glad that I did, because these are incredibly useful. I told you in January that I planned to sew for Christmas in July, and I’ve actually been doing this since June. So I’ve been making lots of bento bags as wrappings for the gifts I am sewing now. And for my own personal and household use, too.

There are different ways to sew bento bags. Whichever method you use, they end up the same shape. It is useful to know how to make these both ways, though, so that you can use scraps to make them. You might choose one way over the other depending on what size fabric scrap you have.

How to sew bento bags from rectangles

To make a bento bag from rectangles, you need two same sized rectangles that are three times as long as they are wide. Your rectangles could be 5″ x 15″ for a small bento bag, 6″ x 18″, 7″ x 21″, 8″ x 24″, 9″ x 27″, or any size, as long as it is three times as long as it wide.

Choose most any fabric you like to make these. Use 2 layers of cotton or linen for a soft and relaxed bag, or try denim or canvas for a sturdier bag that holds its shape well.

One rectangle will be the outside of your bento bag; the other is the lining. Align these with right sides together and sew around all four sides, leaving an opening for turning. Turn, press, and sew this opening closed.

Now place this lined rectangle with the outer fabric on top, and fold into thirds, with the lining fabric folded over the front. Sew two seams attaching each outer third of the rectangle to the center at opposite ends.

Then, sew across the two outer corners of the bag to box the corners. The shape and size of the bag will differ depending on how deeply you box these corners. Or you can choose not to box them at all.

Turn right side out and your first bento bag sewn from rectangles is complete. I’m betting you will make many more.

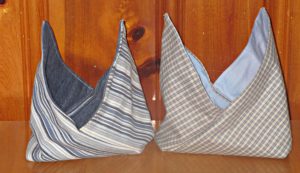
rectangle bentos

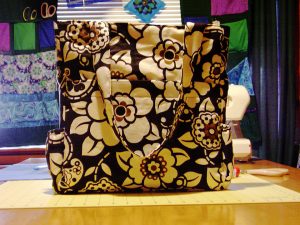
I made these bento bags from rectangles.

Sew bento bags from squares or triangles

There a couple of different ways to construct these from squares and triangles. Here are two slightly different variations on one method:

Take two same sized squares of fabric. They could be the same fabric for a bag with outsides and linings the same, or two different fabrics for a bag that will show both fabrics on both sides. If you want to use this method to make a bag with one fabric showing on the outside and one other fabric for the lining, you will need to first cut a square of each fabric in half diagonally and start the next step with four triangles rather than two squares.

Now you will either fold your squares in half diagonally with right sides together to form right triangles, or lay two different triangles right sides together, if you cut them as described above. Sew these together with an opening. Turn triangles right sides out, press, and sew the opening closed.

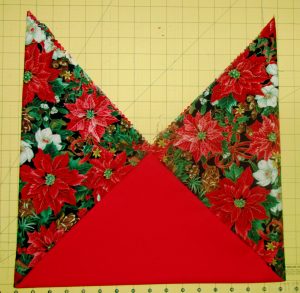
Then lay one triangle on top of the other at the right angles, forming a square where they overlap. Sew down along the edges of this square.

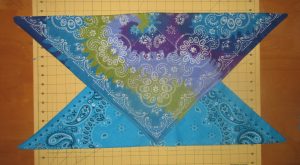
bandana bento

Overlap triangles at the 90 degree angles,and sew the square these form.

Now fold bag with right sides together and sew along both side seams. Box the corners and turn right sides out.

One More Way

Yet another way to make these is to start with three same sized squares, or six for a lined bag. You can use smaller scrap squares for this method than you can for the previous method, since this way uses more of them.

Sew two sides of one square to two sides of another square. Then sew two sides of the third square to the other two sides of the middle square.

You could line these as in the above methods, by sewing outer and lining squares right sides together and turning. Make three of these lined squares and then sew together.

This one is made from three squares. I'll make the lining the same way & sew the two together.

This one is made from three squares. I’ll make the lining the same way & sew the two together.

Or you could sew the bag and lining pieces separately, forming two bags. Then put them right sides together and sew, leaving an opening. Turn, press,and stitch opening closed. Sewing it this way creates a reversible bag, by the way.

What to do with bento bags

Now you know a few different ways to sew bento bags. You can probably think of plenty of things to do with them on your own, but here are quite a few ideas from me for how to make use of these handy bags.

Gift bags

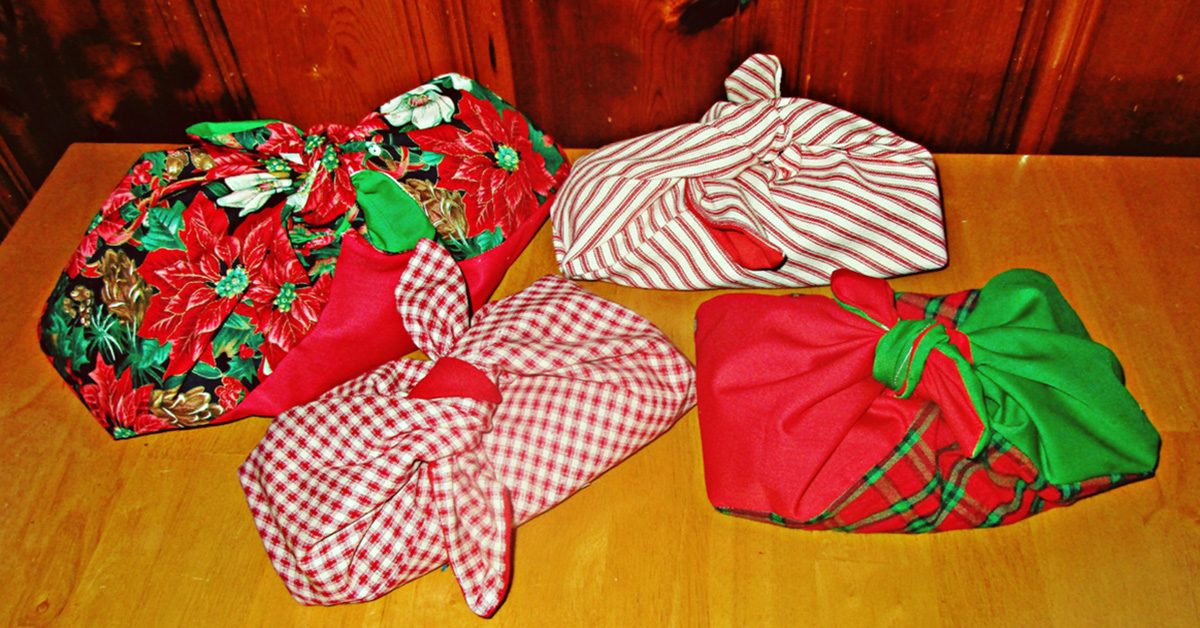
These make “re-useful” wrappings because rather than just being a fabric gift bag, the recipient can then use it for some handy purpose like any of the ideas below.

Lunch sack

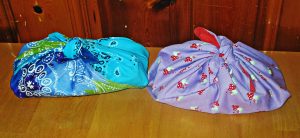
I first found out about these bags when I saw an anime character on TV using one to carry her bento boxed lunch. You can use these to carry your lunch as a pretty package whether you also use a bento box or not.

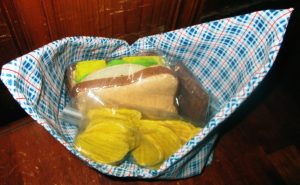
Your lunch will taste much better than this felt example lunch! Just tie bag closed to carry.

Your lunch will taste much better than this felt example lunch! Just tie bag closed to carry.

Bread basket and cloth all-in-one

I’m thinking they are perfect for wrapping loaves of bread as gifts, and these can go straight to the table for serving the bread and keeping it covered, too

Grab and go sack

For pencils, yarn or knitting supplies, small patchwork pieces, works-in-progress: anything you need to keep together and carry along.

Sort-able storage

Make a set for sorting nails or other hardware; fabric, scraps, or trim; cords, wires, or anything else. I plan to make a rainbow set for myself to sort small pieces of fabric and scraps by color. This could be a solution for organizing tools, a kitchen junk drawer, or bead and jewelry supplies collection, too.

Basket / bin

You can make these with interfacing or even quilted for sturdiness. Especially when these are small, they will nicely stand up and hold things on a bureau, desk, counter, or table. Or stand one in a dresser drawer or cabinet.

Harvest bucket

Sew another strip of fabric to connect the two ends and it becomes a handy tool for harvesting your garden.

Produce bags

For separating fruits and vegetables on the counter or to use while shopping. Unlike many reusable bags, bento bags are easily machine washable.

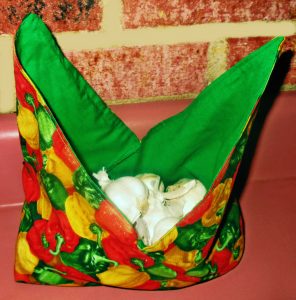
Use them to harvest or store produce.

Use them to harvest or store produce.

Purse or shopping bag

Sew a strip for a handle and carry a bento bag, small or large, as a casual purse or a shopping bag.
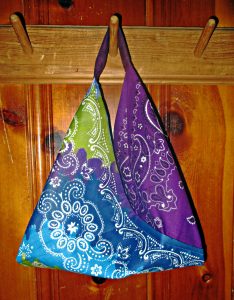
Make a strap by sewing a wide or two narrow rectangles into a tube, then tuck raw ends under & insert the ends of your bento bag, then sew.

Make a strap by sewing a wide or two narrow rectangles into a tube, then tuck raw ends under & insert the ends of your bento bag, then sew.

Add to this list by sharing your ideas for how you will use these in the comments below. Happy sewing!

Gifts to Sew for Dad

Gifts to Sew for Dad

Gifts to Sew for Dad

Sometimes it is hard to think of a great gift to sew for dad. It might seem like endless project options come to mind for most any other recipient, but gift ideas to sew for men don’t come quite as easy. Between the holidays, his birthday, and Father’s Day, you need a few good gift ideas each year—and that’s if you only have one dad to sew for!

Gifts to Sew for Dad

To help solve this perennial problem, here’s a long resource list of ideas to sew for men, including your dad, your children’s dad, or any other dad you might love.

Pillowcase

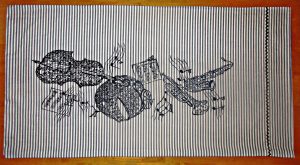
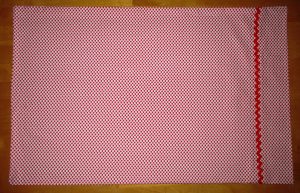
I seem to list pillowcases in every gift idea post I write! That’s because they are easy to make in a hurry, everyone uses them, and none are as nice as those that you make. So they make a nice gift to sew for dad, too. My dear always loves a gift of a new pillowcase, especially for his jumbo XL long pillow. Last year, I made him one with Star Trek fabric, it is covered with line drawings of the Enterprise.  I used a vintage yard I’ve been saving and some vintage trim, too, and made him a new one today.

I think he'll love this for his jumbo pillow. I love the extra bit the sparkly trim adds to this.

I think he’ll love this for his jumbo pillow. I love the extra bit the sparkly trim adds to this.

Pajamas

Simplicity and other pattern makers make super easy to follow patterns for pajama pants. Or you can trace a favorite pair to make a pattern, or you can follow an online tutorial.  Make them extra nice by adding pockets and drawstring waist. My dear prefers these cut quite loose and made from plaid flannel shirting; these look great on him, too.

Handkerchiefs

Make these from soft cotton; they are nice in flannel, or even knit.  Use a serger to finish all sides. For knit fabrics, you don’t even have to hem them at all. To save a step, buy these pre-made and make them more fun with tie-dye or personalize them with embroidery.

Handkerchief detail.

Handkerchief detail.

Quilt

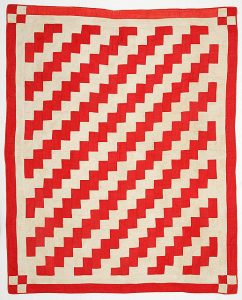
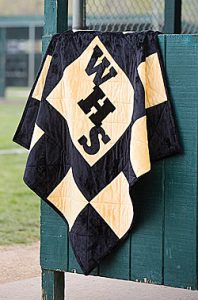
A quilt is a perfect gift to sew for dad. Make him a lap sized or larger quilt in his favorite colors if you know them. If not, you know he loves his college or pro team’s colors, or go with a muted and manly collection of scrap fabrics. My favorite quilt I made for a man was a corduroy scrap quilt, with brightly colored squares alternating with khaki squares in a Streak of Lightning pattern. Choose a high quality, super soft cotton flannel for the quilt backing, and use cotton batting for maximum comfort quilts.

Streak of Lightning quilt, Ashley Van Haeften, from Flickr.

Streak of Lightning quilt, Ashley Van Haeften, from Flickr.

Bedside or chair arm organizer

Sew an organizer pocket to go over the side of his chair and hold his remotes and things, or under his mattress to keep glasses and reading material safely at hand.

Comfy his couch

Besides making a quilt, you can make his couch even cozier with custom cushions, perhaps one which includes pockets for his remote. Or make him a cuddly plush sofa blanket.

Two layers of Cuddle Plush fabric make an ultra cozy sofa blanket.

Two layers of Cuddle Plush fabric make an ultra cozy sofa blanket.

BBQ Apron / tocque / oven mitts

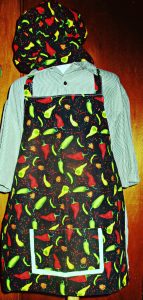
Use appliqué or a fun novelty fabric to make and personalize an apron just for him. I like this reversible pattern from Michael Miller fabrics best. Make the gift even nicer by pairing it with an easy-to-make, matching chef’s hat (tocque is the proper name for these) or an oven mitt.

Reversible, adjustable apron & chef hat.

Reversible, adjustable apron & chef hat.

Handyman apron

Help him around the house by sewing a full-coverage handyman apron or an easy pocketed waist apron for holding nails or a few tools.

First aid kit

Everyone needs one. You can make it roll-up style, or with a zipper.

Zip bag

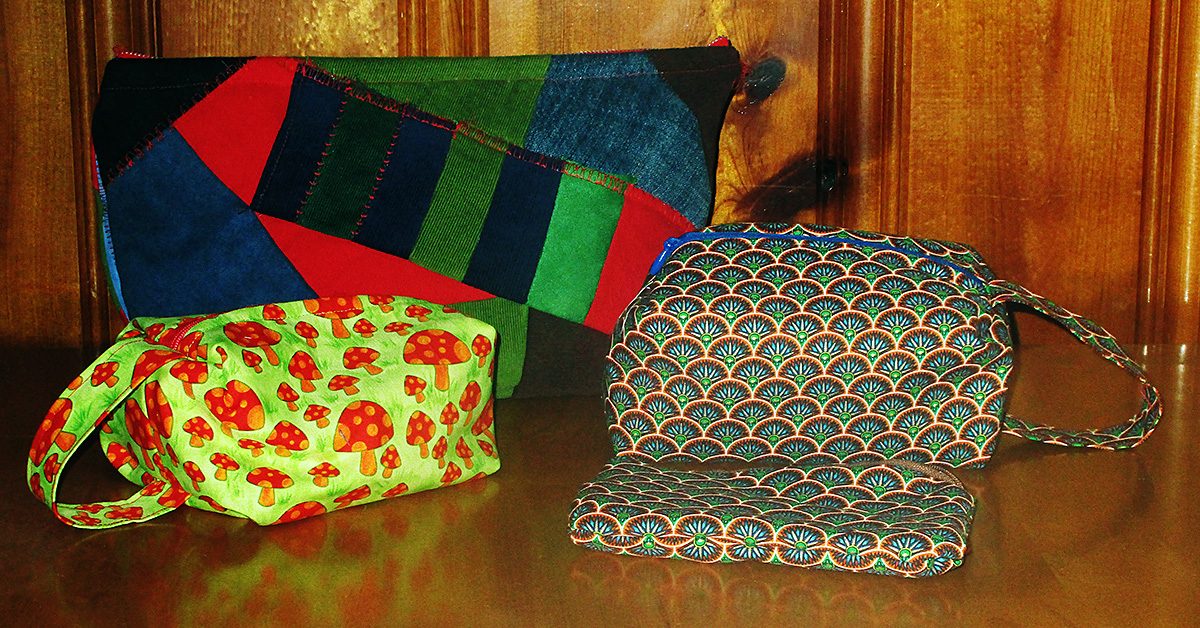
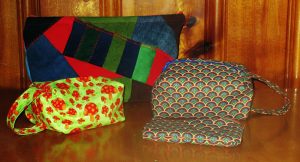
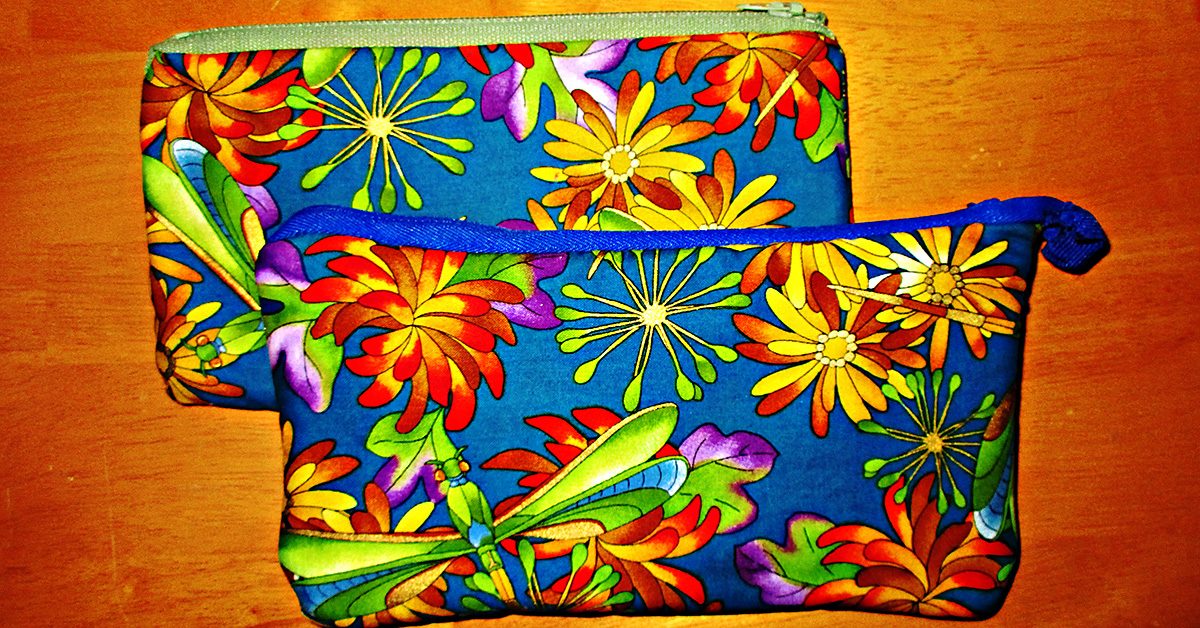
Zip bags I made for guys yesterday.

Zip bags I made for guys yesterday.

Make him a small and simple zippered pouch for holding his cufflinks and jewelry, sketching pencils, or other small items. For something a bit roomier, here is a tutorial for a boxy toiletries bag that will work well to sew for dad.

You can sew an easy zip bag in 15 minutes, or less.

You can sew an easy zip bag in 15 minutes, or less.

Phone or glasses case

These are simple and easy to make. If you prefer, make a hanging charging pouch.

Tablet tote

This one is really easy to make; scroll down to see a manly looking option. The iPlaid is a good choice for a guy, or you could make one from scrap jeans.

Laptop sleeve or bag

If you can get your hands on his laptop to take measurements, then you can make this easy laptop sleeve in an hour or less. For something with a strap, make him a messenger style bag to fit his laptop.

Lunch bag

He’d probably rather not carry a cutesy lunch sack, so here’s how to sew a reusable brown bag with waxed canvas.

Wallet

Make it bifold or trifold. Or make him a simple business card wallet.

Other kits or bags

Make a tool roll or tool bag, a cord roll, a battery bandolier organizer, a monogrammed suede bag for his liquor bottle if he carries one to go, a shoe bag for travel. I’m making a patchwork quilted ukulele bag and a drumstick bag for my hubby this year. A soft padded guitar bag is a great idea, too.

This fabric is perfect for lining his ukulele case.

This fabric is perfect for lining his ukulele case.

Cup, can, or bottle cozy

Here are free tutorials to sew these for a can, a bottle, or a coffee cup.

Keychain

Lanyard type key fobs make useful gifts. You can make them with webbing, leather, even recycled jean denim. Here is a neat tutorial that includes a way to make these with a zipper for a place to stash cash. Or make something else useful to hang hang on his keychain, like a chapstick cozy or earbud or iphone pouch.

CD visor or book

Plenty of dads still keep their music on CD. If yours does, you can sew him a place to hold them on his car visor. I made one with a patchwork dive flag and ocean blue fabrics for my diver dad. You can also use felt to make pocket pages and sew a folder or book for holding CDs.

Baby carrier

Dads love to wear babies, and babies love it when they do. For a new dad, make a sling type, mei-tai, or a toddler sized soft structured carrier in a manly color or fabric.

A mei-tai style baby carrier is super easy to sew and comfy for both dad & baby.

A mei-tai style baby carrier is super easy to sew and comfy for both dad & baby.

Sporting gifts

Stadium blanket, photo courtesy Fons & Porter.

Stadium blanket, photo courtesy Fons & Porter.

Hat

There are lots of ways to sew a hat. Here are tutorials and free patterns for a few different styles:

Shorts

Buy a simple pattern, or use my 10-minute way to make shorts. You can make the bandana style shorts in that link for men using four bandanas instead of two.  Just use two bandanas instead of one for each leg, and add side seams to sew these together. Add length at the rise with a matching or coordinating fabric, or cut a couple more bandanas in half and sew these at the top. Or choose a funky fabric and whip up some board shorts for him.

Tie / bowtie

Buy some silk and make him a stylish tie with a pocket square to match. Here are tutorials for a bow tie and how to add a secret wallet pocket to the back of any tie, too.

Scarf / cowl

Unless you live in the Southern Hemisphere, you probably won’t want to give dad a scarf for Father’s Day. But for winter holidays or birthdays, a scarf or cowl makes a great gift.

Do you have other ideas?

I am sewing all my Father’s Day gifts this year. What about you? Which of these ideas will you sew for dad? If you know any good gifts to sew for dad or men that aren’t on this list, please add them by commenting below.

Sewing on Trucks, Cycling with Sewing Machines

This past week, I got a call to tailor and do some fittings for my friend Matthew, who is the Costume Designer for TBS’s Search Party. I love working for Matthew. He’s sweet and fun and his design choices are quirky, a lovely mix of vintage and high end with a bit of funk blended in.

Search Party doesn’t have the budget for a full time tailor, so Matthew only calls me in for days when he’s doing a lot of fittings or he has a pile of alterations that he needs completed for the next couple weeks of filming.

Day playing

Day playing, which is what we in the film business call working for a day or two on a show when extra help is needed, can be an enjoyable experience (it can also be annoying but I try my best to avoid those types of day playing gigs). Search Party is pretty much always a positive experience, mainly because of Matthew and the people he has working for him.

So, I was happy to get the call, even though it involved going all the way to Red Hook (a neighborhood in Brooklyn sadly lacking in convenient public transportation access) and sewing on a cramped Wardrobe Truck.

The inadequate subway connection was easily solvable: I’d ride my bike just as I do most places in the city, except that I needed to bring a sewing machine and basic sewing supplies with me. Tailor day playing assignments almost always involve dragging your machine and kit through the streets, and usually not on a bicycle.

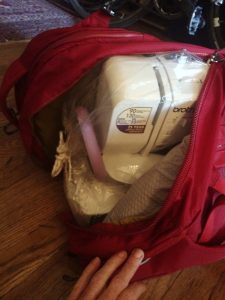
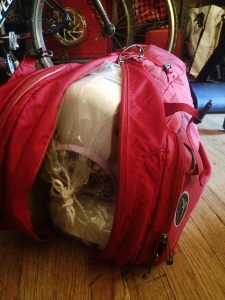
I discovered that my favorite freakishly lightweight Brother sewing machine fit perfectly into the backpack.

I discovered that my favorite freakishly lightweight Brother sewing machine fit perfectly into the backpack.

But, a few months ago, I received an unexpected gift from REI. I’d ordered a tent for some planned bike packing adventures but, instead, received a backpack (definitely not a tent). REI costumer service was very helpful when I called, said they’d send the tent straight away and would email me a pre-paid return label to ship the backpack back (back…). About twenty minutes after I hung up, they called back to say never mind, keep the backpack for free.

I don’t know what made me try it, but a couple weeks after that, I discovered that my favorite freakishly lightweight Brother sewing machine fit perfectly into the backpack. Brilliant! Here are some photos. If you’re interested in which backpack it is, it’s the Osprey Comet.

If you’re interested in which backpack it is, it’s the Osprey Comet.

If you’re interested in which backpack it is, it’s the Osprey Comet.

I packed a few other things in the backpack with the machine (there was still more space!) – shoulder pads, interfacing, and lining scraps, a bag of thread, and some other not very heavy notions. The rest of my supplies, the scissors and more threads and gallon bag of elastics and tapes, I packed into my Revelate Seat Bag that I purchased from my favorite local bike shop. And I was good to go, albeit not very quickly (cause all that gear was a bit heavy)…

The lion, the witch and the Wardrobe truck

Sewing in small spaces on a Wardrobe truck where a whole crew of other people are also trying to do their jobs presents its own set of challenges. Working on the Search Party truck even more so as they use the dreaded split Wardrobe/Hair/Makeup style of 18-wheeler film truck. Most productions have separate trucks for Wardrobe and Hair/Makeup and twice as much space but smaller productions who are trying to save money go with the split trucks. What this means is that there is even less space than normal.

I set up my machine on the front corner, the sink and washer/dryer on my right and the busy Wardrobe Supervisor and her computer on my left. A few feet away, one of the customers steamed and ironed the clothes for the next day and, in the back of the truck Matthew and his assistant did fittings with various cast members. Occasionally, the set costumer was also on the truck gathering things for the next scene, as well as the shopper dropping off or picking up items.

High chair

I had a chair that was too high for the counter. I’d have to crouch in order to sew while sitting in it. Below the counter were drawers so there was no convenient place to put the foot pedal. I ended up standing up to sew, my leg turned out to the right to operate the pedal from a side-saddle angle. The foot kept getting stuck under the lip of the bottom drawer so that the machine would continue to sew even after I’d taken my foot off. I had about two inches of empty space to the left of my machine before the supervisor’s notebooks and computer and the cord from the iron kept falling (along with a bunch of my pins) into the sink to my right. I had to shift position slightly every time someone needed to fill or empty the washer and dryer.

But, it was still a wonderfully pleasant work-day. Because we were all in good spirits and we all worked together, happily jockeying for space, seamlessly adapting to each other’s needs, laughing when we all seemed to need to occupy the same twelve inches of space at the same time, all of us just getting our jobs done.

Things don’t always work this well on a crowded wardrobe truck. Sometimes people forget that everyone’s jobs are important and necessary to the project. Sometimes people are cranky because of lack of sleep, or stress, or just because it’s their nature. But it doesn’t have to be that way and, if you ask me, it shouldn’t. Making TV does not, after all, have anything to do with curing cancer or launching rocket ships (sometimes people forget that!).

One of the most wonderful things is a group of people working together to achieve a common goal. Its also a pretty good way of getting things done! I highly recommend it. 🙂

Gifts for Grads Who Love to Sew

Getting through school requires determination, persistence and intelligence.

Getting through school requires determination, persistence and intelligence.

Getting through school requires determination, persistence and intelligence. Graduating seniors have earned the recognition and gifts their family bestows. We’d like to throw our hat in the ring and congratulate all graduates this year too! To help them celebrate, we have some great gift suggestions for grads who love to sew.

Sewing Totes

As your graduate heads out into the world for the next phase of their life, they’ll want to have their sewing machine and supplies with them. Sewing totes are the perfect way for them to pack up all their sewing gear safely and transport it to this next step on their life and for all the subsequent moves to come. The variety of colors, styles and sizes means you’ll find the perfect sewing tote for your graduate.

Embroidery Hoops

Not all of this year’s grads will embroider, but those who do will love getting a gift of embroidery hoops. Try getting them a variety of shapes and sizes so they’ll have plenty on hand for future projects. And know that any time they use one of the hoops you gave them, they’ll think of you while working on their embroidery project. Those warm memories will work their way into the project, making it that much more special.

Sewing Furniture

Many new graduates begin by moving into a place of their own – with or without roommates. Help them get set up and make their place comfortable with sewing furniture. Whether they’ll have a separate sewing room or a small space in the corner of a shared apartment, the right sewing furniture will help them feel more comfortable and settle into their new living arrangements.

Garment Care

With luck, the graduate in your life has a job lined up. Whether they do or not, they’ll need to look their professional best on the on the job hunt and in the workplace. Garment care items will help them do just that. They work well on both store-bought and handmade items, so your graduate who loves to sew may wind up sharing these gifts with their roommates and coworkers.

Graduates who love to sew may also appreciate gift certificates to fabric stores or to our website. What will you buy your grad this year?

DIY: Reversible Tote Bag Tutorial

DIY: Reversible Tote Bag Tutorial

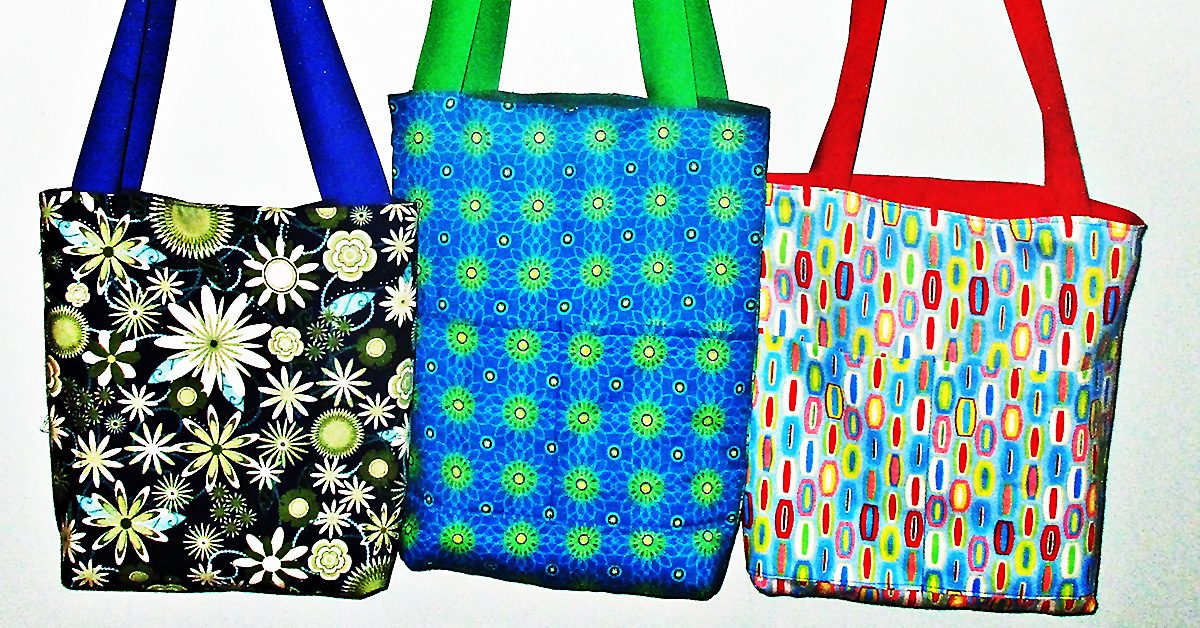
It is easy to sew a reversible tote bag; even beginners can make this project.

It is easy to sew a reversible tote bag; even beginners can make this project.

It is easy to sew a reversible tote bag; even beginners can make this project.

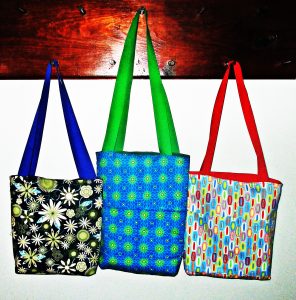
You can make these in any size. My three examples are each sized slightly differently.

To make one reversible tote bag, you need 2 different bag fabrics. Depending on the sturdiness of your fabrics, you may also need medium weight interfacing or fusible fleece. You can make your bag handles from long rectangles of one or both of these fabrics, or you can use grosgrain ribbon, as I have here.

Reversible tote bag step one: cut bag pieces

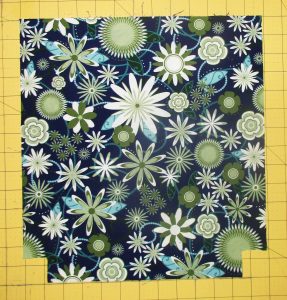
Measure & mark 1.5” from both sides of the bottom corners & cut these little squares out.

Measure & mark 1.5” from both sides of the bottom corners & cut these little squares out.

Cut two squares or rectangles of each fabric to your preferred dimensions. I made these using 13” x 14”, 14” x 15” and 13” x 17” rectangles, and I have made them both much smaller and much larger.  The 13” x 17” is big enough for my laptop. But ribbon handles aren’t a good idea for a laptop bag; follow the directions for making stronger fabric handles if you plan to carry your computer.

Then measure and mark 1.5” from both sides of the bottom corners and cut these little squares out. Do this for all four pieces of your bag fabric.

Step two, optional: interfacing

If you choose to make your reversible tote bag from home decor fabric and/or canvas, you won’t need to use interfacing.

If you are using quilter’s cottons or similar lightweight fabrics, cut fusible fleece or interfacing to fit two of the bag pieces. Follow package directions to fuse fleece or interfacing to the wrong side of both pieces of one bag fabric.

Step three, optional: pockets

You can make pockets on one or both sides of your reversible tote. The easiest way to make pockets is to start with a rectangle, fold it right sides together, and sew all around, leaving an opening for turning. First topstitch the opening closed, then pin and sew the bottom and sides of the pocket to the bag.

You can make a long rectangular pocket that stretches the full width of your bag, or make square patch pockets and sew them in the middle of one or more of the bag pieces.

Step four: sew two bag bodies

Take both pieces of one of the bag fabrics and sew along the bottom and side seams with right sides together. Press seams open. Now, miter the corners by lining up the side and bottom seams you just sewed at the middle of the new seam you will form from the square cut out. Sew these seams.

Repeat with the pieces of the second bag fabric.

Step five: handles

Use a soft measuring tape or even a string hung over your shoulder to determine how long you want your straps to be. I like long shoulder straps, so I usually cut mine about 30 inches long. If you prefer to carry your tote on your arm, cut yours shorter. You need two.

I saved time making these bags by using grosgrain ribbons to make easy straps. To do this, just cut two pieces of ribbon to your desired length.

To make fabric handles, cut two long rectangles to your desired length measurement by twice your desired strap width. Apply interfacing to the wrong side of your fabric if you like.  Fold lengthwise right sides together and press. Sew along the long open edge, then turn. Press again.  Now top-stitch along both long sides.

There is no need to finish the short ends as these will be concealed between the two sections of the bag.

Step six: assembly

They are handy for carrying books, notebooks, your computer, clothes for overnight or the gym.

They are handy for carrying books, notebooks, your computer, clothes for overnight or the gym.

Insert one bag into the other, with right sides together. If your placed pockets on one side of each bag body, insert them together so that the pockets are on opposite sides. Push down the corners to make sure both bag pieces are lined up well at the bottom. Then line up the side seams from both pieces and pin these together.

Take one strap and hold one end in each hand so that the loop hangs down. Be sure it isn’t twisted and insert it between the two bag parts on one side. Measure in from the pinned side seams on each side to be sure the straps are centered. About three inches in is a good guideline, but eyeball your bag to decide on exact strap placement. Just measure the distance between strap and side seam on both sides to be sure they are even. Pin, then repeat on the other side with the other strap.

Now sew together along the top edge.  You will have to leave an opening big enough for turning; I sew across all the straps and leave the opening on one side.  Turn everything right sides out. Both sides of the reversible tote will be pointing out.

Stick your hand into the opening and poke all the corners out from the inside. Then push one bag body into the other so that it becomes a bag with handles at the top. Return to your ironing board and press. Pay attention to the edges still open from turning; you want to press the raw edges inward and neatly align for top-stitching this opening closed.

Now stitch all the way around the top of the bag and you’re done.

Make more!

Reversible tote bags are easy to sew in a hurry & the possible variations are endless.

Reversible tote bags are easy to sew in a hurry & the possible variations are endless.

Reversible tote bags are easy to sew in a hurry and the possible variations are endless. Make them in different sizes and try different fabrics and trims. Use tie-dye, quilting, appliqué, fabric paints, or any other embellishment you like.

They are handy for carrying books, notebooks, your computer, clothes for overnight or the gym. You can use them as a shopping bag, your purse, or for handmade gift giving. Pick out some pretty fabrics and make a bunch. Happy sewing!

Fabrics and Textiles in San Miguel de Allende, Mexico

Fabrics and Textiles in San Miguel de Allende, Mexico

San Miguel de Allende, in the state of Guanajuato, Mexico.

San Miguel de Allende, in the state of Guanajuato, Mexico.

I recently traveled to San Miguel de Allende, in the state of Guanajuato, Mexico for a five day writer’s retreat with two friends. Although famous in Mexico proper, many gringos have not heard of San Miguel, located the mountains at 6,200 ft. elevation, at approximately Mexico’s center (200 miles north of Mexico City and about 600 miles from the Texas border).

Although famous in Mexico proper, many gringos have not heard of San Miguel.

Although famous in Mexico proper, many gringos have not heard of San Miguel.

I’m a sewist and a writer and while I was there to work on my book, I could not tear my eyes away from the gorgeous colors of the city and the beautiful fabrics & textiles I found there.

I could not tear my eyes away from the gorgeous colors & textiles of the city.

I could not tear my eyes away from the gorgeous colors & textiles of the city.

Even the city itself reminded me of a patchwork quilt.

Even the city itself reminded me of a patchwork quilt.

Even the city itself reminded me of a patchwork quilt.

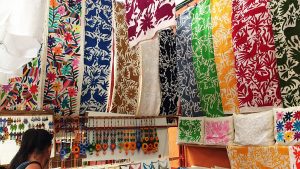
Mexico is not afraid to use color, in fact it embraces bright, vibrant colors in both private and public buildings, art, and culture.


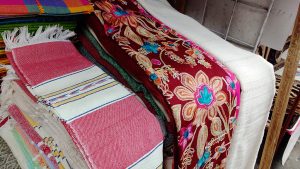
Locals claim that the birthplace of the serape is San Miguel de Allende and I was inundated with options.

Locals claim that the birthplace of the serape is San Miguel de Allende.

Locals claim that the birthplace of the serape is San Miguel de Allende.

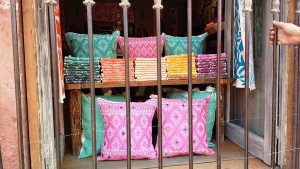
Other items on display were rugs, pillowcases, bedding sets, purses, bags, belts, guayaberas, and embroidered and woven fabrics.

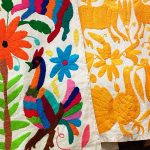
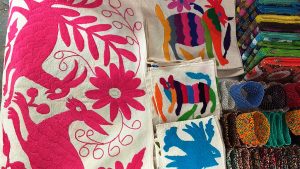
The hand embroidery I found particularly compelling. I bought a bright yellow bag with hand embroidery and my girlfriend, Lizz, bought a hand embroidered panel she plans to hang on her wall at home.

This is the panel she purchased (photo taken with permission).

This is the panel she purchased.

This is the panel she purchased.

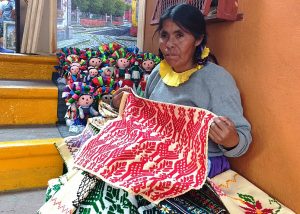
This booth was my favorite. It was located in El Mercado de Artesanías. I was so inspired that I had my pencil and paper out and took notes to plan out quilts I’d love to make with the huge, hand-embroidered panels.

This booth in El Mercado de Artesanías was my favorite.

This booth in El Mercado de Artesanías was my favorite.

They sold smaller squares too, similar to charm packs and layer cakes. I’ve worked these into some upcoming designs as well.

I’ve worked these into some upcoming designs as well.

I’ve worked these into some upcoming designs as well.

Mexico also has the best selection of oil cloth fabrics. Make sure to pick up a few yards for your stash whenever you visit.

Make sure to pick up a few yards for your stash whenever you visit.

Make sure to pick up a few yards for your stash whenever you visit.

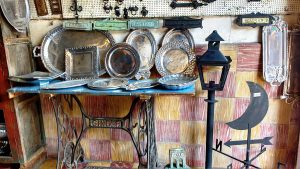
After a long day in el centro, I spotted this Singer sewing table used for display at a local tienda. Sewing is everywhere.

Sewing is everywhere.

Sewing is everywhere.

Here I’m enjoying a hard earned beer after a long day of writing, but it’s the bag in the foreground I want you focus on. Check out that embroidery and the stunning color!

Check out that embroidery & the stunning color!

Check out that embroidery & the stunning color!

I cannot wait to go back. Have you ever visited San Miguel? Did you buy any fabric while you were there? Share with us your finds in the comments.

I cannot wait to go back.

I cannot wait to go back.

(All photos were taken with permission)
———————————————————————————–
Charlotte Kaufman is a writer and sewist in Mammoth Lakes, California. She specializes in marine and home interiors and continues to fall more and more in love with quilting. You can follow her at charlottekaufman.com.
Gifts to Sew for Mom

Gifts to Sew for Mom

Are you looking for ideas to sew for Mom?

Moms come in all types. But most appreciate handmade gifts, especially the ones you make. Whether your mom is glitzy or sporty, a homebody or a world traveler, we’ve got you covered.

For Mother’s Day, her birthday, holiday gifts, or just because you love her, here are lots of fun project ideas you can sew for mom.

Zip bags

There are so many uses for these that zippered cases are always a good gift idea. She can use one for a cosmetics bag for her purse or travel, to hold pencils or art supplies, or anything else. I once made a matching set of these in several sizes for a gift for my mom.

She can use these to hold anything.

She can use these to hold anything.

Quilt

Whether she likes to get comfy in her favorite chair or she babysits grand-babies, a lap quilt is a perfect choice to sew for mom. Make one in her favorite colors, to match her décor, or choose a special pattern.

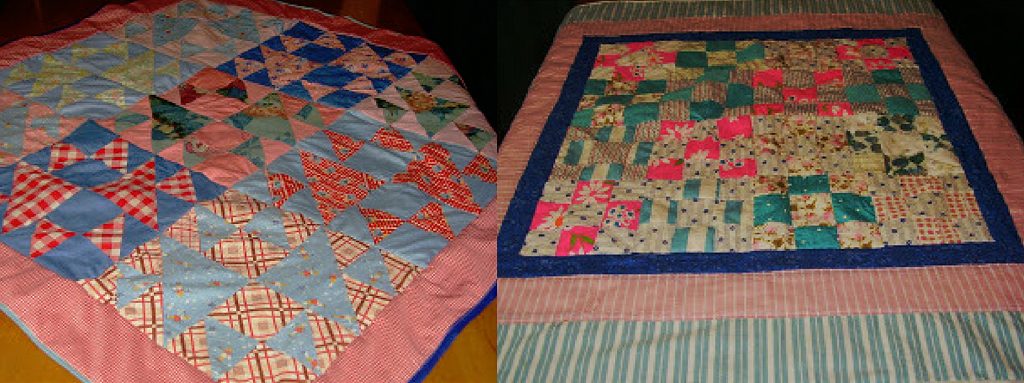
The blocks in these quilts were pieced by my mother's and my husband's grandmothers. I found them in their sewing boxes & put them together with borders to make these lap quilts for our moms to share with their grand babies.

The blocks in these quilts were pieced by my mother’s and my husband’s grandmothers. I found them in their sewing boxes & put them together with borders to make these lap quilts for our moms to share with their grand babies.

And speaking of grand kids and special quilt patterns, you could get the kids involved and make a handprint quilt for their grandmother.  You can make a handprint quilt using washable fabric paint and the kids’ hands as stamps. Or you can have them trace and then cut out their hands and use these as appliqué patterns.

Handbag

Most ladies will appreciate a beautiful new handbag. Depending on your mom’s style, you could make her a clutch, a wristlet, a structured bag, or a casual cross-body purse or messenger bag.

The possibilities are endless here. Choose suede, an elegant stamped faux leather or other fancy fabric, a distinctive or wildly patterned print, or build her a bag based on a small piece of patchwork created just for her.

Totes

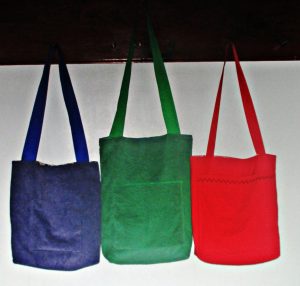
She can’t have too many tote bags since these are endlessly useful.

She can’t have too many tote bags since these are endlessly useful.

She can’t have too many tote bags since these are endlessly useful. Make her a stylish and sturdy tote bag for her library books, groceries, or other shopping and she will appreciate it endlessly.

Make a gorgeous XL tote in a special fabric and she will be thrilled to use it as a stylish everyday bag. Especially if you add in ample pockets and/or smaller zip bags for organizing contents.

You can make a reversible tote bag in any size and give her two bags in one.  Make a canvas tote with ample pockets inside and out to create a custom beach bag she will love. Or make her a few of these cute shopping bags that collapse into their own pocket.

And consider smaller totes, too. Here is one as pretty as a purse meant for toting her tablet.

Pillowcases

You can’t buy pillowcases as pretty as the ones you can sew. Make her a luxe pair trimmed in vintage lace. Choose a colorful patterned fabric to dress up her bed or a special motif she adores. Whether she loves owls,  Star Trek, or her favorite sports team, you can make her a pillowcase from a yard of any novelty print.

You could make a pillowcase covered in hearts to remind her how much she is loved.

You could make a pillowcase covered in hearts to remind her how much she is loved.

Sew a bouquet

A bouquet of flowers is a standard Mother’s day gift. You can sew her a bouquet of flowers that will never wilt and fade away.

Here are a lot of different ways to make fabric flowers.

Rice Pack

Whether she suffers from pains in the neck, back, tummy, or general monthly pains, an oversized microwavable rice pack heating pad will be a welcomed gift of comfort.

Slippers

There are lots of ways to sew slippers, here are some slipper sewing tutorials to choose from.

Pajamas

You can sew cozy pajamas from silk, cotton, flannel, or fleece. Make them ultra feminine with batiste and lace, or pure fun in a funky print. Start with an easy pattern from Simplicity, McCall’s, or Butterick, or use one of these tutorials.

Easy robe

Like pajamas, you can sew a robe from a lightweight or dressy fabric or from something heavier and more cozy. Robes are easy to sew. You can buy an easy robe sewing pattern or here’s a great tutorial showing how to make your own pattern using rectangles.

Apron

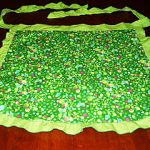
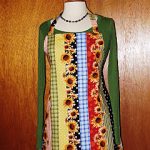
There are so many ways to sew aprons.  You can make her a pretty half apron from just a fat quarter of fabric plus trim, a full coverage bbq style apron from a yard, a reversible apron, or a garden or craft apron.

  • Oven mitts/ pot holders
  • Table runner
  • Placemats
  • Napkins

Travel bags

If your mom travels a lot, there are a lot of great gifts you could sew to help her

Project link at Positively Splendid.

Project link at Positively Splendid.

Pareu

I got this idea from the book Travel Gear and Gifts to Make, by Mary Mulari. She says that a pareu (pa-ray’-oo) is actually a colorful Polynesian wrap skirt. But it can also be used as a shawl, head cover, scarf, swimsuit cover up, light blanket, picnic blanket, or even a knapsack for carrying stuff.

This is probably the most used and loved gift I have ever made for my mom, and it is also the simplest. She travels a lot as a car passenger, and she likes to nap with a light blanket while riding.

A pretty pareau works perfectly for that plus more.

To make one, you just hem a square or rectangle. You can make one from a 44″ or a 60″ square. Since I knew she would use it as a blanket, I made my mom’s in the larger size. And I sewed a small matching tote with a strap, for storing the pareau rolled up while not in use. I bet it has been over ten years since I made it for her, and she still raves about and uses this gift all the time.

Needlebook

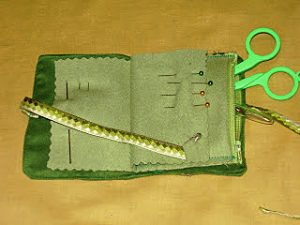
If your mom sews a lot or even just a little, she will certainly treasure a needle book you make with love just for her. You can make a simple one from felt or create a patchwork cover and include a zippered “page” for holding small scissors and other supplies.

I like to make needle books with a zippered page inside.

I like to make needle books with a zippered page inside.

Fabric necklace or bracelets

Jewelry is another go-to gift for moms, but have you ever sewn jewelry? Here are some ideas you could try:

I hope this list gave you some good ideas. What will you sew for mom?

Master Your Serger with Tote-Making Class

Master Your Serger with Tote-Making Class

Sewing Machines Plus in San Marcos, CA has the perfect class to help you master your serger, use your fabric stash & walk away with a fabulous tote bag!

Sewing Machines Plus in San Marcos, CA has the perfect class to help you master your serger, use your fabric stash & walk away with a fabulous tote bag!

If you’ve been using your serger machine for a while now, you’ve probably mastered many of the basics. And if you’re like me, you’re completely in love with your serger! But you’ve probably also noticed there are a lot of features you’ve never used. Some of them you may not need, but wouldn’t it be cool to at least know a few of them? I think so too.

Sewing Machines Plus in San Marcos, CA has the perfect class to help you master your serger, use your fabric stash and walk away with a fabulous tote bag!

Serger Class Details

This class is 2-hours a day for three consecutive Wednesdays in May. May 17, 24 and 31 from 3:30 – 5:30. You’ll need to bring you serger including the power cord, foot pedal and cord. You’ll also need a variety of serger feet, including standard, cording, lace applicator, cover and chain, ruffler, elastic and clear. If you don’t have all of these serger feet, don’t worry, you can buy them at SMP before class.

Don’t forget the fabric! You’ll need at least 7 coordinating fat quarters or scraps and one yard of Soft and Stable.  To go along with the fabric, you’ll also need to bring thread, zipper, buttons, piping and cording. Full class supply list and registration instructions available here. It’s a fun, affordable way to learn the ins and outs of your serger, connect with other stitch aficionados and make an adorable tote bag project.

When your serger tote bag is done, it’ll be great for you or as a gift for a graduating student. Plus, you’ll have a much greater understanding of your serger machine and all its features and accessories.

Are there other classes you’d like to see offered? Let us know! We’ll do our best to accommodate and provide classes of interest.

The Scraps of Christmas

The Scraps of Christmas

It’s officially Christmas week, guys! The day is just around the corner, and soon we’ll be heading into a less twinkle-lit world. Until then though, there’s still time to revel in the holiday for one more blog post! For this particular one, how about we go with a nice wrap-up idea?

You see, I’ve covered a tree skirt, ornaments, and homemade gifts, but if you chose to go all of those routes, you potentially would have collected a series of Christmas fabrics. Each project could have its own material, so there might be quite the variety. Another decent assumption would be that you didn’t have just enough material for all projects, so you could easily have scraps of Christmas fabric left over from your handmade-Christmas-extravaganza.

The Scraps of Christmas

Sure, you could stash it away for future use, but if you keep every scrap of material you ever come across, you’re treading on fabric-hoarder territory! There’s nothing wrong with keeping the pieces that would reasonably be user-friendly in the future, but I’m talking about the small bits that won’t be much use without other smaller parts to make something happen, or for a small enough project.

So, maybe this post will help keep that fabric stash a little smaller and farther from hoarder territory by answering one simple question: What projects can you do with those small parts of leftover Christmas fabric?

Answer: Plenty, and I plan to take you through a number of those options!

Possibility #1: Make a banner

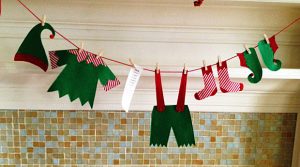
This is such a simple option, but it can add a classy touch to your Christmas decorations. All you need to do is pick a shape for your fabric, cut the scraps in that shape, make sure those hems are smooth, and link them together—maybe with some ribbon or yarn. If you’re feeling particular, you can make sure that each of those shapes is two-sided by sewing two pieces together—maybe spice things up by using more than one fabric for the cause. With that method, you could have (as an example) a bell-shaped addition to your banner that has Rudolph on one side and Frosty on the other! If you’re good at embroidery, use enough shapes to embroider a message across. You could even do this laundry-line idea if you had the right fabric! The options on this idea alone are numerous!

The options on this idea alone are numerous!

The options on this idea alone are numerous!

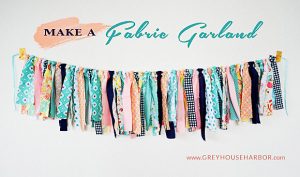
Possibility #2: Make fabric garland

This is like the banner, but requires strips of fabric tied instead of differently shaped pieces embellished and sewn. I mean, sure, you could add gems and such, but the draping quality of the fabric is kind of its distinctive factor, which doesn’t leave a whole lot of room for the Merry Christmas message! Still, this is a simple, elegant idea that could add a touch of holiday cheer to your house by hanging from your mantel. And, as is the main idea of the post, it’s a great way to use that extra Christmas fabric you might have once you finish your holiday sewing projects!

This is like the banner, but requires strips of fabric tied instead of differently shaped pieces embellished and sewn.

This is like the banner, but requires strips of fabric tied instead of differently shaped pieces embellished and sewn.

Possibility #3: Make a Christmas tote

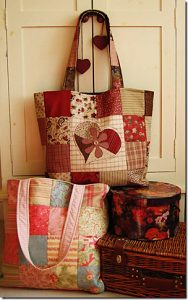
While you might not have enough material to make the entire tote in one style (then again, maybe you will!), you could create a patchwork look for a homemade Christmas tote! You can find patterns for totes here, and Sewing Machines Plus offers free patterns for bags as well. Can you imagine a patched-up Christmas tote in this design! I would definitely carry one of those!

I would definitely carry one of those!

I would definitely carry one of those!

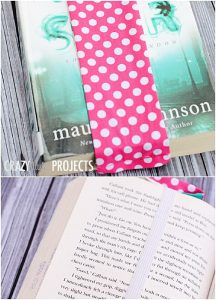
Possibility #4: Make fabric bookmarks

Call me a literature nerd, but how awesome would it be to give someone a copy of A Christmas Carol with a hand-sewn bookmark to go along with it? In fact, this could be a thing you do next year — give out holiday classics with hand-sewn bookmarks in Christmas fabrics! These projects are small, and who knows how many you could make in one day? And they require little fabric, which is the theme of this post! Whether it’s to hold your place for your own holiday reading or for small gift-gestures to let someone know you’re thinking of them, these creations could bring a festive touch to a book-and-hot-chocolate December time!

Call me a literature nerd, but how awesome would it be to give someone a copy of A Christmas Carol with a hand-sewn bookmark to go along with it?

Call me a literature nerd, but how awesome would it be to give someone a copy of A Christmas Carol with a hand-sewn bookmark to go along with it?

Possibility #5: Make a keychain

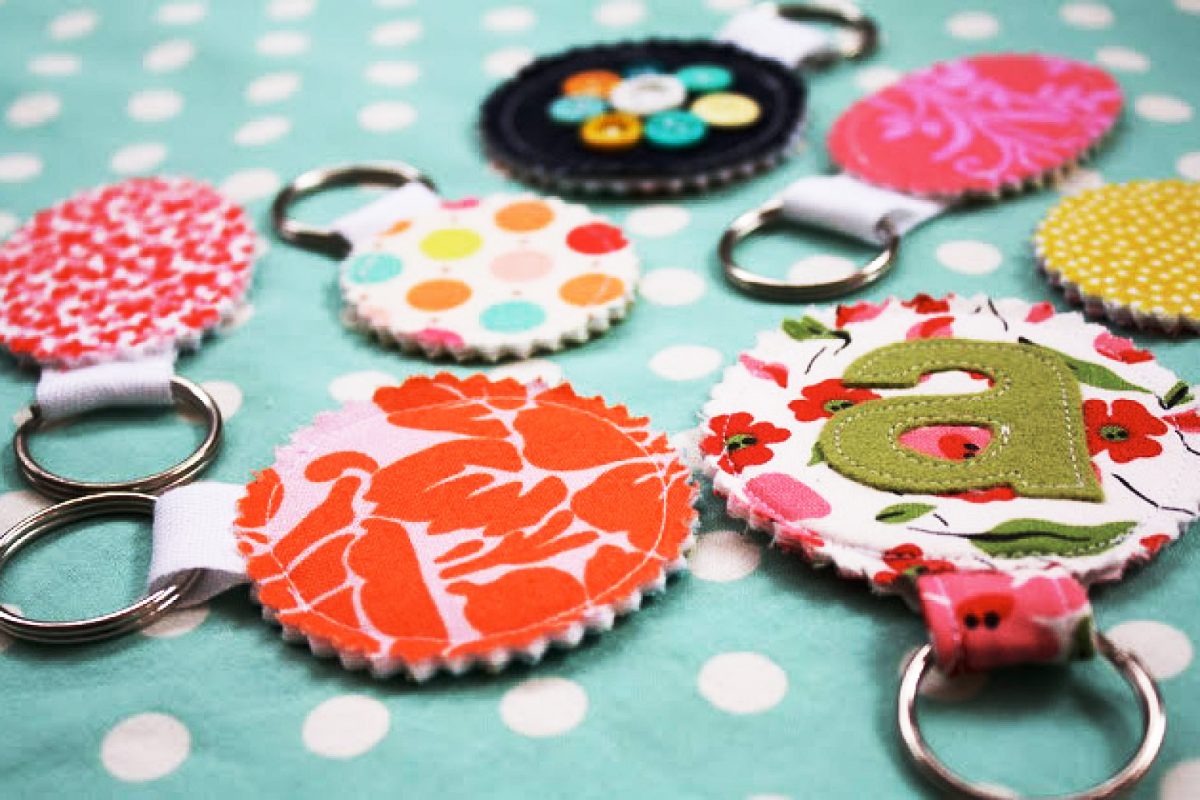
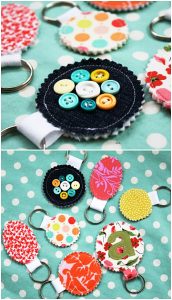
Since childhood, I’ve had an interest in keychains. I don’t know why, but it’s true just the same. So, why not take a bit of that excess material and make a one-of-a-kind keychain? Keyrings don’t have to be expensive, and it’s possible that everything else you’d need you could find around your house—maybe even down to buttons like what you see in the picture. Given the teeny-tiny-ness of keychains, this craft would be a good way to use some of that excess fabric! You can find this possibility (and #5) here!

Given the teeny-tiny-ness of keychains, this craft would be a good way to use some of that excess fabric!

Given the teeny-tiny-ness of keychains, this craft would be a good way to use some of that excess fabric!

So, the moral of the story is that you don’t have to be a Christmas-fabric hoarder after your holiday sewing! There are plenty of avenues to expend some of that scrap material!
Book Promoting for the Crafty Author

Book Promoting for the Crafty Author

I have a number of creative outlets, guys. I like to sew, quilt, bake, design floral arrangements…

I’ve of fallen in love with the idea of freelance writing.

I’ve of fallen in love with the idea of freelance writing.

But my number one creative outlet is writing. That’s one of the reasons why having this blog opportunity fits so well with my personality and interests. I get to dabble in one category of creative endeavor and learn about it while exercising my number-one creative passion by writing about it. It’s a pretty awesome system, honestly, and I’ve kind of fallen in love with the idea of freelance writing because of it.

What would be awesome though is if I could make a living as an author, which is something that I’ve been putting efforts toward. I’ve been working on and publishing books since at least 2013, and I’ve learned a thing or two about what to do in regards to marketing and such. Not enough to make me a best seller, mind you, but I’ve learned enough to be in better shape than I was when my first book was released in 2013!

I’ve learned enough to be in better shape than I was when my first book was released in 2013!

I’ve learned enough to be in better shape than I was when my first book was released in 2013!

In the Beginning…

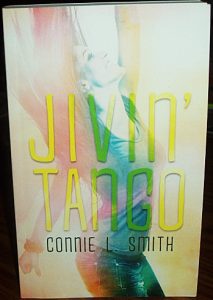
That first book is being re-released by a publisher, and I want to do things right this time around by applying what I know. What I *do* know is that there are steps in marketing that can attract an audience, and giveaways happen to be one of those options. In fact, I recently finished a giveaway on Goodreads for this very copy of one book I wrote. Maybe you’ve heard of it? Jivin’ Tango? Oh well… 🙂

Importance of Planning

I recently finished a giveaway on Goodreads for this very copy of one book I wrote, Jivin' Tango.

I recently finished a giveaway on Goodreads for this very copy of one book I wrote, Jivin’ Tango.

The point—and this is what brings us to the theme of this blog—is that I’ve been trying to think outside of the box for things that I could create for the upcoming book releases that would make for awesome giveaway items. And I think I might actually have come up with some ideas for the process! You see, this upcoming re-released trilogy is a fantasy series that includes essences of a number of mythical creatures—fairies, dragons, vampires, mermaids, werewolves, genies, etc.—and that leaves a whole lot of territory to dive into for the world of sewing and quilting. Why? Because fantasy is a big deal these days, and it isn’t hard to come up with fabric to fit the category!


I figure though that one detail that I should consider is pacing and speed. It would be crazy-awesome to make a crazy-awesome quilt and give it away, but I need to consider other factors. For instance, in order to have these books available for sale next year, there’s more editing I need to go through for each and forms to finish/start filling out, not to mention other why-am-I-an-adult tasks I need to address for life in general. To put that detail plainly, I just might not have the time (or the skill at this point) to make that crazy-awesome quilt by a January release date, which I think is when the first book is scheduled to come out.

Giveaways Galore

So what are some things I would have time for before that first book’s release? Well, there are the obvious options, like totes and wall hangings that would allow for simple makes (I hope!). I could also make a set of throw pillows, scarves, place mats, table runners, oven mitts, purses, bookmarks… Thank you, Google and sites I found via Google, for the ideas!

Of all of these possibilities, for whatever reason, throw pillows and totes seem like the most intriguing options. So, I’m thinking that these could be my primary targets for the first two book releases. For the third, most delayed option, I’m thinking either a quilt or a wall hanging might suffice. If that’s the case, here’s my schedule:

January—Within the Essence (The Division: Book One)—Throw Pillows

February—Through the Ashes (The Division: Book Two)—Tote

March—Beyond the Hope (The Division: Book Three)—Quilt/Wall Hanging

It’s worth noting that I haven’t tried to make a pillow since childhood, and I’ve never done a tote before. With those things in mind, there might be some complications and project switching since I have a limited time frame to work with. If I can’t make one work, something might need to be changed!

Theme is Key

The most connected detail though is to make sure there’s that fantasy link. Otherwise, my theme is gone, and I might as well be sending out paper plate bunnies or something, no matter how impressive the final products are. For that quality, I’m thinking I’ll select three of the mythical creatures that are connected to this trilogy—one for each project. Personally, I’d love to make a quilt out of this material (I love fairies!), and I think throw pillows out of material that’s something like this could be awesome. Beyond the fairy and dragon, I could go with a mermaid concept for the tote, using scaled fabric and charms. The potential problem though would be that, if these were successful, at least two of out three of them I might want to keep!

Honestly, I’ve been looking for ways to blend in these hobbies so that I can have some crossover details, and this feels like a great opportunity! I can improve my sewing and expand my experience in the field while promoting my number-one creative endeavor of writing. How isn’t that a win-win?

I’d be interested in any tips for projects I could do for one of these book releases, if you have a different idea than what I posted! Feedback, guys!