

Most bobbin thread issues get solved by rethreading the upper thread with the presser foot up, confirming the bobbin type and orientation are correct, and clearing lint from the bobbin and hook area. That sequence resolves the majority of pickup failures, bird’s nests, and loose stitching in under 20 minutes, no tools beyond a lint brush required.
Here’s what to try in the first five minutes, in order:
- Rethread the upper thread completely with the presser foot raised. This matters more than most sewists realize, since threading with the foot down leaves the tension discs closed and the thread never seats properly.
- Pull the bobbin, check its orientation, and reinsert it according to your machine’s manual. A bobbin that unwinds the wrong direction will cause pickup problems even if it looks correctly seated.
- Turn the handwheel toward you by hand while holding the upper thread tail, and watch for the bobbin thread to loop up through the needle plate.
Power the machine off before you touch the bobbin area or clear any jam. Do these three checks first, and if stitches start forming normally on a scrap swatch, you’re done. If the machine still skips pickup after all three, you’re likely looking at a timing or hook problem that needs a technician, not another round of rethreading.
Key Takeaways
Most bobbin thread issues resolve with a rethreaded upper thread, a correctly oriented bobbin, a clean hook area, and a fresh needle, in that order.
| Point | Details |
|---|---|
| Rethread first | Rethread the upper thread with the presser foot raised before touching the bobbin. |
| Check bobbin class and orientation | Confirm the bobbin matches your machine’s exact class and drops in the correct direction. |
| Clean every 8 to 10 hours | Brush lint from the hook race and bobbin case regularly rather than using compressed air. |
| Replace the needle often | Swap needles at the start of new projects and immediately after heavy fabric or pins. |
| Know when to call a pro | Persistent misses, grinding, or needle strikes after a full diagnostic mean it’s a timing issue. |
| Buy the correct bobbin class | Sewing Machines Plus carries manufacturer-compatible bobbins by class to eliminate fit-related pickup failures. |
Table of Contents
- Bobbin Thread Issues: A 5 to 10 Minute Diagnostic Checklist
- Common Causes Behind Bobbin Thread Problems
- How to Fix Each Bobbin Thread Cause
- How Bobbin Pickup Works and How to Check Timing
- Preventative Maintenance That Stops Bobbin Problems Before They Start
- When to Call a Professional for Bobbin Thread Problems
- Where to Find the Right Bobbins and Needles for Your Machine
- Sources
- FAQ
Bobbin Thread Issues: A 5 to 10 Minute Diagnostic Checklist
Run through these steps in order. Each one rules something out, so don’t skip ahead even if you’re confident you know the cause.
- Power off the machine and raise the presser foot. This protects you from an accidental start and opens the tension discs so rethreading actually works.
- Rethread the upper thread from spool to needle, making sure it passes through every guide and seats fully in the tension discs. Budget 2 to 3 minutes for this.
- Remove the bobbin and inspect it. Confirm it’s the correct class for your machine, seated in the right orientation, and has a tail of at least 4 to 6 inches. A bobbin that’s the wrong height by even 2mm can throw off timing and pickup, even when it physically drops into the case.
- Clean visible lint from the bobbin case and hook race with a small brush. Give this 3 to 5 minutes, longer if you haven’t cleaned in a while.
- Replace the needle if you have any doubt about its condition. A needle that looks fine to the naked eye can be bent or dull enough to cause missed catches.
- Try the manual pickup test. Hold the upper thread tail loosely, turn the handwheel one full revolution toward you, and gently tug. The bobbin thread should rise as a loop through the needle plate.
- Sew 10 stitches on a scrap of fabric and flip it over. Both sides should show even, balanced stitches with no loops or nesting underneath.
Pro Tip: Hold both thread tails toward the back of the machine (or lay them under a small scrap “leader” fabric) for the first few stitches of any seam. This single habit eliminates most start-of-seam birdnesting before it has a chance to form.
If step 7 shows clean, even stitching, you’re back in business. If the same symptom keeps showing up no matter how carefully you rethread, move to the causes below.
Common Causes Behind Bobbin Thread Problems
Matching what you’re seeing to the likely cause saves you from re-cleaning a machine that actually has a threading error, or rethreading a machine that needs a new needle.
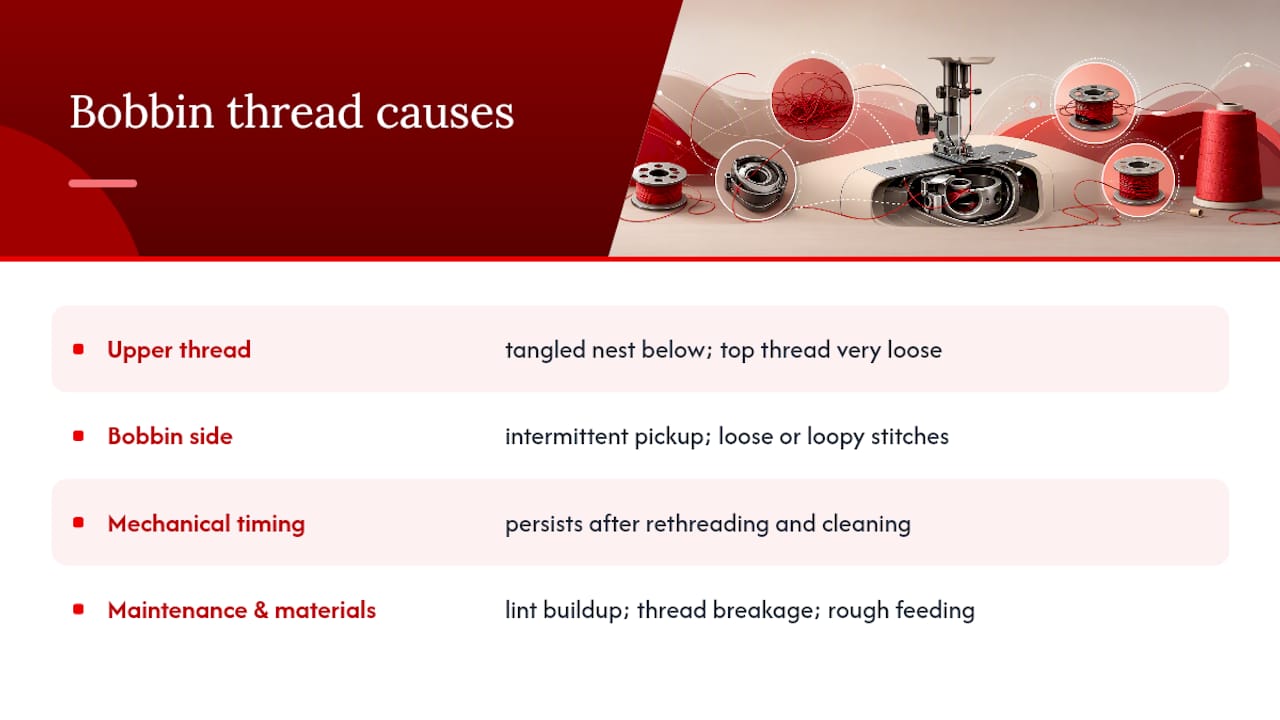
Upper-thread errors. If you threaded with the presser foot down, the tension discs never opened, and the upper thread never seated correctly. The telltale sign is a tangled nest underneath the fabric while the top thread pulls through freely with almost no resistance. A skipped guide or a thread that popped out of the take-up lever produces the same symptom.
Bobbin-side causes. Wrong bobbin class, wrong orientation, or a bobbin that isn’t seated in the tension spring all show up as intermittent pickup, loose or loopy stitches, or bobbin thread visible on the top of the fabric. Bobbins that fit physically but differ in height, diameter, or material by fractions of a millimeter are a sneaky cause here, since they slide right into the case and look correct. An overwound or underwound bobbin, or one with a tail shorter than a few inches, causes the same intermittent misses.
Mechanical or timing causes. If you’ve rethreaded, cleaned, and swapped the needle and the machine still won’t pick up the bobbin thread consistently, the problem is very likely internal: hook timing drift, a damaged hook, or a bent needle that’s deflecting on impact. This is the category that home fixes can’t reach.
Maintenance and materials. Lint buildup, cheap or mismatched thread, and burrs on the bobbin or bobbin case show up as thread breakage, rough feeding, or stitches that seem fine one minute and terrible the next. Fuzzy, low-quality thread sheds lint that gums up the tension mechanism over time, which makes tension problems look random when they’re actually cumulative.
How to Fix Each Bobbin Thread Cause
Once you’ve matched your symptom to a likely cause, here’s how to actually repair it.
- Fix upper-thread errors by rethreading completely with the presser foot up, checking that the thread has dropped fully into the tension discs (you should feel slight resistance when you tug the thread with the foot down), and confirming the spool is feeding in the correct direction for your machine.
- Reseat a front-load bobbin case by removing it fully, checking for lint or burrs inside, and reinserting so the case clicks into the shuttle housing with the thread tail pulling in the correct direction.
- Reseat a drop-in bobbin by dropping it in so the thread unwinds counterclockwise (forming a “P” shape as you look down into the case) and drawing the tail through the tension slot until you feel it click under the leaf spring.
- Test the tension seat by pulling the bobbin thread tail gently. It should release with slight, even resistance rather than falling free or refusing to budge.
- Re-wind an uneven bobbin. If thread bunches unevenly on one side, unwind it and rewind slowly at a moderate speed, guiding the thread by hand so it stacks evenly across the bobbin.
- Adjust bobbin tension in small increments only. A quarter-turn of the tension screw on the bobbin case is usually enough to notice a difference; more than that risks overcorrecting.
- Test tension changes with contrasting thread colors on top and bobbin, then sew a sample seam. Bobbin thread visible on the top of the fabric means the top tension is too tight or the bobbin tension is too loose; top thread visible underneath means the reverse.
- Clean the hook race with a brush, not compressed air. Blowing lint can push it deeper into the mechanism instead of removing it, a mistake even experienced sewists make.
- Inspect for burrs or scratches on the bobbin and case under good light, running a fingernail lightly along the edges. Replace anything that catches or feels rough.
- Replace the needle and retest with a fresh scrap of fabric, checking both sides of the seam for even stitching.
Pro Tip: If you’ve completed every step here and pickup is still inconsistent, stop troubleshooting. Repeating the same fixes on a mechanical problem wastes time and can mask a hook or timing issue that gets worse the longer it runs.
Always power the machine off before reaching into the bobbin area, and never force a jammed mechanism. If the handwheel resists turning or the fabric won’t pull free, cut the thread rather than yanking, and leave the needle in the down position until you’ve cleared the area.
How Bobbin Pickup Works and How to Check Timing
A lockstitch machine works because two threads meet at a precise, repeatable moment. The needle carries the upper thread down through the fabric and starts to rise, forming a small loop in the thread as it does. The rotating hook has to catch that loop at exactly the right instant, pull it around the bobbin case, and release it so the take-up lever can snug both threads into a lock. Miss that timing by even a fraction of a second, and the hook either misses the loop entirely or catches it wrong, producing skipped stitches or a nest of thread underneath.
You can get a rough read on timing yourself. Remove the needle plate, turn the handwheel toward you, and watch the needle descend to its lowest point. As it starts back up, the hook tip should pass the needle’s scarf about 1.5 to 2mm after the needle begins rising. If the hook arrives noticeably later, or you see the needle deflect or wobble as it enters the fabric, that’s a sign of timing drift or a bent needle rather than a threading problem.
| What you observe | Likely meaning |
|---|---|
| Hook passes needle scarf close to 1.5 to 2mm after needle rise begins | Timing is within normal range |
| Hook arrives noticeably late or not at all | Timing has likely drifted and needs a technician |
| Needle visibly deflects or wobbles on heavy fabric | Needle deflection, often fixed with a heavier needle |
| Grinding or metal-on-metal sound during this test | Stop immediately; likely hook or gear damage |
Needle deflection on thick seams is an underrated cause of intermittent pickup failures. Switching to a heavier needle or adding a walking foot for bulky fabric often solves it without touching timing at all.
If you see consistent lateness, grinding, or the needle striking the hook, that’s your cue to stop testing and call a professional. Sewing machine technicians describe the machine as a synchronized system: once one part of that synchronization slips, home adjustments tend to make things worse, not better.
Preventative Maintenance That Stops Bobbin Problems Before They Start
A little routine care prevents most of the pickup failures covered above from ever happening.
- Clean the hook race and bobbin case every 8 to 10 hours of active sewing, using a small brush rather than canned air.
- Replace the needle every 8 to 10 hours of sewing, or immediately after hitting pins, heavy seams, or thick layers.
- Match thread weight between the top and bobbin whenever possible, and choose higher-quality, low-lint thread. Cheap thread sheds fibers that gum up the tension mechanism over time.
- Wind bobbins at a moderate, consistent speed so thread stacks evenly. A correctly wound bobbin has smooth, even layers with no visible gaps or humps.
- Use the bobbin class specified in your machine’s manual rather than whatever happens to fit in the case.
| Maintenance task | How often | Why it matters |
|---|---|---|
| Clean hook race and bobbin case | Every 8 to 10 hours of sewing | Prevents lint-related tension and pickup issues |
| Replace needle | Every 8 to 10 hours or after heavy fabric | Bent or dull needles cause missed catches |
| Check bobbin winding evenness | Each new bobbin | Uneven winding causes inconsistent tension |
| Match top and bobbin thread weight | Every project | Reduces tension surprises and lint buildup |
Sewing Machines Plus carries manufacturer-compatible bobbins in the classes most home machines use, including Class 66 metal bobbins and Class 15 platinum metal bobbins, so you can replace a worn or wrong-class bobbin with one built to your machine’s actual specifications rather than guessing at a generic fit.
When to Call a Professional for Bobbin Thread Problems
Some symptoms mean it’s time to stop troubleshooting and book a service appointment. Watch for these triggers:
- Missed pickup persists after a full diagnostic pass (rethreading, bobbin check, cleaning, and needle replacement).
- The needle audibly strikes the hook, or you hear grinding or metal-on-metal sounds during the handwheel timing test.
- You can see visible damage or scoring on the hook itself.
- Needles keep breaking even after switching to a fresh one matched to your fabric.
- Your handwheel timing check shows the hook consistently arriving well outside the 1.5 to 2mm window after needle rise.
A technician will typically check and reset timing, replace a damaged hook, or swap out a worn bobbin case. Repair costs vary widely by region and machine type, so treat any number as a rough estimate and confirm pricing locally before booking. Diagnostic visits often run 30 to 60 minutes, while a timing adjustment or hook replacement can take anywhere from same-day service to a few days depending on parts availability and shop backlog.
Before you call, document what’s happening: note your machine’s make, model, and serial number, list every troubleshooting step you’ve already tried, and if possible, record a short video of the stitch problem. That saves the technician time and often shaves money off the diagnostic portion of the visit.
A Technician’s Take on Recurring Bobbin Problems
Most bobbin thread complaints trace back to the same handful of causes, over and over: a bobbin that’s the wrong class, a needle nobody thought to replace, or lint that’s been building for months. That pattern holds across skill levels. Experienced sewists get complacent about needle changes; beginners often don’t know their machine takes a specific bobbin class at all.
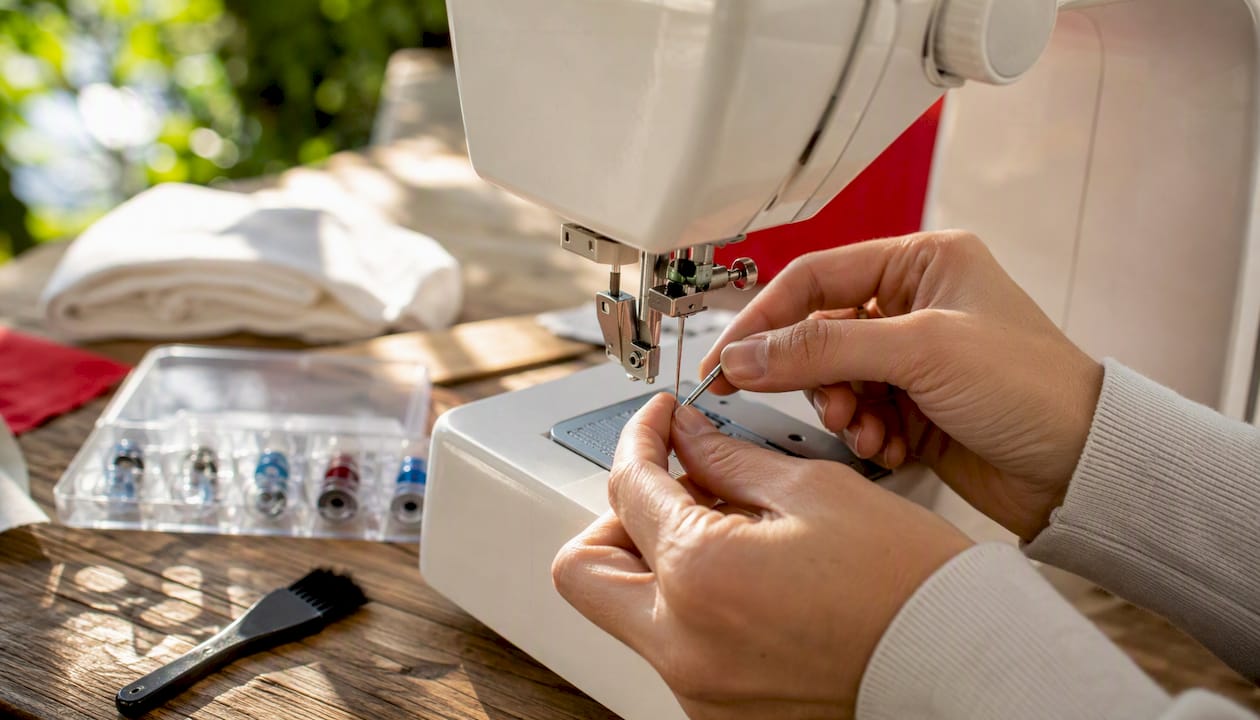
Two habits make a real difference over time. Replace the needle at the start of every new project, not just when something breaks; a dull needle causes more mystery tension problems than any other single part. And keep a small lint brush sitting right next to the machine, not in a drawer three rooms away, because the brush you actually reach for is the one that gets used every project instead of every few months.
The mechanical side matters too, and it’s where good parts save you real frustration. A bobbin case with a scratch or burr will fight you no matter how carefully you thread the machine, and a bobbin that’s a hair off in height will cause the same intermittent misses as a timing problem, just intermittently instead of constantly. Knowing your machine’s exact bobbin class, and buying to that spec instead of “close enough,” eliminates a surprising share of the calls that come in labeled as mysterious pickup failures.
Where to Find the Right Bobbins and Needles for Your Machine
Guesswork with bobbins and needles is what causes most repeat pickup problems, and it’s the one part of this whole process you can solve permanently with the right parts. Sewing Machines Plus stocks manufacturer-compatible bobbins by class, including Class 15 metal bobbins and Class 66 plastic bobbins, plus machine-specific options like Futura bobbins for models that need an exact match rather than a generic fit. Pair a correct-class bobbin with quality, low-lint thread, and you cut out two of the most common causes covered in this article before they ever start.
If your machine turns out to need professional attention, or you’re shopping for a new setup entirely, browse the full sewing machine and accessory selection for parts, machines, and consultation support. Every order over $49 ships free, and the price match guarantee means you’re not overpaying for the correct bobbin class just because a generic option looked cheaper on the shelf. If tension troubleshooting on fabric itself is part of your puzzle, this guide to adjusting fabric tension from our fabric partners is worth a look too. Start by checking your machine’s manual for its exact bobbin class, then order the matching bobbins and a fresh needle pack to get back to sewing with confidence.
Sources
For deeper detail on specific parts of this process, these references cover the mechanics in more depth:
- Sewing machine not catching bobbin thread (Sewing Machine Advice)
- Sewing machine not picking up bobbin thread (Sewing With Ease)
- Cleaning your sewing machine (Quilting Gail)
- Upper thread not catching bobbin? (SewingTrip)
- How to timing your sewing machine (Instructables)
Check your own machine’s manual first for the exact bobbin class and orientation it calls for. That single detail resolves more pickup complaints than any generic troubleshooting list, this one included.
FAQ
Why isn’t my sewing machine catching the bobbin thread?
The most common cause is an upper-thread error, usually threading with the presser foot down or a thread that popped out of a guide. If rethreading doesn’t fix it, check the bobbin class and orientation next, and suspect a timing issue if the problem persists after a full diagnostic pass.
Why is my bobbin thread bunching up underneath the fabric?
Bunching underneath almost always points to the upper thread tension or a threading error, not the bobbin itself. Rethreading the entire upper path with the presser foot raised resolves this in most cases.
Why is my bobbin threading loosely?
Loose bobbin stitches usually mean the bobbin tension is too weak, the bobbin isn’t seated under the tension spring, or you’re using the wrong bobbin class for your machine. A quarter-turn adjustment on the bobbin case tension screw is often enough to correct it.
Why does bobbin thread show up on top of my fabric?
Bobbin thread visible on top typically means the top tension is too tight relative to the bobbin tension. Test with contrasting thread colors on a scrap seam to confirm which tension needs adjusting before making changes.
How do I know if my bobbin problem is a timing issue and not something I can fix?
If you’ve rethreaded, cleaned the hook area, and replaced the needle and pickup is still inconsistent, or you hear grinding or see the needle strike the hook during a handwheel check, the issue is very likely mechanical and needs a professional technician.
