

Birdnesting happens when thread bunches up underneath your fabric in a tangled mass, usually right at the start of a seam. The fastest fix: stop sewing, raise your presser foot, and rethread the upper thread completely from scratch. Then check that your bobbin is seated correctly. Those two steps alone clear the problem in most cases, according to troubleshooting guidance from Gathering Thread.
Before you dig deeper, check these three causes first:
- Upper thread not seated in the tension discs (almost always because you threaded with the presser foot down)
- Bobbin inserted in the wrong direction or not clicked into place
- Needle bent, dull, or the wrong size for your fabric
Pro Tip: Always raise your presser foot before threading. When the foot is up, the tension discs open and let the thread seat properly. Thread with the foot down and the discs stay closed, so the thread skips right over them — and birdnesting follows.
Key Takeaways
Sewing machine birdnesting is almost always caused by incorrect upper threading, a misaligned bobbin, or a dull needle, and rethreading with the presser foot raised resolves the majority of cases.
| Point | Details |
|---|---|
| Rethread first, always | Raise the presser foot before rethreading so the tension discs open and seat the thread correctly. |
| Read the loops | Loops on the bottom mean the top thread is too loose; loops on top point to a bobbin tension or insertion problem. |
| Replace the needle regularly | Swap the needle after every large project or every 8–10 hours of sewing to prevent tension-related tangles. |
| Clean the bobbin area monthly | Lint and dried oil in the bobbin area cause jams; brush out debris monthly and oil per your manual. |
| Call a technician when basics fail | Persistent birdnesting after rethreading, cleaning, and a new needle signals a timing or mechanical issue needing pro tools. |
| Sewingmachinesplus for supplies and service | Replacement bobbins, needles, and expert consultations are available at Sewingmachinesplus, with free shipping on orders over $49. |
Table of Contents
- What causes sewing machine birdnesting? Six checks to run first
- Step-by-step fixes for each common cause
- How do you prevent birdnesting from coming back?
- When should you stop DIYing and call a technician?
- A sewer’s honest take on birdnesting
- Parts, supplies, and expert help from Sewingmachinesplus
- Sources
- FAQ
What causes sewing machine birdnesting? Six checks to run first
Run these in order. After each change, sew 6–10 stitches on a scrap of fabric before moving to the next check. Change one thing at a time so you know exactly what fixed it.
-
Rethread the upper thread with the presser foot raised. Lift the presser foot lever, remove the thread completely, and rethread from the spool pin through every guide, down and around the tension discs, up through the take-up lever, and down to the needle. BERNINA’s support page confirms that upper thread not seated in the tension discs or take-up lever is one of the most common causes of thread bunching under fabric.
-
Confirm the take-up lever is at its highest position before you start sewing. If the lever is mid-stroke when you begin, the thread loop won’t form correctly and you’ll get tangles immediately. Turn the handwheel toward you until the lever reaches the top.
-
Remove the bobbin case and inspect the bobbin. Take out the bobbin, check which direction the thread unwinds (follow your machine’s diagram), and reseat it so the thread pulls through the tension slit in the bobbin case. Give it a gentle tug — you should feel slight resistance.
-
Check the needle. Hold it up to the light and look for a flat side (that goes to the back on most machines), any visible bend, or a blunt tip. A needle that’s been through 8–10 hours of sewing is often dull enough to cause skipped stitches and tangles even when everything else is correct.
-
Look at where the loops appear. Superior Threads explains that loops on the underside of the fabric point to the top thread being too loose or not seated properly, while loops on the top surface suggest a bobbin tension or insertion problem. That location tells you which side to fix first.
-
Test your fabric handling. Are you pulling the fabric as you sew? Let the feed dogs do the work. Also confirm the presser foot is fully lowered before you start each seam.
Step-by-step fixes for each common cause
Threading problems
Remove all thread from the machine. With the presser foot raised, rethread from the spool pin, making sure the spool sits on the pin with the thread unwinding in the direction your manual shows (usually counterclockwise from the front). Guide the thread through every numbered guide, down through the tension discs, up and through the take-up lever eye, then down through the lower guides and the needle eye (front to back on most machines). Leave a 3–4 inch tail hanging free.
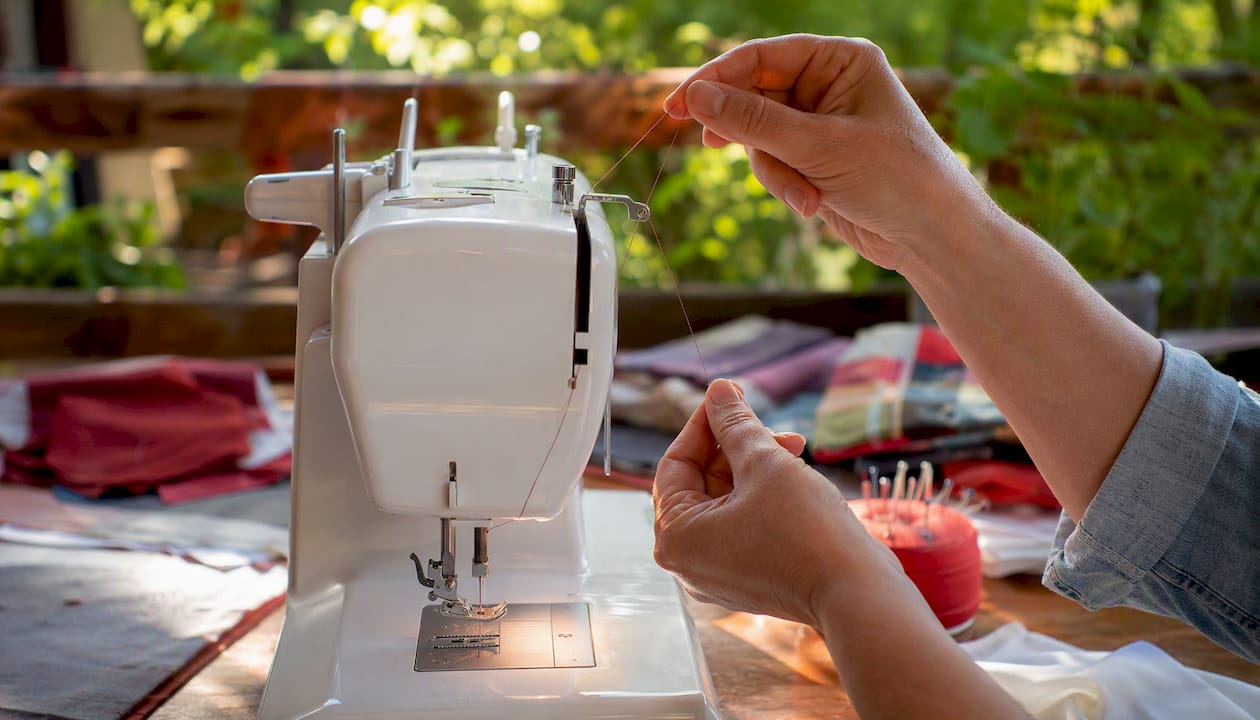
The single most common threading mistake is skipping the take-up lever. If the thread isn’t looped through that lever, the machine can’t pull the stitch tight, and you’ll get a tangle on the first few stitches every time.
Bobbin and bobbin case
Remove the needle plate cover and lift out the bobbin. Check your machine’s diagram for the correct winding direction — it matters. Drop the bobbin back in, pull the thread through the small slit or slot in the bobbin case, and tug gently to confirm tension. You should feel a light drag, not free-spinning and not locked tight.
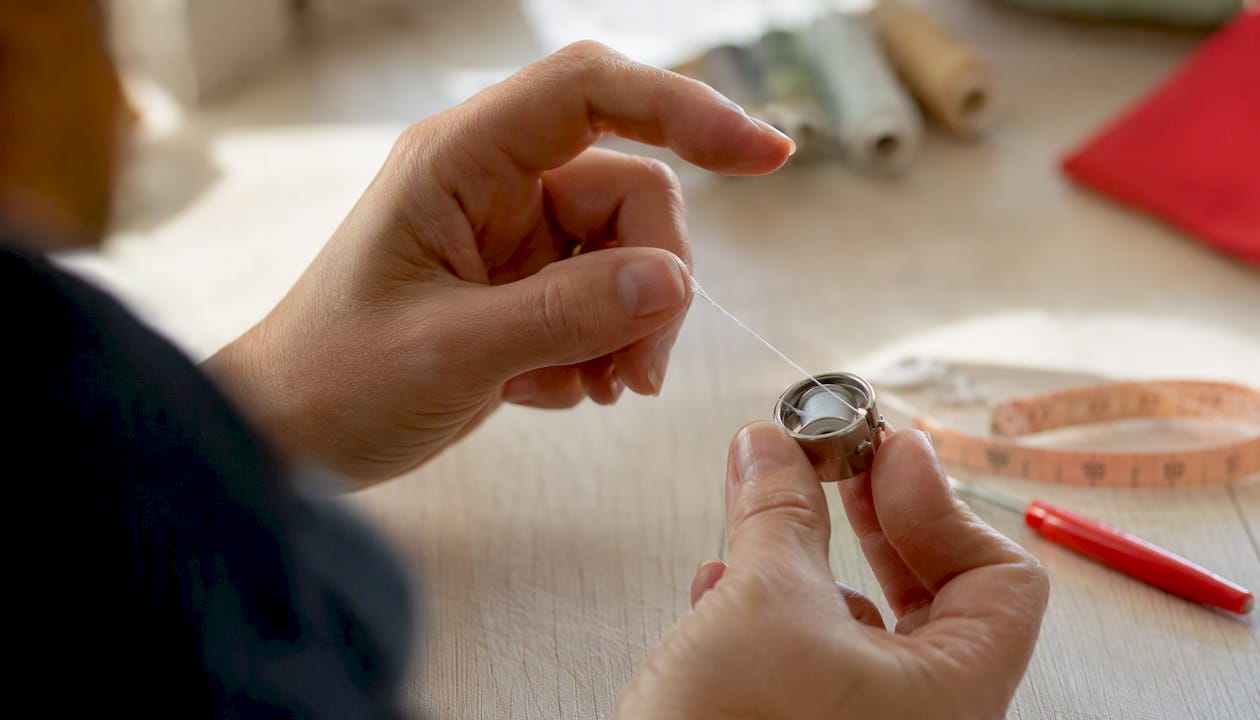
If you see loops forming on top of the fabric, the bobbin tension may be too loose. The bobbin case usually has a small flathead screw on the tension spring. A quarter-turn clockwise tightens it slightly. Turn no more than a quarter at a time, test on scrap, and note your starting position so you can return to it if needed. Be careful not to over-tighten — a screw that’s forced can crack the spring or strip the thread.
Tension adjustments
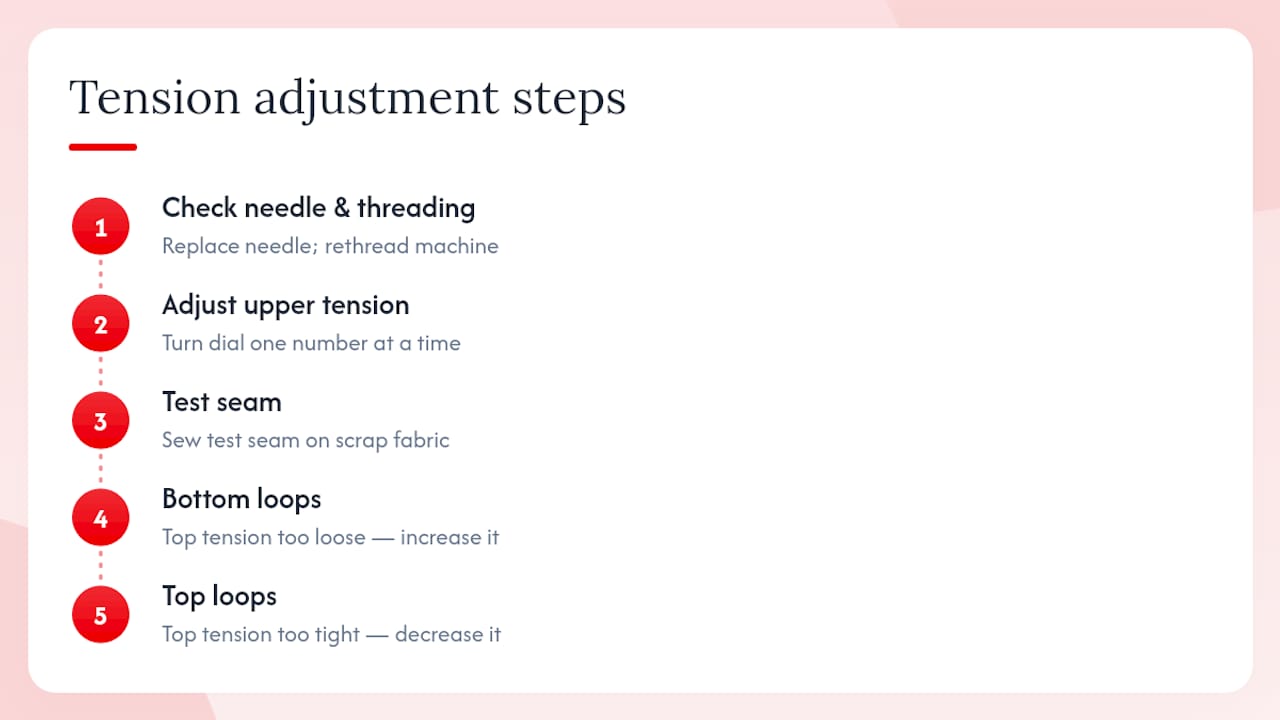
Sew Finesse’s repair guide notes that many tension-related stitch problems trace back to a dull needle or poor threading, so fix those first before touching the tension dial. If rethreading and a new needle don’t resolve it, adjust the upper tension in small increments — one number at a time on the dial — and sew a test seam after each change. Loops on the bottom mean the top tension is too loose; increase it. Loops on the top mean the top tension is too tight; decrease it.
Needle replacement
A bent or dull needle is a surprisingly frequent culprit. Replace the needle, seat it fully into the clamp (flat side to the back on most home machines), and tighten the screw firmly. A practical rule: replace your needle regularly after extended use, such as after approximately every large project, whichever comes first. Use the correct needle type for your fabric — a ballpoint for knits, a sharp for wovens, a denim needle for heavy canvas or denim.
Lint cleaning and oiling
NMSU Extension’s sewing machine checklist identifies lint, dust, and dried oil in the bobbin area as common causes of thread jams and heavy machine feel. Power off and unplug the machine before cleaning. Remove the needle plate and use a small lint brush or the brush that came with your machine to sweep out the bobbin area and feed dog slots. Do not use compressed air inside the machine — it pushes lint deeper into the mechanism rather than removing it.
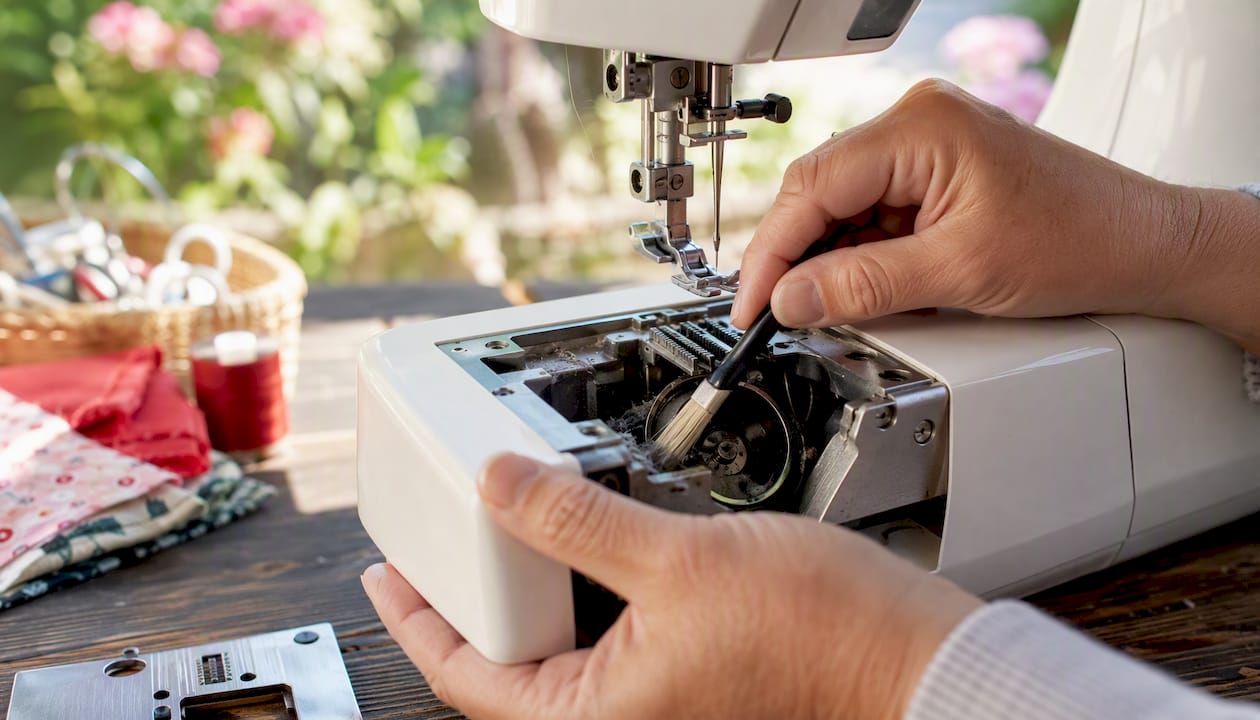
Oil only the points your manual specifies, using sewing machine oil (not WD-40 or general lubricants). After oiling, run the machine on a scrap of fabric for a minute to work the oil in and prevent it from transferring to your project.
Fabric handling and stitch settings
Pulling or pushing fabric while sewing is one of the most overlooked causes of thread bunching. Let the feed dogs move the fabric at their own pace. For very thin fabrics like chiffon or organza, try lengthening the stitch slightly and holding the thread tails for the first few stitches. BERNINA’s manufacturer guidance also suggests that on delicate fabrics, disabling automatic securing stitches (if your machine has that option) can reduce bunching at the start of a seam.
For thick fabrics like denim or multiple quilt layers, use a heavier needle, slow your sewing speed, and consider a walking foot to feed layers evenly. Mismatched stitch width on a zigzag setting can also cause the needle to strike the presser foot or throat plate, so confirm your width is appropriate for the foot you’re using.
How do you prevent birdnesting from coming back?
A short maintenance routine eliminates most repeat problems before they start.
Maintenance schedule:
- Before each session: Check that the needle is straight and sharp, confirm thread tails are 3–4 inches long, and thread with the presser foot up.
- Monthly: Remove the needle plate and brush out lint from the bobbin area and feed dog slots. Check the bobbin case for lint in the tension slit.
- Annually (or when the machine sounds heavy): Schedule a professional cleaning and inspection. Machines that sit unused for months often develop dried oil and gummed lubrication that no amount of home cleaning fully resolves.
Supplies to keep on hand:
- Sewing machine oil (the type your manual specifies)
- Small lint brush and a soft cloth
- Assorted replacement needles (ballpoint, sharp, denim)
- Replacement bobbins in the correct class for your machine
- Small flathead screwdriver (for the bobbin case tension screw)
- Quality thread from a reputable brand
On thread quality: low-quality thread sheds lint at a much higher rate than quality thread, clogging the bobbin area faster and creating more tangles. Cheap thread also breaks more easily under tension, which can mimic birdnesting symptoms.
Pro Tip: Whenever you change thread, needle, or fabric type, rethread the machine completely and sew a test seam on a scrap before starting your project. This one habit catches most setup errors before they reach your good fabric.
When should you stop DIYing and call a technician?
Some problems sit beyond what rethreading and cleaning can fix. Call a technician when you see any of these:
- Birdnesting persists after you’ve rethreaded, replaced the needle, cleaned the bobbin area, and adjusted tension
- The machine sounds strained or labored, especially at normal sewing speeds
- Skipped stitches happen consistently across different needle sizes and thread types
- You can see visible damage to the hook, needle bar, or needle plate
A technician will inspect hook timing (the hook must catch the needle’s thread loop at a precise moment), bobbin hook alignment, belt condition, worn gears, and gummed lubrication. These checks require specialized tools and hands-on adjustment that can’t be done safely at home. NMSU Extension’s maintenance guide lists hook timing, worn hooks, and stretched belts as the most common technician-level repairs.
Before your service appointment:
- Write down every fix you already tried (thread brand, needle size, fabric type)
- Record a short video of the problem at normal sewing speed — technicians find this especially helpful for diagnosing feed behavior and timing issues before they even open the machine
- Remove bulky accessories and extra presser feet from the case
Simple servicing (cleaning, oiling, minor adjustments) typically costs less than a repair involving replacement parts or timing realignment. Giving the technician a clear picture of what you’ve already tried saves bench time and keeps the bill lower.
Pro Tip: If your machine has been sitting unused for a year or more, book a professional cleaning proactively rather than waiting for a problem. Dried oil is far easier and cheaper to address before it causes mechanical wear.
A sewer’s honest take on birdnesting
Birdnesting has a reputation for being mysterious, but it almost always comes down to one of three things: threading with the presser foot down, a bobbin that isn’t quite seated right, or a needle that’s been in the machine too long. The checklist approach works because it forces you to isolate variables instead of guessing. Most sewers who work through the six checks in order find the culprit by step two or three.
The habit worth adopting is simple: rethread completely and test on scrap every time you change thread, needle, or fabric. It takes 90 seconds and eliminates the majority of mid-project tangles. Treat it as part of your setup routine rather than a troubleshooting step, and you’ll spend far less time unpicking thread nests.
Parts, supplies, and expert help from Sewingmachinesplus
When you’ve worked through the troubleshooting steps and need fresh supplies, Sewingmachinesplus carries everything on the maintenance checklist: replacement needles, metal bobbins in the correct class for your machine, cleaning accessories, and a full range of presser feet. Orders over $49 ship free, and a price match guarantee means you’re not overpaying for the basics.
If your machine needs professional attention, the team at Sewingmachinesplus can point you toward service options and help you find the right replacement parts before your appointment. Personalized consultations are available if you’re unsure whether a repair is worth the cost versus upgrading to a more reliable machine. Financing options are also available for larger purchases. Browse the full selection or reach out directly to get a recommendation matched to your sewing style and budget.
Sources
- Checklist of Common Sewing Machine Problems
- How to prevent thread bunching - Support - BERNINA
- Why your sewing machine is birdnesting
- Sewing Machine Bird Nesting? 4 Easy Fix
- Superiorthreads
FAQ
Why does my sewing machine keep birdnesting?
The most common reason is that the upper thread wasn’t seated in the tension discs during threading, usually because the presser foot was down. Rethreading with the presser foot raised, combined with checking the bobbin orientation, resolves most repeat cases.
How do you fix birdnesting quickly?
Stop sewing, raise the presser foot, and rethread the upper thread completely from the spool pin through every guide and the take-up lever. Then remove and reseat the bobbin, confirm it threads through the tension slit, and test on scrap fabric before returning to your project.
How do you get rid of a thread nest under the fabric?
Clip the threads close to the fabric on both sides, gently pull the nest free, and trim any remaining loops. Then address the root cause before sewing on, or the nest will return within the first few stitches.
Does thread quality affect birdnesting?
Yes. Low-quality thread sheds lint at a higher rate, clogs the bobbin area faster, and breaks more easily under tension, all of which contribute to thread bunching. Switching to a quality thread brand and cleaning the bobbin area regularly reduces how often the problem appears.
Recommended
- Sewing, Quilting & Embroidery | 50+ year Authorized Dealer | SMP
- Baby Lock Sewing Machine Embellisher EMB7
- 10 Pack of Singer Class 15 METAL Platinum Collection Bobbins 2518 Fits
- Juki DDL-8700 High-speed Single Needle Straight Lockstitch Industrial Sewing Machine with Table and Servo Motor (Table Comes Assembled)
