

A short, regular routine of clearing lint, using the right sewing-machine oil sparingly, swapping out needles, and scheduling occasional professional tune-ups keeps most home machines running trouble-free for years. Experts confirm that these simple habits prevent the majority of common failures. Here is what you need to do, in the right order, with the right supplies.
Your core maintenance checklist:
- Unplug the machine before touching any internal parts
- Remove thread, needle, and presser foot before cleaning
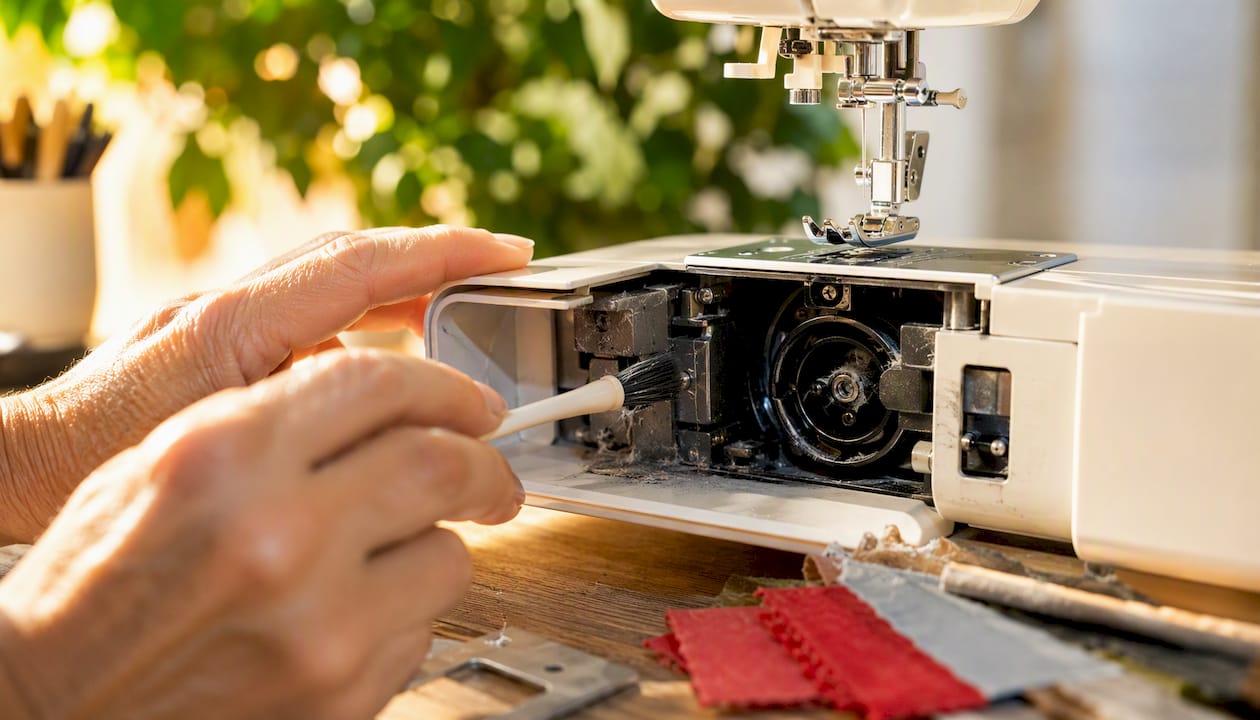
- Brush out lint from the bobbin area and feed dogs after every session
- Oil only where your owner’s manual specifies, using sewing-machine oil only
- Replace the needle every 8–10 hours of sewing or at the start of each new project
- Test on scrap fabric after oiling, then cover and store the machine properly
Pro Tip: Never use canned compressed air to blow out lint. It pushes debris deeper into gears and electronics. Use a small brush or mini-vacuum instead.
Key Takeaways
Consistent sewing machine maintenance — cleaning lint after every session, using the correct oil sparingly, replacing needles regularly, and scheduling professional service every few years — prevents most common failures and extends machine life.
| Point | Details |
|---|---|
| Clean after every session | Brush lint from the bobbin area and feed dogs each time you sew to prevent buildup. |
| Use only sewing-machine oil | Light, resin-free sewing-machine oil is the only safe lubricant; household oils gum up internal parts. |
| Replace needles regularly | Change the needle every 8–10 hours of sewing or at the start of each new project. |
| Schedule professional tune-ups | Hobbyists need a pro service every 1–2 years; frequent sewers should plan annually. |
| Sewingmachinesplus for supplies | Stocks approved oils, Schmetz needles, Singer bobbins, and maintenance kits with free shipping over $49. |
Table of Contents
- What tools and supplies do you need before you start?
- How often should you clean, oil, and replace parts?
- How to clean and oil your sewing machine step by step
- Where exactly do you oil, and how much is enough?
- How do needles, bobbins, and thread affect your machine’s health?
- What are the most common sewing machine problems and quick fixes?
- When should you call a professional for sewing machine repair?
- Your printable maintenance checklist
- Why you should never use household oils or canned air
- What consistent maintenance actually teaches you about your machine
- Where to find the right supplies and service for your machine
- Sources
- FAQ
What tools and supplies do you need before you start?
Having the right kit on hand before you open the machine saves time and protects parts you cannot easily replace.
Safe cleaning tools:
- Small angled lint brush (usually included with the machine)
- Soft, lint-free cloths
- Mini-vacuum or vacuum with a brush attachment
- Small flathead and Phillips screwdrivers
- Tweezers for pulling out stubborn lint threads
- A flashlight or headlamp to see inside the bobbin cavity
Safe lubricants:
- Light, clear, resin-free, acid-free sewing-machine oil — the only type that belongs inside your machine
- Some machines ship with a small bottle of manufacturer-approved oil; use that first
Sewing-machine oil is a specialized product. Experts at iFixit are explicit: it must be light-viscosity, resin-free, and acid-free. Household alternatives become gummy over time and can seize internal parts. Keep a dedicated bottle near your machine so you are never tempted to grab something from the garage.
Safety first: Always unplug the machine and wait a moment before reaching inside. Oil can irritate skin and eyes, so wash your hands after handling it.
How often should you clean, oil, and replace parts?
The honest answer is: it depends on how much you sew. Here is a practical framework tied to real usage patterns.
After every sewing session:
- Remove the bobbin and brush lint from the bobbin area and feed dogs
- Wipe down the needle plate and throat plate with a soft cloth
Weekly (for regular sewers):
- Deep-brush the feed dogs and under the needle plate
- Check the needle for bends or dullness and replace if needed
Monthly:
- Inspect the bobbin case for burrs or rough spots
- Oil the machine if your manual calls for it and you have sewn several projects
Every 6–12 months:
- Replace the needle even if it looks fine
- Clean the entire exterior, check the power cord, and inspect the foot pedal
Annual or every 1–2 years: professional tune-up. Service cadence depends on use: hobbyists typically need a professional tune-up every 1–2 years, while frequent sewers should plan for annual service. If the machine has been sitting idle for several months, run through the full cleaning routine before your first project back.
Signs that override the schedule and call for immediate attention: grinding or squealing noises, skipped stitches, stiff handwheel, or thread nesting under the fabric.
How to clean and oil your sewing machine step by step
This procedure works for most home machines. Check your owner’s manual for model-specific differences, especially if you have a front-loading bobbin versus a drop-in (top-loading) bobbin. A clean-first, then-oil routine resolves most stitch-quality problems and prevents premature wear.
- Unplug the machine. Pull the power cord from the wall, not just the foot pedal.
- Remove the thread. Take the spool off the pin and pull thread out of the guides.
- Remove the needle and presser foot. Loosen the needle clamp screw and set the needle aside (or discard it if it has been in use for a full project).
- Remove the needle plate. Use a small screwdriver to lift or unscrew the plate. Set the screws somewhere they will not roll away.
- Take out the bobbin and bobbin case. For drop-in bobbins, lift the bobbin straight out. For front-loading machines, open the side door, release the latch, and slide out the bobbin case. Set both aside on a clean cloth.
- Brush out lint. Use your angled brush to sweep lint away from the feed dogs, the bobbin cavity, and the hook race area. Work from the inside outward. If you have a mini-vacuum, use it now to pull debris out rather than pushing it further in.
- Inspect for burrs and damage. Run a fingertip lightly around the hook race and bobbin case. Any rough spot or burr can shred thread. A light polish with a soft cloth often removes minor burrs; a damaged case needs replacement.
- Apply oil only where the manual indicates. One drop at each specified metal-on-metal contact point. Wipe away any excess with a soft cloth immediately.
- Reassemble in reverse order. Replace the bobbin case, bobbin, needle plate, presser foot, and a fresh needle.
- Thread the machine and test on scrap fabric. Run several inches of stitching. BERNINA’s guidance confirms this step removes excess oil and verifies there is no transfer to your project fabric.
Drop-in vs. front-loading bobbins: Drop-in bobbins give you direct access to the hook race from the top. Front-loading machines require removing a side or front cover, but the cleaning steps are the same once you have access.
Pro Tip: After reassembly, hold the machine’s handwheel and rotate it manually one full turn before plugging in. If it catches or feels stiff, something is not seated correctly. Fix it before applying power.
Where exactly do you oil, and how much is enough?
The most common mistake is applying oil in the wrong place or using too much. Not all machines need user-applied oil: some modern machines have factory-lubricated or oil-impregnated parts that should never be touched by the user. Adding oil to a sealed component attracts dust and can void your warranty. Your owner’s manual is the definitive authority here.
For machines that do require oiling, here are the typical points:
- Hook race (rotary or oscillating): One drop on the metal race where the hook rotates. This is the most common oiling point on machines that use a metal hook assembly.
- Needle bar: One drop at the top of the needle bar where it meets the needle bar bushing, if the manual lists it.
- Shaft points: Any other metal-on-metal contact points your manual diagram marks with an oil symbol.
Practical rules:
- One drop per point. That is it. More oil does not mean more protection.
- Wipe away any visible excess with a soft cloth before reassembling.
- Always run a few stitches on scrap fabric after oiling to absorb residual oil.
Pro Tip: If you hear a new, louder noise after the machine has sat unused for a while, clean out all lint first. Lint buildup mimics the sound of a dry bearing. Only oil after you have confirmed the area is clean.
How do needles, bobbins, and thread affect your machine’s health?
These three consumables cause more maintenance headaches than any mechanical failure. Getting them right is one of the most effective forms of sewing machine upkeep.
Needle rules:
- Replace the needle every 8–10 hours of sewing time, or at the start of each new project, whichever comes first
- Match needle type and size to your fabric: a universal needle for wovens, a ballpoint for knits, a sharp for fine fabrics
- Discard any needle that is bent, dull, or has a visible burr on the tip — a damaged needle can score the hook race and cause expensive damage
- Schmetz Universal needles in an assorted pack cover most home sewing projects and make it easy to keep fresh needles on hand
Bobbin care:
- Use the bobbin type your manual specifies — metal or plastic, and the exact class number (Class 15, Class 66, and so on). The wrong bobbin creates tension problems and can damage the bobbin case
- Clean the bobbin area at every session, not just monthly
- Inspect the bobbin case for rough spots or nicks each time you remove it; a damaged case is worth replacing rather than tolerating
- Singer Class 15 metal bobbins are a reliable choice for compatible machines and resist warping better than plastic alternatives
Thread quality: Avoid cheap, linty threads and waxed or glazed threads designed for hand sewing. They shed fiber into the tension discs and bobbin area faster than quality machine thread, shortening the interval between cleanings.
What are the most common sewing machine problems and quick fixes?
Most issues that feel alarming have a simple cause. Work through these checks before assuming something is broken.
| Symptom | Likely Cause | Quick Home Fix | Stop and Call a Pro If… |
|---|---|---|---|
| Skipped stitches | Dull or wrong needle; incorrect threading | Replace needle; rethread top and bobbin | Persists after new needle and rethreading |
| Thread nesting under fabric | Incorrect top threading; bobbin tension | Rethread from scratch; reseat bobbin | Bobbin case is damaged or timing is off |
| Uneven tension | Lint in tension discs; wrong thread weight | Clean tension discs; rethread; match thread to needle | Tension dial has no effect |
| Grinding or squealing | Lint in hook race; dry bearing | Clean thoroughly; oil if manual allows | Noise continues after cleaning and oiling |
| Stiff handwheel | Lint jam; lack of lubrication | Clean bobbin area; apply one drop of oil | Wheel will not turn at all |
| Thread breaking repeatedly | Burr on needle plate or hook; wrong needle | Inspect and polish or replace; change needle | Burr is deep or on the hook race itself |
Urgent warning signs that require you to power off immediately and call a technician: any burning smell, visible sparks, or smoke. Do not attempt to diagnose these at home.
When should you call a professional for sewing machine repair?
Home maintenance covers a lot of ground, but some problems are beyond what a brush and a drop of oil can fix. Knowing when to stop saves you from making a small problem worse.
Signs that require a technician:
- Burning smell from the motor or electronics
- Timing is off (needle hits the hook, stitches form incorrectly even after rethreading)
- Persistent grinding after a thorough cleaning and oiling
- Seized gears or a handwheel that will not turn
- Complex electronic faults on computerized machines (error codes that do not clear)
- Any internal repair that requires disassembling the machine body
What a professional service visit typically includes: full disassembly, deep cleaning of internal parts you cannot reach at home, lubrication at internal bearing points, timing checks and adjustment, replacement of worn feed dogs or tension components, and a full test run. For warranty-covered machines, using an authorized dealer protects your coverage.
Rough U.S. cost ranges: A routine tune-up generally runs $50–$100 depending on your region and machine type. More extensive repairs involving timing adjustment or part replacement can range from $100–$200 or more. Service frequency guidance suggests planning for professional service every 1–2 years for hobbyists, annually for frequent sewers.
Your printable maintenance checklist
Keep this list near your machine or photograph it for quick reference.
After every sewing session:
- Remove thread from machine and spool pin
- Brush lint from the bobbin area and feed dogs
- Wipe down the needle plate with a soft cloth
Weekly:
- Deep-brush under the needle plate and around the feed dogs
- Check the needle; replace if it has been in use for a full project or shows any dullness
Monthly:
- Remove and inspect the bobbin case for burrs
- Oil at manual-specified points if you have sewn several projects this month
- Inspect the power cord and foot pedal for wear
Annually (or every 1–2 years):
- Schedule a professional tune-up with an authorized dealer
- Replace the needle even if it appears fine
- Deep-clean the exterior and all accessible internal areas
Storage tips:
- Always cover the machine with its dust cover or a clean cloth when not in use
- Store in a room with stable humidity — avoid garages or basements prone to moisture swings
- Remove the needle before storing the machine for an extended period
- Keep the machine away from direct sunlight, which can fade and warp plastic components
Why you should never use household oils or canned air
This point comes up in every credible maintenance guide because the consequences are real and often expensive.
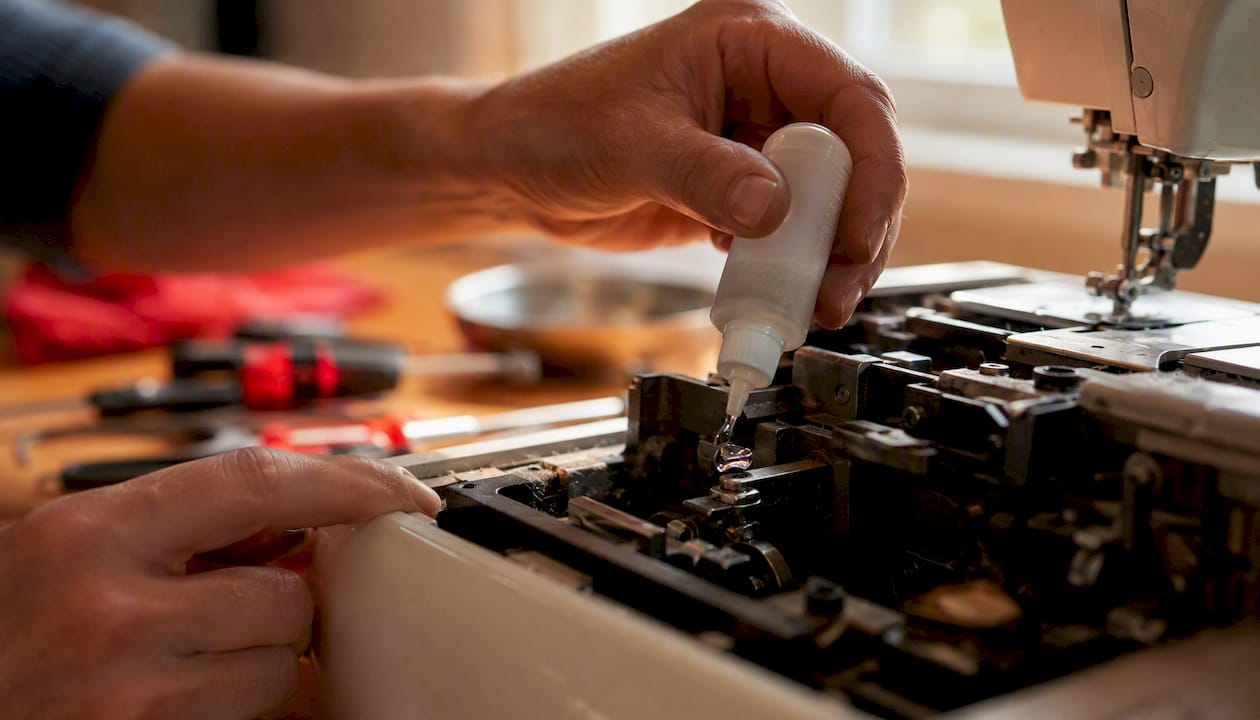
Household oils — WD-40, 3-in-1 oil, cooking oil, baby oil — behave very differently from sewing-machine oil inside a precision mechanism. BERNINA’s manufacturer guidance warns that cooking oils and household lubricants will gum up mechanisms over time, creating sticky residue that attracts lint and eventually seizes moving parts. What feels like a quick fix becomes a repair bill.
Canned compressed air has a different problem. The Restart Project’s repair guidance notes that compressed air pushes lint deeper into the machine’s hidden cavities, often forcing debris into gears and electronics that require professional disassembly to reach. The lint you think you are removing is just moving somewhere you cannot see.
Sewing-machine oil is light, clear, and formulated to stay fluid at the temperatures and pressures inside a sewing machine without breaking down into gum. There is no substitute that behaves the same way.
The exact list of what not to use: WD-40, 3-in-1 oil, cooking oil, olive oil, baby oil, motor oil, and canned compressed air.
Pro Tip: If you do not have sewing-machine oil on hand, do not oil at all until you get the right product. A dry machine runs better than a gummed-up one.
What consistent maintenance actually teaches you about your machine
There is a tendency in sewing circles to treat machine care as a chore to get through, something you do when the machine starts acting up. That framing gets it backwards. The most useful thing about a regular maintenance routine is not the cleaning itself — it is the familiarity you build with how your machine sounds, feels, and moves when everything is right.
When you handle the bobbin case every session, you notice the moment it develops a rough spot. When you rotate the handwheel by hand after reassembly, you feel the difference between smooth and slightly stiff before you ever plug in. That kind of tactile knowledge is what lets you catch a small problem before it becomes a timing issue or a seized gear.
Manufacturer guidance and professional technicians agree on the fundamentals: clean first, oil sparingly and only where specified, change needles more often than you think you need to, and get a professional service on a regular schedule. What they cannot teach you is the specific rhythm of your own machine. That comes from showing up for the routine, even when the machine seems fine.
Where to find the right supplies and service for your machine
Knowing what to do is half the equation. Having the right supplies on hand makes it easy to follow through every time.
Sewingmachinesplus stocks manufacturer-approved sewing-machine oil, Schmetz needle assortment packs, Singer metal bobbins, and maintenance kits so you are never caught without what you need mid-project. The SmartKit RX-24 accessory kit includes the brushes and small tools referenced throughout this guide, all in one compact case. For machines that need a professional tune-up, Sewingmachinesplus connects you with authorized service options and carries a full range of machines from brands with established dealer networks.
Free shipping applies on orders over $49, and a price match guarantee means you get the correct supplies at a fair price. Always follow your manufacturer’s manual for model-specific oil points and parts, and use an authorized technician for any warranty-covered repair.
Browse maintenance supplies and service options at Sewingmachinesplus to keep your machine running the way it should.
Sources
- Basic Sewing Machine Maintenance: Tips From an Expert - iFixit
- Sewing Machine Maintenance | New Mexico State University
- Oiling your machine - Support - BERNINA
- How to Clean and Oil Your Sewing Machine - Threads
- How Often to Service Your Sewing Machine (and Signs It’s Due)
FAQ
How do I service my sewing machine myself?
Unplug the machine, remove the needle and bobbin, brush out lint from the bobbin area and feed dogs, apply one drop of sewing-machine oil only at the points your manual specifies, reassemble, and test on scrap fabric. This covers routine home maintenance; internal timing and electronic repairs require a professional technician.
What is the average cost to service a sewing machine?
A routine professional tune-up in the U.S. typically runs $50–$100, while more extensive repairs involving timing adjustment or part replacement can range from $100–$200 or more, depending on the machine type and your region.
What are the most common sewing machine problems?
The seven problems sewers encounter most often are skipped stitches, thread nesting under fabric, uneven tension, thread breaking, grinding or squealing noise, a stiff handwheel, and the machine not feeding fabric evenly. Most trace back to a dull needle, incorrect threading, or lint buildup in the bobbin area.
How often should I oil my sewing machine?
Oil only when your owner’s manual says to, and only with sewing-machine oil. Many modern machines have sealed or factory-lubricated parts that should never be oiled by the user; consult your manual before oiling to avoid voiding your warranty.
When should I stop troubleshooting and call a technician?
Call a technician if you smell burning, see sparks, notice the timing is off (needle hitting the hook), or if grinding persists after a thorough cleaning and oiling. These signs point to internal mechanical or electrical issues that home maintenance cannot safely address.
