

A sewing machine skipping stitches almost always comes down to three things: a needle that needs replacing, threading that went wrong somewhere, or lint packed into the bobbin area. Before you assume something is mechanically broken, try these three steps first.
Start here — your first three actions:
- Replace the needle. Use the correct type and size for your fabric. A fresh needle takes about 60 seconds and fixes a large share of skipped-stitch cases outright.
- Rethread completely — top thread and bobbin — with the presser foot raised. This resets the tension discs and clears any thread caught in a guide.
- Clean the bobbin and shuttle area. Remove the bobbin, brush out lint, and reinsert the bobbin correctly.
After each step, sew a 6-inch test line on scrap fabric at medium speed. If the stitches look even and no loops appear on either side, you found your fix. If skips continue, move to the full checklist below.
Pro Tip: Always raise the presser foot before rethreading. The tension discs only open when the foot is up, so threading with it down means the thread never seats properly — and you’ll get skips no matter how carefully you thread.
According to NMSU Cooperative Extension’s guide on skipped stitches, common causes include incorrect needle insertion, the wrong needle size or type for the material, a bent or blunt needle, improper presser-foot pressure, wrong upper or lower tension combinations, and a thread-fabric mismatch. Most of these are fixable in under ten minutes.
Key Takeaways
Replacing the needle, rethreading completely with the presser foot raised, and cleaning the bobbin race resolves the vast majority of skipped-stitch problems in home sewing machines.
| Point | Details |
|---|---|
| Replace the needle first | Needle issues cause a large share of skipped stitches; swap it before adjusting anything else. |
| Rethread with presser foot up | Tension discs only open when the foot is raised; threading with it down causes persistent skips. |
| Clean the bobbin race regularly | Lint in the shuttle race blocks loop capture; clean every 3 months or after every 3–4 bobbins. |
| Timing problems need a technician | If skips persist after all basic fixes, needle-to-hook timing is likely off; U.S. repair typically runs $75–$150. |
| Sewingmachinesplus for parts and service | A 50+ year authorized dealer carrying needles, bobbins, and accessories, with expert consultations available. |
Table of Contents
- Why is your sewing machine skipping stitches? A step-by-step checklist
- How to change a needle, run a pull test, and clean the bobbin race correctly
- Fast fixes for knits, denim, zipper feet, and embroidery
- When should you call a technician instead of fixing it yourself?
- A simple maintenance schedule that prevents most skipped stitches
- The part most sewers overlook when troubleshooting
- Sewingmachinesplus has the needles, bobbins, and expert guidance you need
- Sources
- FAQ
Why is your sewing machine skipping stitches? A step-by-step checklist
Repair guides commonly group the first checks into a sequence called TNT: Threading, Needle, Tension. Work through the steps below in order. Each one includes a quick pass/fail test so you know whether to keep going or stop.
Step 1: Rethread the entire machine
Remove all thread from the top and the bobbin. With the presser foot raised, rethread from scratch, following every guide and tension disc. Reinsert the bobbin so it unwinds in the correct direction (check your manual — usually counterclockwise when viewed from above). Lower the presser foot and pull up the bobbin thread.
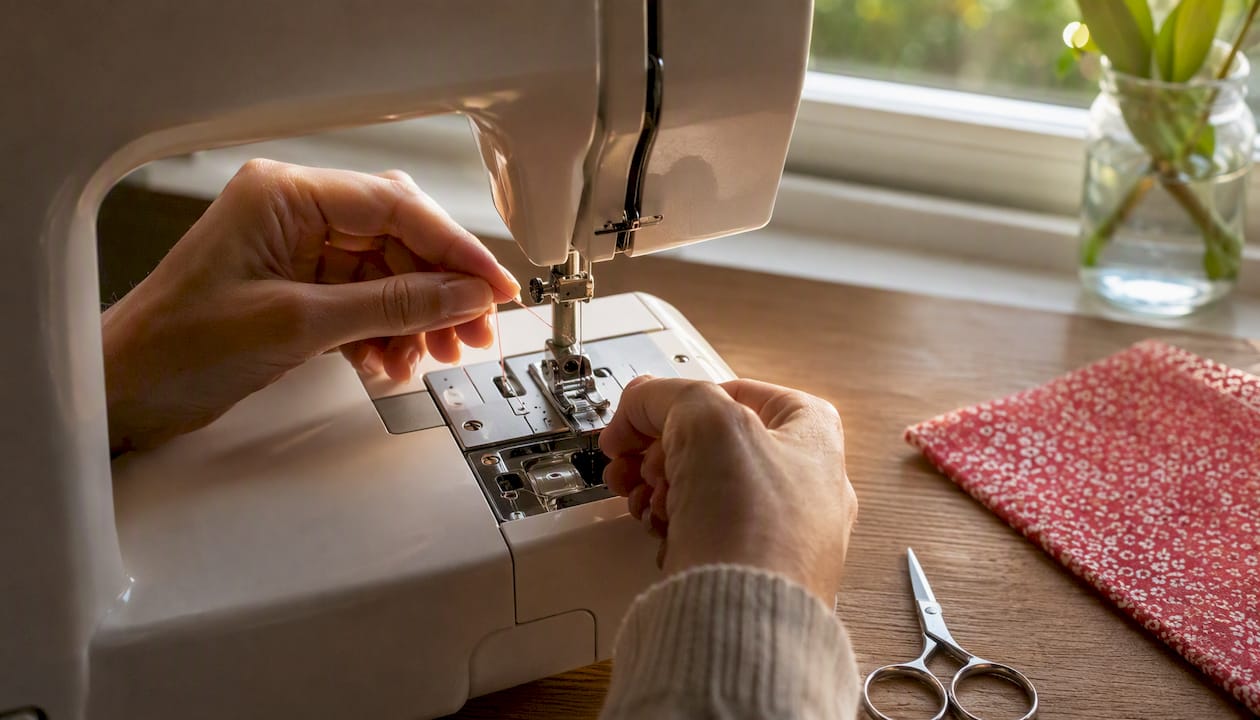
Test: Sew a 6-inch line on scrap at medium speed. Pass: Even stitches, no loops. Stop here. Fail: Skips continue. Move to Step 2.
Step 2: Replace and inspect the needle
Pull the needle out and look at it under good light. A bent tip or a tiny burr is often invisible to the naked eye but enough to miss the thread loop. Install a fresh needle, flat side to the back, and push it all the way up into the clamp before tightening the screw.
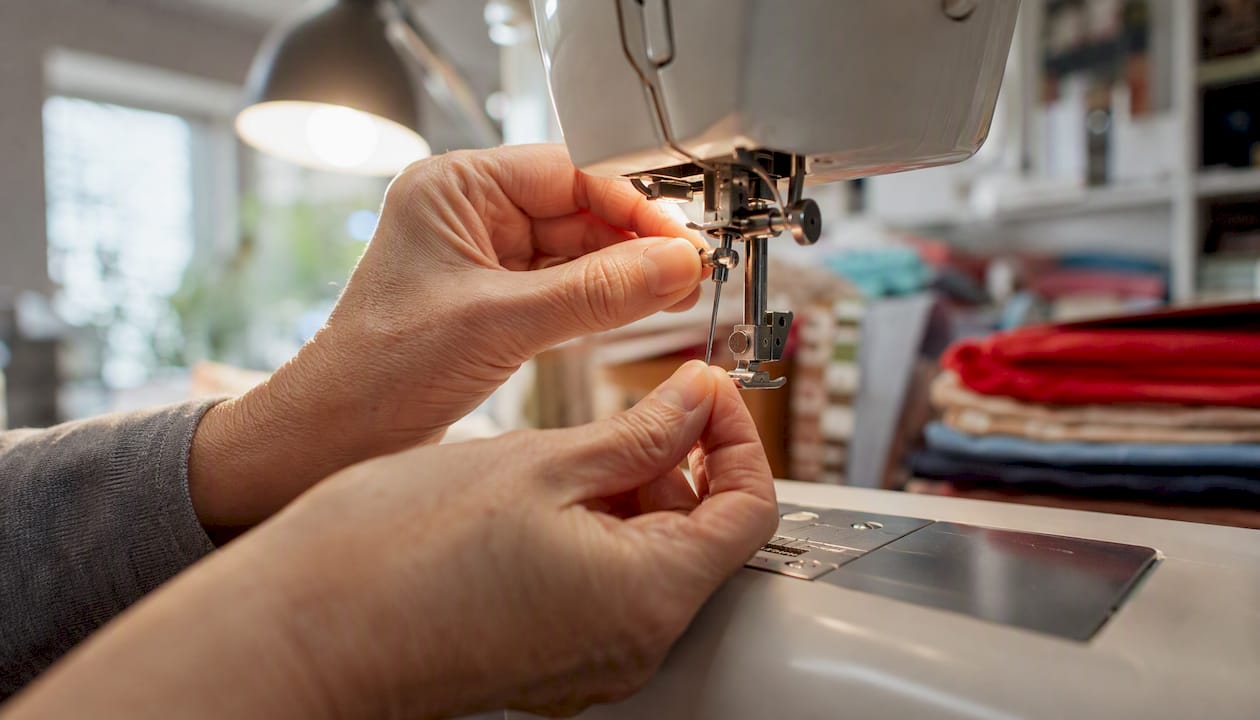
Brother USA’s troubleshooting guidance specifically calls out needle orientation and full seating as first-line fixes. A needle that sits even 1 mm too low will miss the hook’s timing window every time.
Test: Sew another 6-inch line. Pass: Stitches are even. Done. Fail: Still skipping. Move to Step 3.
Step 3: Check and adjust tension
Thread imbalance is a frequent driver of uneven and skipped stitches. To diagnose it quickly, use two different thread colors — one on top, one in the bobbin.
Two-color pull test:
- Sew a test seam and examine both sides.
- If the top-thread color shows on the underside, upper tension is too tight (or lower tension too loose).
- If the bobbin-thread color shows on the top, upper tension is too loose.
- Adjust upper tension one number at a time and retest.
Bobbin drop test: Hold the bobbin thread and let the bobbin case hang. Give the thread a gentle jerk. The case should drop slightly and stop — not fall freely (too loose) or refuse to move (too tight).
Test: Sew a fresh 6-inch line after each small adjustment. Pass: Both sides show only their own thread color. Fail: Move to Step 4.
Step 4: Clean the bobbin race and shuttle area
Lint in the shuttle race physically blocks the hook from catching the thread loop. Remove the needle plate, take out the bobbin and bobbin case, and use a small brush to sweep lint out of the race. A vacuum with a narrow nozzle works well. Avoid blowing compressed air in — it pushes lint deeper into the machine.
Lint and dust in the shuttle race often prevent the hook from catching the thread loop. Cleaning the bobbin area and feed dogs every three months — more often with heavy use — is the standard recommendation for reliable stitch capture.
Test: Reinsert the bobbin, rethread, and sew a test line. Pass: Clean stitches. You’re done. Fail: Move to Step 5.
Step 5: Check presser-foot pressure and feed dogs
Too little presser-foot pressure lets the fabric float, which shifts the needle’s entry point and causes intermittent skips. Too much pressure can distort lightweight fabric and produce the same symptom. Adjust the pressure dial (usually on the left side of the machine head) and test again.
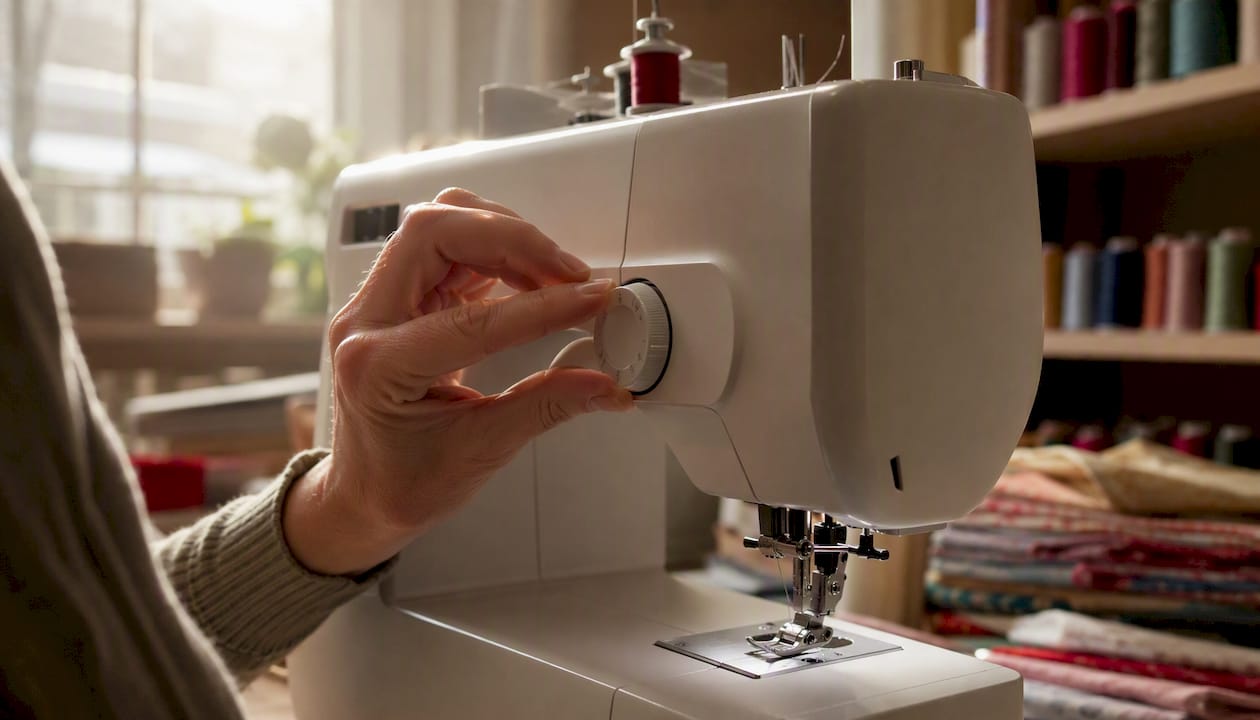
Also look at the feed dogs. If they’re clogged with lint or worn down, fabric won’t advance evenly. Clean them with a stiff brush.
Step 6: Inspect the throat plate and needle hole
A throat plate with a worn or enlarged needle hole lets the fabric dip slightly as the needle enters, pulling the thread loop out of position. Look for scratches or a hole that’s noticeably larger than the needle. If you see damage, replace the plate.
Also confirm you’re using the right plate for your stitch. A zigzag plate has a wide oval hole; a straight-stitch plate has a small round hole. Using a zigzag plate for straight stitching gives the fabric room to dip.
Step 7: Check special-foot alignment
Zipper feet and edge feet position the needle off-center. If the foot isn’t aligned correctly, the needle can miss the hook’s catch window. Check that the needle drops cleanly through the foot’s needle slot without touching the foot’s edge. An invisible zipper foot designed for your machine brand removes most of this guesswork.
Flowchart decision path:
- Rethread fails → Replace needle
- New needle fails → Adjust tension
- Tension fix fails → Clean shuttle race
- Cleaning fails → Check presser foot, feed dogs, throat plate
- All of the above fail → Likely needle-to-hook timing or damaged hook. Stop DIY. Call a technician.
How to change a needle, run a pull test, and clean the bobbin race correctly
Choosing and changing the needle
Needle size and type matter more than most beginners expect. The needle-hook gap is roughly 0.1–0.3 mm in most home machines — a tolerance so tight that a slightly bent needle or the wrong diameter causes the hook to miss the loop entirely.
Common needle types and their uses:
| Fabric | Needle type | Size range |
|---|---|---|
| Woven cotton, linen | Universal | 90/14 |
| Knits, jersey | Ballpoint or stretch | 75/11 – 90/14 |
| Denim, canvas | Jeans/denim | 90/14 |
| Embroidery | Embroidery | 75/11 – 90/14 |
| Sheer, silk | Microtex/sharp | 60/8 – 70/10 |
To change the needle: turn off the machine, loosen the needle clamp screw, slide the old needle down and out, insert the new needle with the flat side facing the back, push it up as far as it will go, and retighten the screw firmly.
Replace your needle every 6–8 hours of sewing, or at the start of each new project. A needle that looks fine visually can still have a microscopic burr that causes skips.
Pro Tip: Run your fingernail lightly along the needle tip. Any roughness you can feel is enough to cause skipped stitches — replace it immediately.
Cleaning the bobbin race safely
- Turn off and unplug the machine.
- Remove the presser foot and needle.
- Slide off or unscrew the needle plate.
- Lift out the bobbin and bobbin case.
- Use a small lint brush to sweep the race channel in one direction — don’t scrub back and forth.
- Vacuum the area with a narrow attachment.
- Apply one small drop of sewing machine oil to the race if your manual specifies it (many modern machines are self-lubricating — check before oiling).
- Reassemble, rethread, and test.
Never use compressed air. It drives lint into the motor housing and can cause bigger problems down the road.
Running the bobbin drop test
Hold the bobbin thread and suspend the bobbin case in the air. Give the thread a short, sharp jerk. The case should drop about an inch and stop. If it falls freely, the bobbin tension is too loose. If it doesn’t move at all, it’s too tight. Adjust the small screw on the bobbin case in tiny increments — a quarter turn at a time.
Fast fixes for knits, denim, zipper feet, and embroidery
Not every skipping problem follows the same pattern. Here are the most common special-case scenarios and the one adjustment that usually solves each.
-
Knit fabrics: Skips on jersey or stretch fabric almost always mean you’re using a universal needle. Switch to a ballpoint or stretch needle — the rounded tip slides between fibers instead of piercing them, which keeps the thread loop stable. Also try a slightly longer stitch length (2.5–3.0 mm instead of 2.0 mm).
-
Denim and heavy canvas: Use a jeans needle (size 90/14 or 100/16), slow your speed down, and increase presser-foot pressure. Heavy fabric resists the feed dogs and can cause the needle to flex, shifting it away from the hook at the critical moment.
-
Zipper and edge feet: These feet offset the needle position. If the needle clips the foot’s edge, it deflects just enough to miss the hook. Reposition the foot so the needle drops cleanly through the slot, and sew a test seam before continuing.
-
Embroidery and quilting: High speed combined with low-quality thread is a reliable recipe for skips. Slow to about 60–70% of maximum speed, switch to a quality embroidery thread, and test on a stabilizer scrap first. Schmetz embroidery needles (size 75/11) are a solid choice for delicate embroidery work.
Pro Tip: For free-motion quilting, lower or cover the feed dogs and use a darning or free-motion foot. Without feed-dog engagement, the fabric moves only as fast as you guide it — and inconsistent speed is the main cause of skipped stitches in free-motion work.
When should you call a technician instead of fixing it yourself?
If you’ve replaced the needle, rethreaded, adjusted tension, and cleaned the shuttle race and the machine still skips, the problem is almost certainly mechanical. The most common culprit is needle-to-hook timing.
What needle-to-hook timing means
Every stitch forms when the hook on the rotating shuttle catches a tiny loop of thread that forms just behind the rising needle. The hook passes within roughly 0.1–0.3 mm of the needle at a precise moment in the needle’s upstroke. If the shuttle drive gear shifts even slightly, the hook arrives too early or too late and misses the loop. The result is a skipped stitch — every time, or only at higher speeds, or only on zigzag stitches (which move the needle laterally, changing its relationship to the hook).
Signs that point to a timing or hook problem
- Skips persist after needle, thread, tension, and cleaning fixes.
- Skips happen only at higher speeds or only on zigzag stitches.
- You hear a faint clicking or ticking sound as the needle descends.
- The needle has struck the hook — you can see a small nick or bend on the needle, or a visible mark on the hook itself.
- The hook looks bent, chipped, or has a rough spot you can feel with a fingernail.
A technician will use a timing light or manual positioning to realign the shuttle drive gear and check the hook-to-needle clearance. This is not a job for household tools — the tolerances are too small and the adjustment too easy to get wrong.
Pro Tip: Before bringing your machine in, note exactly when skips happen (speed, stitch type, fabric), bring a sample swatch showing the problem, and remove all thread. A clear symptom description cuts diagnostic time significantly.
What to expect from a repair visit
Timing adjustments at a U.S. repair shop typically cost a moderate service fee depending on the machine and the shop’s labor rate, though prices vary by region and machine complexity. If the hook itself is damaged, parts add to that cost. For a basic home machine worth less than $150, it’s worth asking the technician whether repair or replacement makes more financial sense before authorizing the work.
A simple maintenance schedule that prevents most skipped stitches
Most skipped-stitch problems are preventable. The habits below take less time than diagnosing a problem after it starts.
- Change your needle every 6–8 hours of sewing or at the start of each new project, whichever comes first. Needles are inexpensive; skipped stitches and fabric damage are not.
- Clean the bobbin race and feed dogs every three months with regular home use, or after every 3–4 bobbins’ worth of sewing if you sew heavily. Lint buildup directly blocks loop capture and is the easiest problem to prevent.
- Use quality thread. Old, brittle, or bargain-bin thread breaks down and sheds fiber into the machine. Store spools in a dry, dust-free container away from direct sunlight.
- Test on scrap before every project. A 6-inch test line on the same fabric you’re about to sew takes 30 seconds and catches tension and needle problems before they ruin your project.
- Rethread before long sewing sessions. Thread can slip out of a guide without you noticing, especially after changing bobbins.
Maintenance schedule at a glance
| Task | Frequency |
|---|---|
| Replace needle | Every 6–8 hours of sewing or per project |
| Clean bobbin race and feed dogs | Every 3 months (more with heavy use) |
| Oil the machine (if manual specifies) | Per manufacturer schedule |
| Full rethread check | Before each long sewing session |
| Professional service | Every 1–2 years with regular use |
Pro Tip: Keep a small notebook near your machine and jot down the date each time you change a needle or clean the bobbin area. You’ll quickly see patterns — and you’ll never wonder whether it’s been “too long” since the last cleaning.
The part most sewers overlook when troubleshooting
Here’s something worth saying plainly: the single most underestimated fix in sewing machine troubleshooting is the needle change. Not because it’s complicated, but because it’s so simple that most people assume they already did it, or assume their needle is fine because it looks fine.
The mechanical reality is unforgiving. The hook passes within a fraction of a millimeter of the needle on every single stitch. A needle that’s bent by the width of a human hair — invisible without magnification — is enough to shift it outside the hook’s catch window. Repair technicians see this constantly: a machine comes in described as “broken,” and a fresh needle fixes it in 30 seconds.
The same logic applies to rethreading. A thread that slipped out of one guide, or was threaded with the presser foot down, will produce intermittent skips that look random and feel maddening. They’re not random. The fix is always the same: rethread from scratch, presser foot up, following every step.
Where I’d push back on conventional troubleshooting advice is the tendency to jump straight to tension adjustments. Tension is almost never the root cause — it’s usually a symptom of a needle or threading problem. Adjust tension last, not first. If you fix the needle and rethread properly, tension often corrects itself.
Sewingmachinesplus has the needles, bobbins, and expert guidance you need
When your machine is skipping stitches, having the right parts on hand makes all the difference. Sewingmachinesplus, a 50+ year authorized dealer with over 175,000 positive reviews, carries the needles, bobbins, and accessories that solve most skipping problems fast.
Pick up Singer Class 15 metal bobbins or Singer ballpoint needles for knits with free shipping on orders over $49. If your machine needs professional service or you’re considering an upgrade after repeated mechanical issues, the team at Sewingmachinesplus offers personalized consultations, a price match guarantee, and financing options. Browse the full selection or reach out directly to get your machine sewing cleanly again.
Sources
The following references were used in preparing this guide and are worth bookmarking for deeper reading:
- Why is my sewing machine skipping stitches ?
- Causes of Skipping Stitches (NMSU Cooperative Extension)
- Skipping stitches — Brother USA help article
- Why Is My Sewing Machine Skipping Stitches ? — SewingSage
- Sewing machine skipping stitches – quick fixes for needle, tension & timing
FAQ
Why does my sewing machine keep skipping stitches?
The most common reasons are a dull or bent needle, incorrect threading, or lint in the bobbin/shuttle area. Work through needle replacement, a full rethread with the presser foot raised, and a bobbin-area cleaning before checking tension or mechanical parts.
What is the most common cause of skipped stitches?
Needle problems — a dull, bent, or wrong-type needle — account for a large share of cases seen by repair technicians. A fresh needle of the correct type and size for your fabric is always the first fix to try.
How do I fix a skipped stitch in sewing?
Follow the TNT sequence: rethread completely (presser foot up), replace the needle with the correct type and size, then check and adjust tension using a two-color thread test. Clean the bobbin race if skips continue after those three steps.
How do I fix tension issues that cause skipped stitches?
Thread the machine with the presser foot raised so the tension discs open fully, then sew a test line using two different thread colors — one on top, one in the bobbin. If the top color appears on the underside, reduce upper tension one increment at a time and retest until both sides show only their own color.
When should I take my machine to a technician?
If skips persist after replacing the needle, rethreading, adjusting tension, and cleaning the shuttle race, the problem is likely needle-to-hook timing misalignment. This requires special tools to fix and typically costs $75–$150 at a U.S. repair shop.
Recommended
- Sewing, Quilting & Embroidery | 50+ year Authorized Dealer | SMP
- Baby Lock Sewing Machine Embellisher EMB7
- Juki DDL-8700 High-speed Single Needle Straight Lockstitch Industrial Sewing Machine with Table and Servo Motor (Table Comes Assembled)
- Invisible Zipper Foot (ESG-IZF) (SA128) Fits Baby Lock, Brother, Elna, Janome, Singer
