

Most sewing machine tension problems clear up in under five minutes once you know where to look. Rethreading with the presser foot raised, checking bobbin insertion, and making small upper-tension dial adjustments resolve the majority of complaints before you ever need to touch a screw. Here’s what to try right now:
- Raise the presser foot, then rethread completely. Lifting the foot opens the tension discs so the thread seats properly between them. Threading with the foot down is the single most common cause of “mystery” tension issues.
- Remove and reinsert the bobbin. Check that it’s wound evenly and sitting in the correct orientation for your machine (check your manual if unsure).
- Change the needle. A dull or bent needle creates drag that mimics tight tension. If you can’t remember the last time you changed it, change it now.
- Clean the bobbin area and tension discs. Brush out lint from under the throat plate and floss a thin cloth between the tension discs.
- Make one small upper-tension dial adjustment. Move the dial by half a number, sew a test seam, and look at both sides of the fabric before moving it again.
Stop adjusting and take the machine to a technician if you hear grinding, the feed dogs feel rough, or stitches remain badly unbalanced after completing the full troubleshooting workflow below.
Key Takeaways
Rethreading with the presser foot raised and cleaning the tension discs resolves most sewing machine tension problems before any dial adjustment is needed.
| Point | Details |
|---|---|
| Rethread first, always | Raise the presser foot before rethreading so the thread seats properly between the tension discs. |
| Change the needle early | A dull or wrong-size needle mimics tight tension; replace it before adjusting any dial. |
| Adjust upper tension in half-steps | Move the dial by half a number, sew a test seam, and inspect both sides before moving it again. |
| Bobbin tension is a last resort | Photograph the screw position, then turn no more than a quarter-turn at a time and retest after each change. |
| Sewingmachinesplus for parts and help | Replacement bobbins, needles, and expert consultations are available with free shipping over $49. |
Table of Contents
- How do you recognize sewing machine tension problems?
- What’s the right order to troubleshoot thread tension?
- How do you adjust the upper tension dial safely?
- When and how should you adjust bobbin tension?
- What common causes actually create tension problems?
- How does tension work for decorative stitches, quilting, and specialty fabrics?
- What maintenance prevents tension problems before they start?
- Get the right parts and expert help from Sewingmachinesplus
- Sources
- FAQ
How do you recognize sewing machine tension problems?
Knowing which thread is “winning” tells you exactly which direction to adjust. The goal is a balanced stitch, where the upper thread and bobbin thread lock together in the exact middle of the two fabric layers. Both sides of the seam look identical. Pull the seam apart gently and the threads should break at roughly equal resistance.
When tension is off, the symptoms are readable:
- Bobbin thread visible on the top surface: Upper tension is too tight, or bobbin tension is too loose. The upper thread is pulling the bobbin thread up through the fabric.
- Upper thread looping on the bottom surface: Upper tension is too loose, or bobbin tension is too tight. The bobbin thread is pulling the upper thread down.
- Puckering along the seam line: Overall tension is too high for the fabric weight. Common on lightweight sheers and thin cotton.
- Skipped stitches: Often a needle issue, but can also signal that the thread isn’t seated in the tension discs.
A balanced stitch locks in the middle of the fabric layers and sits flat on both sides. If you see any thread from one side appearing on the other, that’s your diagnostic signal — the thread that’s visible on the wrong side is the one being pulled too hard.
Fabric type matters here. Lightweight sheers pucker at tension settings that work fine on quilting cotton. Heavy denim or canvas may need slightly higher tension to keep stitches from looping. Always test on a scrap of the actual fabric you’re sewing before adjusting the machine.
What’s the right order to troubleshoot thread tension?
Work through this sequence in order. Each step is lower-risk than the one after it, and most problems resolve before you reach step five. This ordered checklist resolves most tension complaints before you touch the tension dial.
- Rethread with the presser foot up. Cut the thread, raise the presser foot lever, and rethread the entire upper path from the spool pin through every guide, the take-up lever, and the needle. Lower the presser foot only after threading is complete.
- Change the needle. Use a fresh needle matched to your fabric and thread weight (more on this below). A size 80/12 universal needle works for most medium-weight fabrics.
- Check the bobbin. Remove it, inspect for dents or uneven winding, and reinsert it correctly. Confirm the thread unwinds in the direction your machine requires.
- Clean the tension discs and bobbin area. Floss a thin strip of cloth between the tension discs. Brush lint from the bobbin race and under the throat plate.
- Sew a test seam. Cut a piece of two-layer muslin or medium-weight cotton, set a medium stitch length, and sew a diagonal seam. Examine both sides. The diagonal cut lets you see how tension behaves across the bias, which is more revealing than a straight seam.
- Adjust the upper tension dial in small increments. If the test seam shows imbalance, move the dial by half a number. Sew another test seam. Repeat until balanced.
- Check the bobbin tension last. Only after the steps above fail to fix the problem.
Pro Tip: Before you change anything, write down your current dial setting or take a quick photo. One change at a time, one test seam after each change. This is the only way to know what actually fixed the problem.
How do you adjust the upper tension dial safely?
The upper tension dial controls how much pressure the tension discs apply to the thread as it feeds through. Higher dial numbers generally mean more pressure and a tighter stitch. Lower numbers mean less pressure and a looser stitch. Most machines ship with the dial set near the middle of its range, typically around the midpoint of the scale, and that’s your baseline starting point.
Move the dial in half-to-one-number increments only. Sew a test seam after each adjustment and look at both sides before moving the dial again. If bobbin thread is showing on top, increase the upper tension number slightly. If upper thread is looping on the bottom, decrease it.
Three mistakes to avoid:
- Threading with the presser foot down. The tension discs stay closed, so the thread rides on top of them instead of between them. Every stitch will be off.
- Turning the dial aggressively. Moving from 4 to 8 in one jump makes it impossible to find the sweet spot. Half-step moves are the rule.
- Changing stitch length at the same time. Stitch length affects how tension looks on the fabric. Change only one variable per test seam.
When and how should you adjust bobbin tension?
Bobbin tension adjustment is a last resort for beginners. The screws are tiny, the increments are small, and an over-adjusted bobbin case is harder to reset than an upper-tension dial. Before touching any screw, confirm the bobbin is inserted correctly and the thread is routed through the bobbin case properly.
The drop test: Hold the bobbin case by the thread. The case should hang without dropping. Give the thread a gentle jerk — the case should drop a few inches and stop. If it falls freely, bobbin tension is too loose. If it won’t drop at all, it’s too tight.
Before adjusting bobbin tension, assume the lower tension is correct and try upper-tension adjustments first. If you’ve exhausted upper-tension options and the drop test confirms the bobbin is out of range, here’s how to proceed safely:
- Photograph the bobbin case screw position before touching it.
- Turn the small flathead screw nearest the center of the spring. Clockwise tightens; counterclockwise loosens.
- Move no more than a quarter-turn at a time, and sew a test seam after each adjustment.
- If the bobbin case looks damaged, cracked, or the screw won’t hold its position, replace the case rather than continuing to adjust.
A dropped or dented metal bobbin can cause inconsistent tension that no amount of dial tuning will fix. Discard a bobbin after a hard drop even if it looks fine. Replacing a pack of metal bobbins costs very little compared to the frustration of chasing a phantom tension problem.
What common causes actually create tension problems?
Many issues that look like tension dial problems are caused by something else entirely. Here’s what to check and what to do about it.
| Symptom | Probable cause | First-step fix |
|---|---|---|
| Loops on bottom of fabric | Upper thread not in tension discs | Rethread with presser foot up |
| Bobbin thread on top surface | Presser foot down while threading | Rethread with presser foot up |
| Puckering on lightweight fabric | Tension too high for fabric weight | Lower upper tension by 1 number |
| Skipped stitches | Bent or dull needle | Replace needle immediately |
| Uneven stitch length | Uneven bobbin winding | Re-wind bobbin on machine |
| Inconsistent tension throughout seam | Lint in tension discs or bobbin race | Clean discs and bobbin area |
| Thread breaking frequently | Thread-weight/needle-size mismatch | Match needle size to thread weight |

Needle size and thread-weight mismatch frequently mimic tension problems because a needle eye that’s too small for the thread creates friction and drag, producing the same effect as overly tight tension. A size 80/12 needle pairs with standard 50-weight cotton thread. Move to a 90/14 for heavier thread or denim, and a 70/10 for fine silk or lightweight fabric.
Pro Tip: Keep a pack of Schmetz needles in a few sizes at your machine. Changing the needle takes 30 seconds and solves a surprising number of “tension” problems that are actually friction problems.
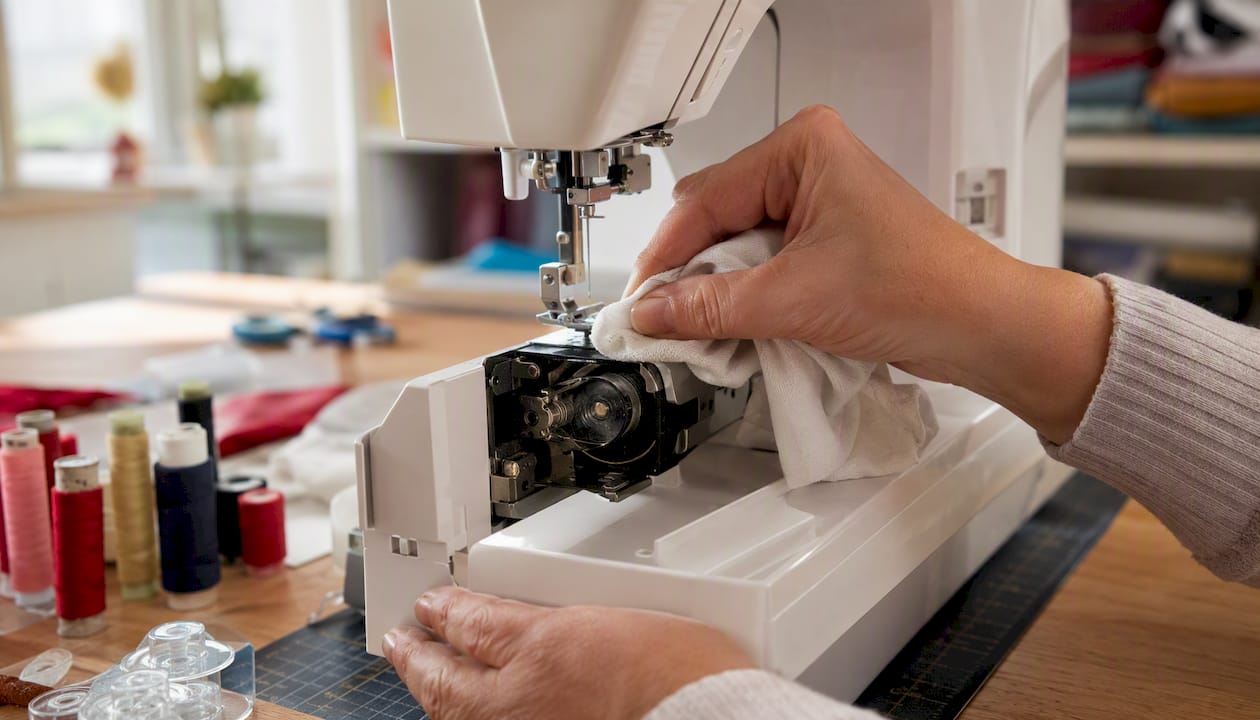
Lint in the tension discs is another underrated culprit. Thread fibers accumulate between the discs over time and increase resistance unpredictably. Flossing the discs with a thin cloth every few projects takes seconds and keeps tension behavior consistent.
How does tension work for decorative stitches, quilting, and specialty fabrics?
Balanced tension is the goal for straight seams, but not always for decorative work. For satin stitches and dense embroidery fills, a slightly looser upper tension pulls the top thread just below the fabric surface, giving the stitch a smoother, more polished appearance on top. This is intentional, not a fault.
For decorative or heavy bobbin-thread work, a dedicated bobbin case or a slight intentional imbalance produces better results than repeatedly changing your baseline settings. If your machine has a bobbin-case eye (a small secondary hole in the bobbin case), threading the bobbin thread through it adds resistance without touching the main tension screw. Using a second bobbin case reserved for specialty work protects your standard settings.
For wide zigzag stitches or heavy topstitching thread, reduce upper tension slightly and go up one needle size. Test on a scrap at the exact stitch width you’ll use, because zigzag width changes how tension behaves across the stitch.
Quilting and free-motion work add another layer. Before adjusting tension for a quilt sandwich, confirm the batting is flat and the layers are basted evenly. Drop or cover the feed dogs for free-motion work, use a darning or free-motion foot, and check that presser foot pressure is appropriate for the sandwich thickness. Many quilting “tension problems” are actually feed or pressure issues.
What maintenance prevents tension problems before they start?
Consistent maintenance keeps tension stable and reduces the chance you’ll need to troubleshoot at all.
- Clean the bobbin area after every project. Remove the throat plate, brush out lint, and check the bobbin race for thread bits or burrs.
- Floss the tension discs every few projects. Run a thin strip of cloth between the discs to clear accumulated fiber.
- Change the needle every 8–10 hours of sewing (or sooner if you hear a popping sound as it enters the fabric, which signals a dull point).
- Inspect bobbins before each use. Check for dents, flat spots, or uneven winding. Discard any bobbin that looks damaged.
- Store thread away from direct sunlight and dust. Degraded thread breaks more easily and creates inconsistent tension.
Signs it’s time for professional service: stitches remain badly unbalanced after completing the full troubleshooting workflow, the bobbin case is cracked or the tension screw won’t hold, the feed dogs feel rough or scratchy, or you hear grinding or clicking during stitch formation. At that point, stop adjusting and take the machine in. A qualified technician can identify worn tension discs, damaged feed dogs, or timing issues that no amount of dial turning will fix.
For frequent sewers, a light brush-out weekly and a deeper cleaning monthly keeps things running well. An annual service appointment catches wear before it becomes a real problem.
One habit that changes everything
The single most effective habit for avoiding tension frustration is simple: always rethread with the presser foot up, every time, without exception. It takes five extra seconds and it prevents the most common tension complaint beginners bring to service centers.
Beyond that, keep a labeled test swatch notebook. Every time you change thread, fabric, or needle, sew a small sample seam on a scrap, label it with your settings, and keep it. When something goes wrong later, you have a reference point. It sounds like extra work, but it saves real time when you’re troubleshooting at 11 PM before a deadline.
Sewingmachinesplus has been an authorized dealer for over 50 years, and the team there can help you find the right parts or point you toward a service center when the machine needs more than a cleaning.
Get the right parts and expert help from Sewingmachinesplus
When you’ve worked through the troubleshooting steps and the fix turns out to be a new needle, a fresh set of bobbins, or a cleaning kit, having the right parts on hand makes the difference between finishing your project today and waiting a week.

Sewingmachinesplus carries needles, metal bobbins, accessories, and a full range of sewing and quilting machines, with free shipping on orders over $49 and a price match guarantee. If you’re not sure which needle size or bobbin type fits your machine, the team offers personalized consultations to point you in the right direction. With over 175,000 positive reviews, you can count on accurate product guidance and fast fulfillment. Browse the full accessories selection at Sewingmachinesplus and get what you need to sew with confidence.
Sources
These sources support the guidance in this article and are worth bookmarking for deeper reference:
- How To Fix Sewing Machine Tension Problems
- CT-MMB.213
- Understanding thread tension on your sewing machine
- Sewing Machine Tension Issues: What to Check Before You Adjust
- Seven Steps to Perfect Thread Tension (with video!) – Tilly and the Buttons
Always consult your machine’s manual for model-specific bobbin insertion direction, tension disc locations, and bobbin-case screw positions before making any physical adjustments.
FAQ
What number should the tension be set to on a sewing machine?
Most machines work well with the upper tension dial set near the middle of its range, typically around the midpoint of the scale. Use that as your starting point and adjust in half-number increments based on your test seam results.
What are the signs of incorrect sewing machine tension?
The clearest signs are bobbin thread visible on the top surface of the fabric (upper tension too tight), upper thread looping on the bottom (upper tension too loose), puckering along the seam, or skipped stitches. Inspect both sides of a test seam to identify which thread is off.
Why is my thread looping underneath the fabric?
Looping on the bottom almost always means the upper thread is too loose or wasn’t seated in the tension discs during threading. Rethread completely with the presser foot raised, then sew a test seam. If looping continues, increase the upper tension dial by half a number and retest.
How do you know if your tension is too high or too low?
Sew a diagonal test seam on two layers of medium-weight fabric and examine both sides. If the bobbin thread is pulled to the top, tension is too high. If the upper thread loops on the bottom, tension is too low. A balanced stitch looks identical on both sides, with threads locking in the middle of the fabric layers.
