

To wind a bobbin correctly, place the right empty bobbin on the winder spindle, thread it through the bobbin tension guide, engage the winder, and run it slowly until the thread fills evenly. That lower thread is what locks every stitch, so getting it right saves you from tangled seams later.
Before you sit down at the machine, run through this quick check:
- Right bobbin type: confirm it matches your machine (Class 15 is common, but check your manual).
- Even layers: thread should stack flat with no lumps or bulges on one side.
- Slight resistance: the thread should pull with a little tension as it passes through the disk, not flop through loose.
Pro Tip: Sewing Machines Plus stocks bobbins for most major brands, but your owner’s manual is still the fastest way to confirm which class your machine actually needs.
Key Takeaways
A properly wound bobbin depends on the correct bobbin class, a threaded tension guide, and even, unhurried winding until the layers fill flat.
| Point | Details |
|---|---|
| Confirm bobbin class first | Check your manual for Class 15, Class 66, or a machine-specific type before winding. |
| Thread the tension guide | Route thread through the bobbin winding disk to keep layers even and prevent lumps. |
| Start slow with manual wraps | Secure the tail with four to six hand wraps before engaging the winder at speed. |
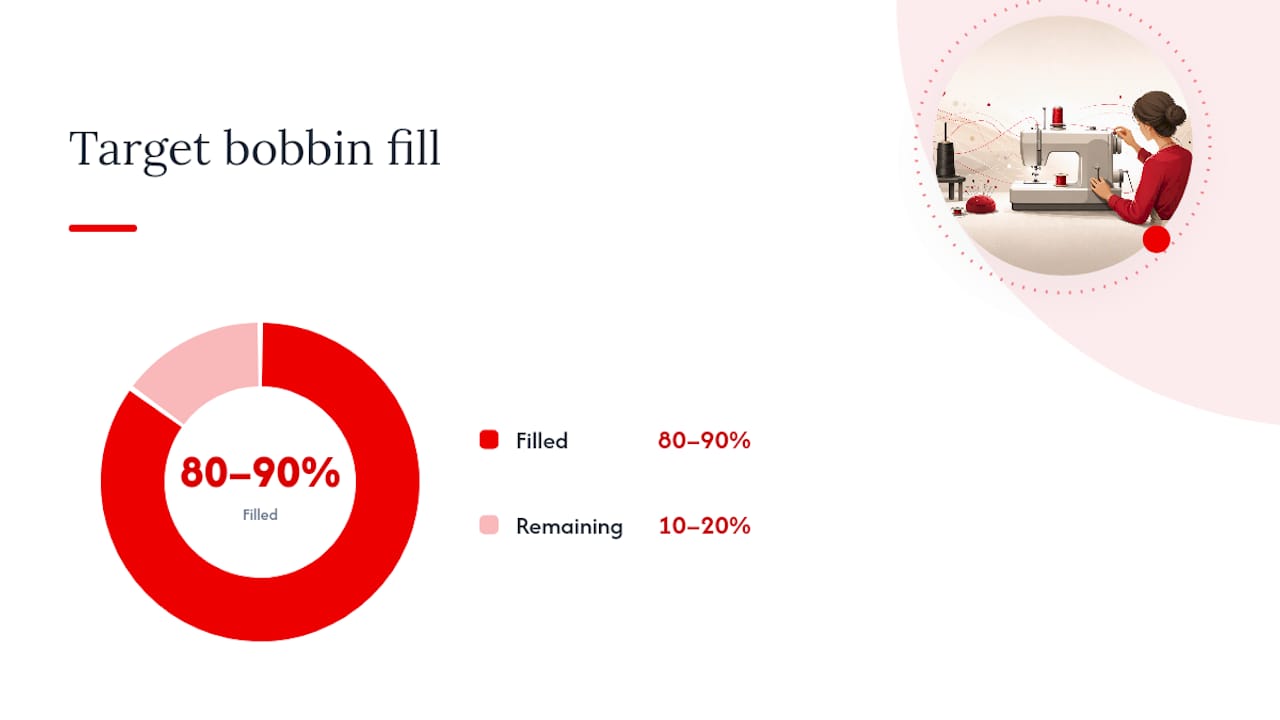
| Watch for 80 to 90 percent fill | Stop winding once thread covers most of the rim or the automatic stop clicks. |
| Sewingmachinesplus for parts | Offers compatible bobbins, thread, and consultations if you’re unsure what your machine needs. |
Table of Contents
- What You Need Before You Wind a Sewing Bobbin
- How Do You Wind a Bobbin on a Sewing Machine?
- Can You Wind a Bobbin by Hand?
- Which Bobbin and Thread Should You Use?
- Why Is My Bobbin Not Winding Evenly?
- How Do You Keep a Bobbin Winder Working Reliably?
- Getting Comfortable With Bobbin Winding
- Where to Find Bobbins, Thread, and Support
- Sources
- FAQ
What You Need Before You Wind a Sewing Bobbin
Gather everything before you sit down. Hunting for scissors mid-wind is how thread ends up wrapped around a table leg.
- An empty bobbin that matches your machine’s class
- A spool of thread that matches your project (and matches the bobbin thread weight when possible)
- A spool cap to keep the thread from wobbling off the pin
- Sharp scissors for trimming the tail
- A small lint brush
- Your machine’s manual, opened to the bobbin section
Bobbin classes aren’t interchangeable. A Class 15 bobbin won’t sit right in a machine built for Class 66, and top-load (drop-in) machines often need a different bobbin than front-load models. Check the manufacturer’s guidance on bobbin type before you buy replacements, and inspect your bobbin for burrs or hairline cracks. Sewingmachinesplus carries Class 15 metal bobbins and Class 66 options in both metal and plastic if yours needs replacing.
Pro Tip: A cracked bobbin edge will snag thread mid-stitch even if everything else is threaded correctly. Run your fingernail around the rim before every few winds.
How Do You Wind a Bobbin on a Sewing Machine?
Most home machines, whether Singer, Brother, or Janome, follow the same basic sequence, though the diagram in your manual always wins if it differs from what’s here.
- Power off or lift the presser foot, and place your thread spool on the spool pin with the cap seated correctly.
- Pull the thread through the bobbin winding tension guide, the small disk usually near the top of the machine.
- Thread the tail through the hole in the bobbin from the inside out.
- Set the bobbin onto the winder spindle and push it to the right (or however your machine engages the winder).
- Hold the thread tail loosely and start the machine at a slow speed for the first several turns.
- Once the tail catches, let go and continue winding, watching for even layers building up around the bobbin.
- Stop when the bobbin reaches roughly 80 to 90 percent of the rim, or when your machine’s automatic stop clicks and disengages the winder.
- Trim the thread tail close to the bobbin before removing it.
Direction matters less than consistency. Some machines wind clockwise, others counterclockwise, so trust the arrows printed on your machine over general advice. What actually determines a good bobbin is the layer pattern: flat, even, and free of any bulge on one side. A bulge usually means the thread slipped past the tension guide at some point during the wind.
Keep your fingers clear of the spindle once it’s spinning, and never crank the machine to full speed the moment you engage the winder. A slow start gives the tail time to lock in.
Pro Tip: Wrap the thread around the bobbin by hand four to six times before engaging the winder. Those manual wraps anchor the tail so it doesn’t pop loose the second the machine speeds up, a trick confirmed in iFixit’s winding walkthrough.
Can You Wind a Bobbin by Hand?
Yes, and it’s worth knowing even if your machine has a working winder, because winders do fail. Here’s the manual method:
- Thread the tail through the bobbin hole, or simply hold it in place with your finger against the side.
- Turn the bobbin clockwise slowly and steadily, keeping light, even tension on the thread with your other hand.
- Guide the thread side to side as you turn so it distributes across the width of the bobbin instead of piling up in the center.
- Stop before the thread reaches the outer rim, leaving a little clearance.
Pro Tip: Slide the bobbin onto a pencil or a thin dowel to act as a makeshift spindle. It gives you something to grip while you turn, which makes even tension far easier to hold.
Hand-winding takes noticeably longer than a machine winder, and the tension depends entirely on your hand, so test the finished bobbin in its case before committing to a full project.
Which Bobbin and Thread Should You Use?
Compatibility problems cause more winding headaches than technique ever does. Before you load a spool, confirm the bobbin class and material your machine actually calls for.
- Check your manual for the exact class (Class 15 and Class 66 are the most common) and whether it takes metal, plastic, or specifically the plastic drop-in style many newer machines require.
- Never substitute a different bobbin class because it “looks close.” Even a slightly different size changes tension and can jam the machine, a point Singer’s own guidance backs up directly.
- Stick to all-purpose polyester thread in the 40 to 50wt range for general sewing, and retire old or knotty spools. Fresh, quality thread winds far more consistently than thread that’s been sitting in a drawer for a decade.
- Match your bobbin thread weight to your upper thread when you can. A mismatch is a common, overlooked cause of uneven stitch tension.
- Inspect the bobbin itself for scratches or burrs before every few winds. A rough edge shreds thread invisibly until it snaps mid-seam.
If you’re stocking up, Madeira’s embroidery thread set is a solid option for readers who want consistent, reliable spools on hand.
Pro Tip: If you sew embroidery or quilting projects regularly, keep a dedicated set of bobbins just for that thread weight. Swapping weights on the same bobbin over and over accelerates wear.
Why Is My Bobbin Not Winding Evenly?
Most bobbin problems trace back to one of a handful of causes, and nearly all of them are fixable in under a minute.
- Uneven winding: the thread likely skipped the tension disk. Rethread it through the guide and rewind.
- Loose bobbin thread: often means the initial wraps weren’t secure. Rewrap the first few turns by hand and check the tension spring engagement before restarting.
- Bird-nesting under the fabric: check both the bobbin winding and the upper threading path, since either can cause it.
- Overfilled bobbin: remove the excess thread and rewind to the correct fill level rather than forcing it into the case.
- Thread breaking mid-wind: swap in fresh thread and clean out any lint buildup in the bobbin area first.
Run this checklist before every sewing session: bobbin seated correctly in the case, thread pulling in the right direction, work area free of lint, and the bobbin type confirmed correct for your machine. Most winding and stitching issues, according to common troubleshooting guidance, come down to incorrect threading or a dirty bobbin area rather than a broken machine.
If tension problems persist after rethreading, or the bobbin case looks cracked or the winder mechanism won’t engage at all, that’s your cue to check the manual’s troubleshooting section or call in a technician rather than keep fighting it.
| Problem | Quick Fix |
|---|---|
| Uneven layers | Rethread the tension disk and rewind from scratch. |
| Loose tail | Rewrap initial turns by hand, check tension spring. |
| Bird-nesting | Inspect both bobbin winding and upper thread path. |
| Overfilled bobbin | Remove excess thread, rewind to proper fill level. |
How Do You Keep a Bobbin Winder Working Reliably?
A little routine care keeps the winder mechanism and bobbin area running smoothly for years.
- Clear lint from the bobbin area after every few projects, not just when the machine starts acting up.
- Check the bobbin case and winder spindle occasionally for burrs, since a rough spindle chews up new thread fast.
- Keep spool pins and caps clean and free of buildup.
- Rotate through several spare bobbins instead of running one until it cracks, and replace any bobbin the moment it looks worn.
- Test bobbin tension on a scrap of fabric periodically, especially after switching thread weights.
Pro Tip: Dealers often recommend keeping a small set of pre-wound bobbins in your most-used thread colors. It saves you from stopping mid-project to rewind, and Sewingmachinesplus can help you find replacement bobbins that match your exact machine.
Getting Comfortable With Bobbin Winding
Your first few bobbins probably won’t look perfect, and that’s normal. Uneven layers and loose tails are part of learning the feel of your specific machine, not a sign you’re doing something wrong. Sew a quick test square after winding to check tension before you commit to a real project. A fast test stitch tells you more in thirty seconds than staring at the bobbin ever will. Routine checks and a habit of following your manual will get you winding confidently within a few tries.
Where to Find Bobbins, Thread, and Support
Once you know what your machine needs, the fastest path is having the right parts on hand instead of guessing at a craft store shelf. Sewingmachinesplus carries Class 15 metal bobbins and Class 66 plastic bobbins sized for specific machine families, plus reliable thread sets that wind more consistently than old, brittle spools. Orders over $49 ship free, and every purchase is backed by a price match guarantee, so you’re not stuck overpaying for a part you could’ve found cheaper elsewhere. If you’re not sure which bobbin class your machine takes, or whether your model is top-load or front-load, a quick consultation with the Sewingmachinesplus team can settle it before you buy anything. Start at the Sewingmachinesplus site to browse compatible bobbins or ask a question about your specific machine.
Sources
- Singer® Machine FAQs
- How to Wind a Bobbin — iFixit
- Bobbins gone bad: common problems and how to fix them — Sew Cute Patterns
FAQ
What Is the Best Way to Wind a Bobbin?
Place the correct bobbin class on the winder spindle, thread it through the tension guide, secure the tail with a few manual wraps, then wind slowly until the layers fill evenly and stop automatically or near the rim.
How Do I Wind a Bobbin on My Machine?
Follow your manual’s threading diagram for the bobbin tension guide and bobbin hole, engage the winder, and start slow so the initial wraps catch before the machine speeds up.
What Is the Correct Way to Load a Bobbin?
Seat the bobbin in its case so the thread pulls in the direction shown in your manual, usually counterclockwise for front-load machines, and confirm it drops in without resistance.
Can You Manually Wind a Bobbin?
Yes. Hold or thread the tail through the bobbin hole, turn it clockwise slowly while guiding the thread side to side, and stop before the thread reaches the outer rim.
