

Yes, most routine sewing machine cleaning is safe to do at home once you unplug the machine and remove the needle. The one hard caveat: check your owner’s manual before you oil anything, since many modern machines are self-lubricating. What follows is the full routine, tools, bobbin and hook care, oiling rules, a maintenance schedule, and troubleshooting tied to lint and needle problems.
TL;DR:
- Most routine sewing machine cleaning can be done safely at home if the machine is unplugged and the manual is checked for oiling instructions.
- Regular cleaning involves removing lint from the bobbin race, feed dogs, and tension discs, especially after sewing with high-lint fabrics.
- Deep cleaning should occur every 8 to 10 hours of sewing or after working with fleece, flannel, or minky, complemented by frequent quick lint brushings.
- Oil should only be applied if specified in the manual, using clear sewing machine oil and avoiding areas like belts, drive belts, or circuit components.
- For issues like skipping stitches or birdnesting, cleaning lint and replacing needles often fix problems, but persistent issues may require a dealer visit for internal inspection.
Table of Contents
- What Tools Do You Need to Clean a Sewing Machine?
- How Do You Clean a Sewing Machine Step by Step?
- Cleaning the Bobbin Area and Hook: What to Check For
- When Should You Oil a Sewing Machine, and When Should You Not?
- How Often Should You Clean a Sewing Machine?
- What Sewing Machine Problems Does Cleaning Actually Fix?
- How Can You Prevent Lint Buildup Between Cleanings?
- When Does a Sewing Machine Need a Dealer, Not a DIY Fix?
- Keep Your Machine Running With the Right Supplies
- Where to Learn More About Sewing Machine Maintenance
- Why Most Sewing Machine Fear Is Really Just Lint Fear
- Sources
- FAQ
What Tools Do You Need to Clean a Sewing Machine?
Most of what you need probably came in the accessory box that shipped with your machine. A small screwdriver kit, a lint brush, and a spare needle or two cover the basics for a beginner. Build from there once you start doing deeper cleans.
Here’s what to gather before you start:
- Small Phillips and flat screwdrivers (usually included in your machine’s accessory kit)
- Micro brush or the small lint brush that came with your machine
- Tweezers for pulling out wrapped or tangled thread
- Magnetic dish or small labeled container to hold screws so nothing rolls under the sewing table
- Mini vacuum with a narrow nozzle or a soft-bristle brush for loosening compacted lint
- Cotton swabs for tight corners around the bobbin case
- Toothpicks or a wooden orange stick to clear lint from between feed dogs without scratching metal
- Clear sewing machine oil, but only if your manual calls for it
- Isopropyl alcohol on a cotton pad for gummy oil residue (skip this on plastic housing parts)
- Clean, lint-free cloths and a fresh needle to finish the job
An LED inspection light or a small magnifying glass helps if you’re working on an older machine with tiny screws and dim visibility inside the bobbin cavity. A small tray nearby keeps the throat plate, bobbin case, and screws organized so reassembly doesn’t turn into a guessing game. One practical trick worth borrowing from repair shops: snap a quick photo on your phone before you remove each part. It costs you ten seconds and saves you from staring at a pile of tiny pieces wondering which screw went where.
How Do You Clean a Sewing Machine Step by Step?
This is the part most people search for, and it’s simpler than it looks once you break it into stages. Follow the order below and you’ll avoid the two most common mistakes: forgetting to unplug the machine, and reassembling parts in the wrong sequence.
- Unplug the machine completely. Pull the cord from the wall, not just the machine’s power switch. Working on a powered machine, even one that’s switched off, is the fastest way to get a needle through your finger. This step comes directly from university extension guidance on sewing machine maintenance, and it’s non-negotiable.
- Remove the top thread and spool. Snip or unwind it fully so nothing snags while you work inside the machine head.
- Take out the needle and presser foot. Loosen the needle clamp screw, slide the needle free, and unclip the presser foot. Set both aside where they won’t get lost.
- Remove the throat plate. Most machines use one or two small screws here. Drop them straight into your magnetic dish as you go.
- Lift out the bobbin case or bobbin. This is where machines split into two camps. Drop-in (top-load) bobbins usually lift straight out once the throat plate is off, no extra unlatching required. Front-loading bobbins sit inside a removable metal case that you slide out from the front of the machine, and that case itself needs a light brushing before you set it aside.
- Brush and vacuum the bobbin race, shuttle hook, and feed dogs. This area collects more lint than anywhere else on the machine. According to SewCanShe’s maintenance guide, lint buildup in the bobbin area and feed dogs is the single most common cause of sewing problems, and a simple brushing fixes a surprising number of them. Use tweezers to pull out any wrapped thread fragments the brush can’t reach.
- Clean the tension discs. With the presser foot lifted (this releases the discs), run a strip of clean cotton fabric or thread back and forth between them like dental floss. If you see dark, gummy residue, dampen a cotton swab with isopropyl alcohol and work it gently between the discs. Avoid alcohol near plastic housing or printed labels, since it can dull or strip the finish.
- Reassemble in reverse order. Bobbin case or bobbin first, then throat plate, then presser foot, then a brand-new needle. A fresh needle matters here. Reinstalling a dull or bent needle after a thorough cleaning undercuts the whole effort.
- Test on scrap fabric. Run a few inches of straight stitch and a zigzag on a fabric scrap before you go back to your project. Check for even stitch tension on both sides and listen for any new noise.
Pro Tip: If the handwheel feels stiff or hard to turn during reassembly, don’t force it. Grit or old lint can jam a bearing, and forcing the wheel risks bending something delicate. A light flush with cleaning fluid and a few slow hand turns usually loosens it back up, according to NMSU Cooperative Extension’s maintenance guidance — just let any solvent evaporate fully before you oil.
If at any point a screw won’t budge or a part looks like it’s held in with something other than a standard screw, stop. That’s usually a sign you’ve reached the edge of what a manual is designed to walk you through, and forcing it risks the kind of internal damage that turns a 20-minute cleaning session into a repair bill.
Cleaning the Bobbin Area and Hook: What to Check For
The bobbin race and hook assembly do more work than any other moving part on your machine, which is exactly why they collect the most lint. Getting into this area safely depends on your bobbin style: drop-in bobbins typically expose the race the moment the throat plate comes off, while front-loading systems require you to also slide out the removable hook race cover.
Once you’re in, look for a few specific things:
- Wrapped thread around the hook shaft. Even a few strands can throw off timing over weeks of sewing, so tweezers are essential here, not optional.
- Compacted lint “cake” in the feed dog grooves. This builds up in thin layers until it hardens into a solid block that stops the feed dogs from gripping fabric evenly. A toothpick or a stiff brush usually breaks it loose.
- Burrs or rough edges on the hook or race surface. Run a fingertip (carefully) along the metal. Any snag or roughness is a sign of wear.
If you find a burr, do not try to file or sand it yourself unless a technician has specifically walked you through it. A burr changes how thread glides through the hook assembly, and an amateur fix can make the surface worse instead of smoother. This is one of the clearest lines between DIY cleaning and dealer territory.
When Should You Oil a Sewing Machine, and When Should You Not?
Oil is where well-meaning sewists get into trouble. The rule is simple: your owner’s manual has the final word, and a growing number of modern machines are designed to run oil-free. Adding oil to a machine that wasn’t built for it can attract more lint than it prevents, and it can stain fabric on your next project.
If your manual specifically calls for oiling:
- Use only clear sewing machine oil, never household oil and never WD-40. WD-40 is a solvent and water-displacer, not a lubricant, and it can gum up over time or damage rubber parts.
- Apply one small drop per designated oil hole or bearing point, exactly where the manual shows.
- Turn the handwheel by hand several times afterward to work the oil through the mechanism.
- Wipe away any excess with a clean cloth, then stitch on a scrap fabric first to catch any oil that might bleed into your next seam.
Never oil tension discs, drive belts, rubber feed rollers, or anything near circuit boards. NMSU Extension’s maintenance guidance specifically warns against oiling nylon or graphite-impregnated bronze bearings, since those parts are engineered to run without added lubrication. If you’re not sure which category your machine falls into, that uncertainty is itself the signal to check the manual before reaching for the oil bottle.
How Often Should You Clean a Sewing Machine?
Think in layers: a quick brush after nearly every project, and a deeper clean on a set schedule. Trying to remember “when did I last clean this” never works as well as tying the habit to something concrete, like bobbin count or hours sewn.
- Quick lint brush: after every project, or at minimum every 2 to 3 bobbins, per the frequency Diary of a Quilter recommends for regular users.
- Deeper bobbin and feed-dog clean: every 8 to 10 hours of sewing time, or immediately after working with high-lint fabrics like fleece, flannel, or minky.
- Dealer servicing: annually for computerized and high-end machines, since some internal lubrication and timing checks only happen in a shop setting.
- Needle replacement: every time you do a deep clean, or sooner if you notice skipped stitches, popping sounds, or visible thread shredding.
Our full sewing machine maintenance guide breaks this cadence down further if you sew across a mix of fabric weights.
What Sewing Machine Problems Does Cleaning Actually Fix?
A surprising share of “my machine is broken” panic calls turn out to be lint, not mechanical failure. Here’s how to match the symptom to the fix before you assume the worst.
- Skipping stitches. Start with a fresh needle, since a dull or slightly bent one is the most common cause. If new needles don’t help, clean the bobbin and tension area and check the hook for burrs. Our guide to skipping stitches walks through the less obvious causes.
- Birdnesting underneath the fabric. Rethread the top thread completely, clean the tension discs with cotton fabric, and check that the bobbin sits correctly in its case. Low-quality thread that sheds fibers makes this worse, so switching thread brands sometimes solves what cleaning alone can’t. If it keeps happening, our bobbin thread diagnostic checklist covers the remaining causes.
- Rhythmic clunking or knocking. Clear lint from the feed dogs and bobbin race first. SewCanShe recommends a simple test here: remove the needle and bobbin, then turn the handwheel by hand. If the clunk continues with nothing else moving through the mechanism, that’s an internal timing or gear issue, not a lint problem.
- When to stop troubleshooting. If you’ve cleaned, changed the needle, and rethreaded and the problem persists, further DIY attempts risk making things worse. That’s your cue to book a dealer appointment rather than keep guessing.
How Can You Prevent Lint Buildup Between Cleanings?
A little prevention goes a long way toward shrinking how often you need a deep clean. Cover your machine when it’s not in use and keep it unplugged between sessions, both to block dust and to keep curious pets or kids away from the pedal.
- Store thread spools in a sealed container or drawer instead of leaving them exposed to open air.
- Choose higher-quality thread where you can. Cheap thread sheds more short fibers, and those fibers are exactly what clogs your tension discs and bobbin race.
- Wipe down a spool’s outer layer before threading it, since dust settles on the exposed thread first.
- Keep a small cleaning kit (brush, mini vacuum, tweezers) sitting right next to your machine so quick touch ups actually happen.
- Swap needles on a regular schedule rather than waiting for visible damage.
Pro Tip: Skip canned compressed air on an assembled machine. The propellant can force dust and lint deeper into the mechanism instead of out, which is why SewCanShe advises against it in favor of a mini vacuum or a soft brush.
When Does a Sewing Machine Need a Dealer, Not a DIY Fix?
Cleaning solves lint, thread tangles, and most tension complaints. It does not solve timing drift, worn gears, or electronic faults, and trying to chase those with a brush and a screwdriver usually makes diagnosis harder for the technician who eventually sees it. A dealer visit typically covers a timing check, gear wear inspection, internal lubrication that’s inaccessible from the outside, worn part replacement, and a general safety check of the wiring and pedal.
Before you call, have your model and serial number ready, along with a plain description of the symptom and when it started. Dealers recommend an annual check for computerized machines and for anyone sewing heavy volume, since some internal servicing genuinely can’t happen outside a shop.
Keep Your Machine Running With the Right Supplies
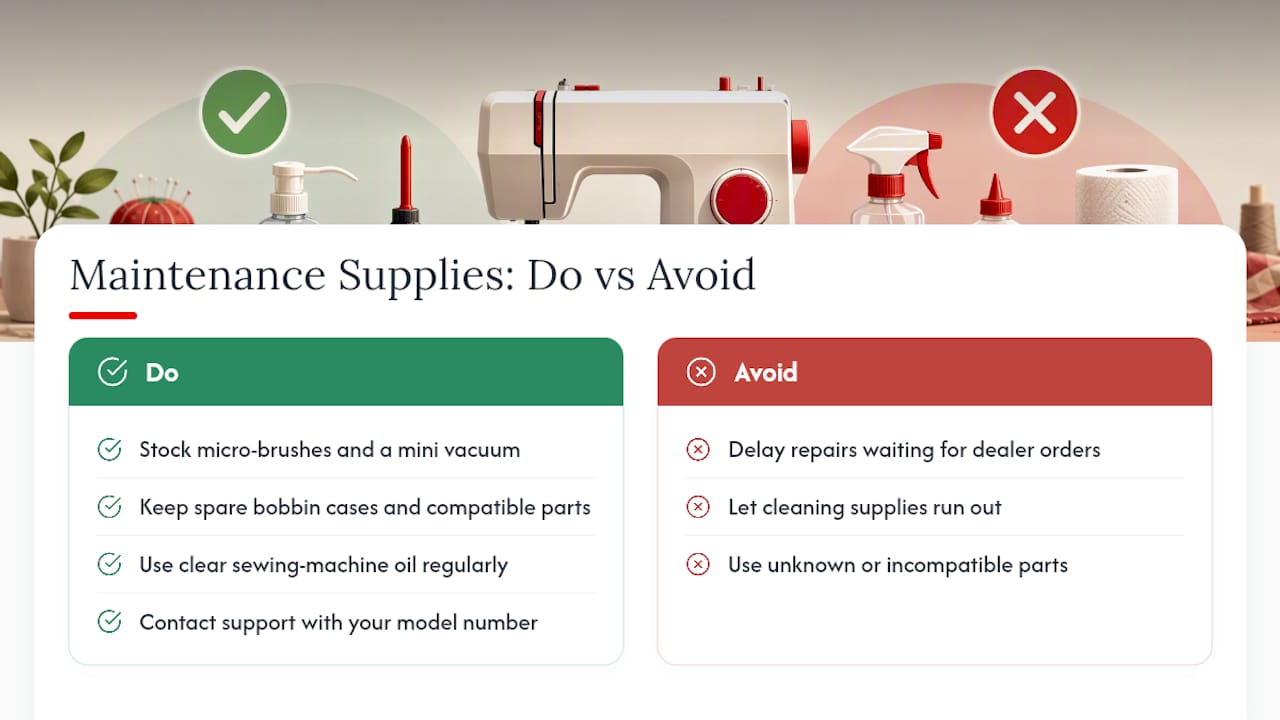
Every tool in this guide, from micro brushes and mini vacuums to clear sewing machine oil and replacement needles, is the kind of small purchase that pays for itself the first time it saves you a repair bill. Cleaning supplies, bobbin cases, and compatible replacement parts keep a routine maintenance habit cheap and simple, instead of turning into a scramble every time something goes missing from your kit. If a deep clean reveals a worn or damaged bobbin race, a compatible bobbin case is a faster fix than waiting weeks for a dealer order. Not sure which oil, needle size, or part fits your specific model? Reach out to Sewingmachinesplus customer support with your model number, and start browsing maintenance supplies and machines to build out a cleaning kit that actually matches what your machine needs.
Where to Learn More About Sewing Machine Maintenance
For deeper reading beyond this guide, UC ANR’s extension publication on sewing machine maintenance and NMSU Cooperative Extension’s maintenance guide both offer manufacturer-neutral, safety-focused instructions worth bookmarking alongside your machine’s manual.
Why Most Sewing Machine Fear Is Really Just Lint Fear
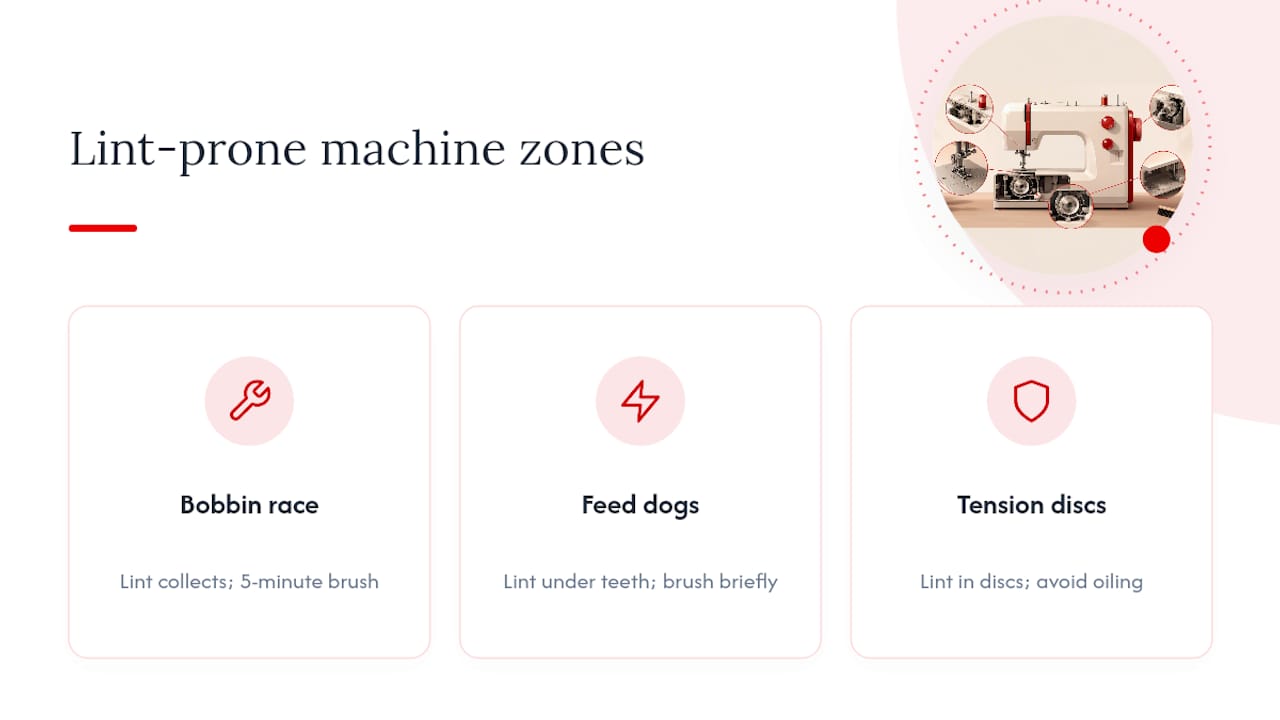
The biggest misconception about home sewing machine care isn’t about tools or oil. It’s the assumption that anything inside the machine head is fragile and mysterious, best left untouched. In reality, the overwhelming majority of “my machine is acting up” moments trace back to lint sitting exactly where it always sits: the bobbin race, the feed dogs, the tension discs. That’s not a mechanical failure. That’s a five-minute brush job.
Where I think sewists overcorrect is oiling. There’s a persistent old-school instinct to oil a machine the moment it sounds a little dry, and that instinct is increasingly wrong. Modern machines, especially computerized ones, are built with sealed or self-lubricating parts specifically so home sewists don’t need to guess. Reaching for the oil bottle out of habit, instead of checking the manual first, causes more staining and gummed-up mechanisms than it prevents.
The real skill isn’t knowing how to clean a sewing machine. It’s knowing where the line sits between what a brush and screwdriver can fix and what needs a technician’s eyes on the timing gears. Sewists who respect that line get decades out of a machine. Sewists who don’t tend to turn a $40 cleaning kit into a $200 repair bill.
— Chris
Sources
- Sewing machine maintenance (UC ANR extension guidance)
- Sewing Machine Maintenance (NMSU Cooperative Extension)
- Sewing Machine Maintenance: The Complete Guide to Cleaning, Oiling & Care (SewCanShe)
- How to Clean Your Sewing Machine (Diary of a Quilter)
FAQ
What Is a Good Sewing Machine Cleaner Spray?
Most manufacturers recommend against aerosol cleaner sprays on an assembled machine, since propellants can push dust deeper into the mechanism rather than out. A soft brush or a mini vacuum with a narrow nozzle handles lint more safely.
Can I Use Rubbing Alcohol to Clean My Sewing Machine?
Isopropyl alcohol on a cotton swab works well for gummy oil residue on metal tension discs and hook assemblies. Avoid using it on plastic housing, painted surfaces, or LCD screens, since it can dull the finish.
Can WD-40 Be Used to Oil a Sewing Machine?
No. WD-40 is a solvent and water-displacer, not a proper lubricant, and it can gum up internal parts over time. Use only clear sewing machine oil, and only where your manual specifically calls for it.
How Do You Clean a Very Old Sewing Machine?
Older mechanical machines often have more oiling points than modern ones, so track down the manual or contact the manufacturer if you don’t have it. Focus first on removing decades of compacted lint from the bobbin race and feed dogs before you touch any oil holes, since old, hardened lint is usually the real cause of sluggish stitching.
How Often Should You Deep-Clean a Sewing Machine?
Plan on a deeper clean of the bobbin area and feed dogs every 8 to 10 hours of sewing, or right after a project using high-lint fabric like fleece or minky. A quick lint brush after every project or every 2 to 3 bobbins keeps buildup from compacting in between.
