

Every sewer needs a handful of core presser feet to handle 90% of projects: universal/zigzag, zipper, invisible zipper, buttonhole, blind hem, walking/even-feed, 1/4" quilting, and darning/free-motion. Before buying any of them, check your machine’s shank type and attachment style (snap-on, screw-on, or brand-specific), since a foot that fits your neighbor’s machine might not fit yours at all.
TL;DR:
- Most home sewing machines use low-shank snap-on presser feet, which are the most widely compatible and easiest to change.
- Specialty feet like zipper, invisible zipper, and ruffler should be tested on scraps of your fabric to prevent costly mistakes.
- Proper attachment includes raising the needle and presser foot, then securely clicking or tightening the new foot before testing on similar fabric.
- Compatibility relies on matching shank type and attachment method, especially for European brands like Bernina or Pfaff that may need adapters.
- Consulting a knowledgeable retailer or support team can prevent buying the wrong foot and ensure it fits your specific machine.
Table of Contents
- Common Presser Feet Types and What They Do
- Zipper Feet and Invisible Zipper Feet: Getting Clean Insertions
- Buttonhole Feet and Button Sewing Feet
- Blind Hem and Rolled Hem Feet: Invisible Finishes Made Simple
- Overcast Feet and Serger Alternatives
- Walking Foot: Solving the Layer-Shift Problem
- Quilting and Patchwork Feet for Accurate Piecing
- Free-Motion, Darning, and Embroidery Feet
- Gathering, Ruffler, and Decorative Automation Feet
- Shank Types and Attachment Systems: The Compatibility Rules That Matter Most
- How to Choose, Attach, and Maintain Your Presser Feet
- How Sewingmachinesplus Helps You Find the Right Fit
- Author Tips: Small Habits That Save Real Money
- Get the Right Presser Feet Without the Guesswork
- Sources
- FAQ
Common Presser Feet Types and What They Do
Your machine almost certainly came with a universal foot already attached, and it earns that name honestly. It handles straight stitches, zigzag stitches, and most basic decorative stitches without complaint, which makes it the default choice for seams, topstitching, and general construction work.
The wide opening in a universal foot lets the needle swing side to side for zigzag and satin stitches, and the flat bottom keeps light to medium fabrics feeding evenly. Keep it mounted for everyday sewing. Switch away from it only when a task demands something the universal foot cannot do well, like guiding a zipper pull or feeding two fabric layers at exactly the same rate.
Here’s how to think about the rest of your presser foot toolkit, since each one exists to solve a specific problem rather than to add complexity for its own sake:
- Zipper foot: Narrow profile that lets the needle stitch close to a zipper’s teeth without hitting them.
- Buttonhole foot: Measures and stitches consistent buttonholes, either automatically or through manual back-and-forth passes.
- Blind hem foot: Uses a guide to catch just a thread or two of fabric for an invisible hem.
- Overcast foot: Wraps thread around a raw edge to slow fraying when you don’t own a serger.
- Walking foot: Feeds the top fabric layer at the same pace as the machine’s feed dogs, which matters most on quilts and slippery fabrics.
- 1/4" quilting foot: Keeps piecing seams at a consistent quarter inch without you watching a ruler line.
- Darning/free-motion foot: Hovers just above the fabric so you can guide stitching by hand with the feed dogs dropped.
Sewing tutors and retailers agree that specialty presser feet exist to solve a specific sewing challenge, not to add bells and whistles you’ll never touch. Buy based on the problem in front of you, not the size of the accessory box.
Zipper Feet and Invisible Zipper Feet: Getting Clean Insertions
A standard zipper foot is narrower than your universal foot and often has a notch cut out on one side or both, letting the needle sew right along the zipper tape without the foot riding up over the teeth. Some are one-sided, meaning you flip the foot around depending on which side of the zipper you’re stitching. Adjustable zipper feet solve that by letting you slide the needle position left or right instead of swapping the foot itself, which speeds up projects with lots of zipper work.
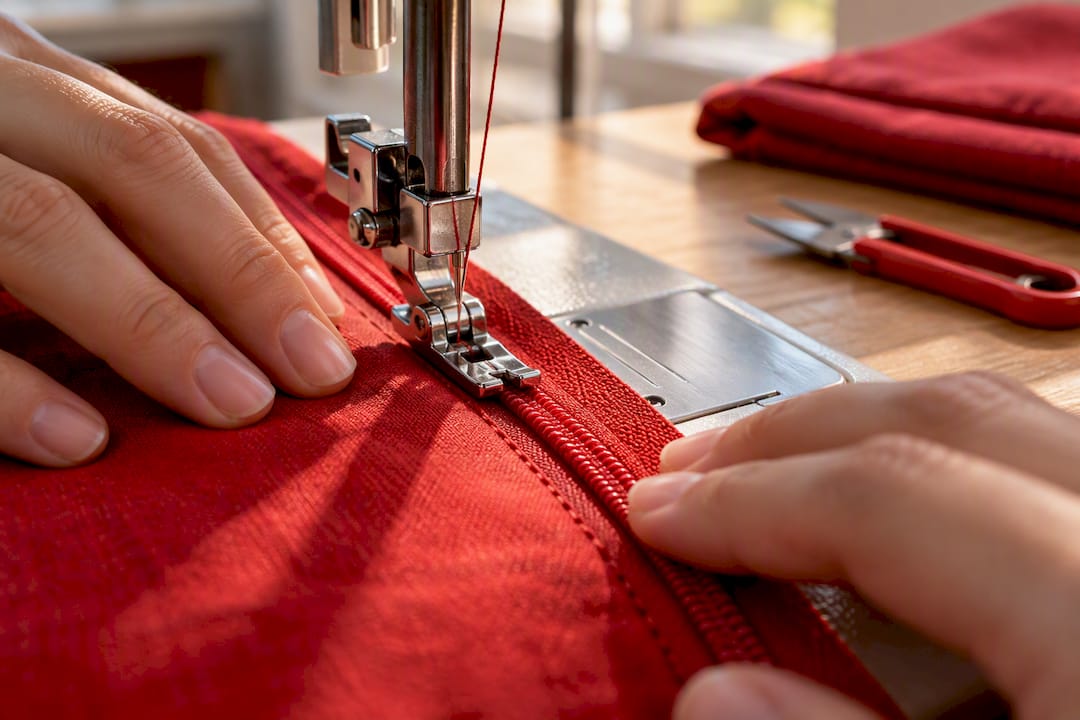
An invisible zipper foot looks different again: it has two grooves on the underside that roll the zipper’s coils upright as they pass under the needle, so the finished seam shows no visible stitching or zipper tape at all. This only works with actual invisible zippers, not standard ones, since the coil shape has to match the grooves.
Pro Tip: Match your thread color to the zipper tape, not the surrounding fabric. Zipper tape often reads slightly different from your fabric under bright light, and matched thread hides small stitching wobbles far better than matched fabric color does.
Follow this sequence for a cleaner result on your next zipper:
- Baste the seam closed where the zipper will go, then press the seam open.
- Position the zipper face down over the basted seam with teeth centered on the seamline.
- Switch to your zipper foot (or invisible zipper foot for a hidden finish).
- Stitch one side, then the other, keeping the foot’s edge or groove against the coils.
- Remove the basting stitches and press the finished zipper flat.
Test the whole sequence on a scrap of your actual project fabric first. Zipper insertion is one of those skills where a five-minute practice run saves you from unpicking stitches out of your good fabric later.
Buttonhole Feet and Button Sewing Feet
Most modern machines use a 1-step automatic buttonhole foot, which measures your button by holding it in a small tray at the back of the foot and stitches the entire buttonhole in one continuous pass. Older or more basic machines rely on a 4-step manual buttonhole foot instead, where you stitch each side and end individually using marked settings on the machine.
The automatic version is faster and more consistent once it’s calibrated correctly. The manual version gives you more control over buttonhole length, which matters on thick fabrics like coating wool where the button tray method can misjudge the size.
- Always test your buttonhole on a scrap of the same fabric and interfacing you’re using in the final garment.
- Check that your button slides through the test buttonhole snugly, not loosely, since buttonholes stretch slightly with wear.
- Use a seam ripper or buttonhole cutter to open the slit, working from both ends toward the center to avoid cutting through the stitching.
- Switch to a button sewing foot when you need to attach buttons by machine instead of by hand; it holds the button steady while a wide zigzag stitch passes through the holes.
A button sewing foot saves real time on multi-button projects like shirts, but it takes practice to get thread tension right on buttons with a shank versus flat two-hole or four-hole buttons.
Blind Hem and Rolled Hem Feet: Invisible Finishes Made Simple
A blind hem foot has a small metal or plastic guide down the center that you position right against the folded edge of your hem. Your machine’s blind hem stitch does the rest: it sews several straight stitches, then makes one zigzag stitch that jumps left to catch just a couple of threads of the folded fabric before returning to straight stitching.
On many home machines, this foot is labeled simply “Foot R.” Brother’s own guidance confirms that the blind stitch presser foot is designed to catch only a small portion of the fabric when the fold sits correctly against the guide, which is what produces a hem that’s nearly invisible from the right side.
Blind hems work best on medium to heavyweight fabrics like wool, denim, and structured cottons, where a little bulk in the fold hides the stitching. Rolled hem feet are a different animal entirely, built for lightweight and sheer fabrics like chiffon or voile. They curl a narrow strip of raw edge into a tiny tube as it feeds through, and a straight or narrow zigzag stitch locks it in place without any pinning.
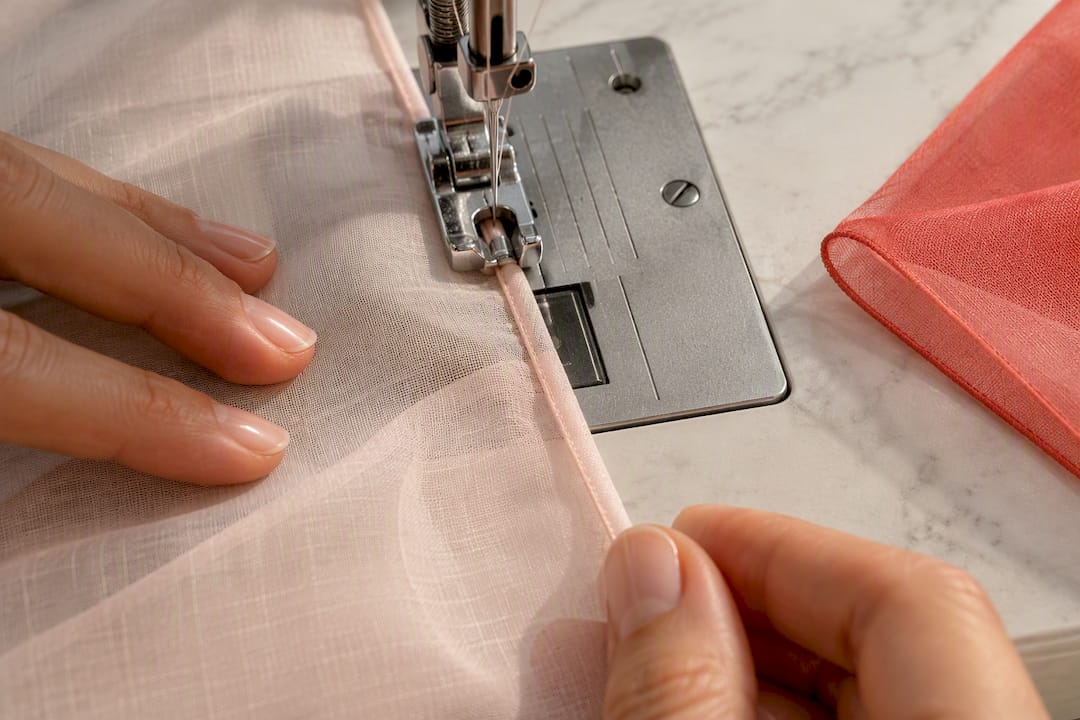
Pro Tip: Before you start your blind hem, fold and press the hem allowance, then fold it back on itself by about a quarter inch. Feed that folded edge against the foot’s guide rather than the raw fabric edge. That extra fold is what keeps the stitch catch consistent from one end of the hem to the other.
Set your stitch width so the zigzag jump is just wide enough to catch the fold without stitching all the way through to the front of the garment. Test on scrap first. Every machine’s default blind hem width is slightly different.
Overcast Feet and Serger Alternatives
An overcast foot (sometimes called an overedge foot) has a small wire or metal guide bar that keeps a raw fabric edge from curling while your machine’s overcast stitch wraps thread around it. It’s the closest a standard sewing machine gets to a true serger finish, and for hobby-level projects, it often does the job well enough.
The tradeoff is speed and trim. A serger cuts and finishes an edge in one pass and trims excess fabric as it goes. An overcast foot on a regular machine only wraps the edge; you still need to trim close to the stitching yourself with scissors.
- Overcast feet work best on woven fabrics that fray easily, like linen, cotton broadcloth, and quilting cotton.
- They’re less effective on very stretchy knits, which tend to need a stretch stitch or actual serger to avoid puckering.
- Pair the foot with your machine’s overcast or overlock stitch setting, not a plain zigzag, for the cleanest wrap.
- If you’re finishing garment seams regularly, consider renting or borrowing a serger for a project rather than relying on the overcast foot long term, since sergers handle knit fabrics and bulk seams far more efficiently.
Walking Foot: Solving the Layer-Shift Problem
A walking foot has its own built in feed mechanism that grips the top fabric layer and moves it forward in sync with the feed dogs underneath. On a standard foot, only the bottom layer gets pulled through by the feed dogs, and top layers can lag behind, bunch up, or shift out of alignment over the length of a seam.
That shifting problem shows up most on quilt sandwiches (top, batting, and backing), slippery fabrics like satin or minky, and any project where matching a plaid or stripe across a seam actually matters. A walking foot keeps all the layers moving together, which is why quilters treat it as close to essential once they move past small piecing work into actual quilting.
- Quilting through batting and backing is the most common reason hobbyists buy a walking foot.
- Slippery synthetics and pile fabrics like velvet also benefit heavily from the even feed.
- Matching plaids, stripes, or engineered prints across a seam gets noticeably easier with even feed on both layers.
Walking feet come in both snap-on and screw-on mounting styles, and some models require screw-on attachment on machines that lack a compatible snap-on adaptor. Check your machine’s shank type before ordering. A walking foot built for Brother, Baby Lock, and Elna machines will list its compatible mounting style directly on the product page, which saves you the guesswork.
Quilting and Patchwork Feet for Accurate Piecing
Piecing accuracy lives or dies on a consistent seam allowance, and a 1/4" quilting foot is built specifically to enforce that measurement without you tracking a ruler line the whole time. The foot’s edge sits exactly a quarter inch from the needle, so you simply keep the fabric edge running along the foot’s edge as you stitch.
Many 1/4" feet also include a small guide bar on the side, which helps you follow a pieced seam for stitching in the ditch, a technique where you quilt directly along the seamline between two pieces of fabric so the stitching disappears into the seam itself. A dedicated ditch quilting foot has a taller center ridge instead of a side guide, letting you follow the seam groove more precisely on thicker quilt sandwiches.
- A consistent quarter inch across dozens of pieced blocks is the difference between a quilt that lies flat and one that puckers or won’t square up.
- Guide feet help you stitch parallel lines a set distance from a seam, useful for echo quilting and channel quilting patterns.
- Drop your stitch length slightly when quilting through multiple layers (roughly 2.5 to 3mm is a common starting point) to help the stitches lock cleanly through the extra thickness.
- Loosen top tension slightly if you notice the bobbin thread pulling up through the quilt top, which is common once you add batting and backing to the mix.
A 1/4" quilting and patchwork foot with a side guide fits a wide range of domestic machines and remains one of the most-used accessories among quilters who piece regularly.
Free-Motion, Darning, and Embroidery Feet
Free-motion sewing flips the usual rules: instead of the feed dogs controlling fabric speed while you guide direction, you control both speed and direction entirely by hand while the feed dogs stay dropped or covered. A darning foot, sometimes called a free-motion foot, hovers just above the fabric on a spring-loaded arm, giving you enough clearance to move the fabric freely while still holding it down each time the needle drops.
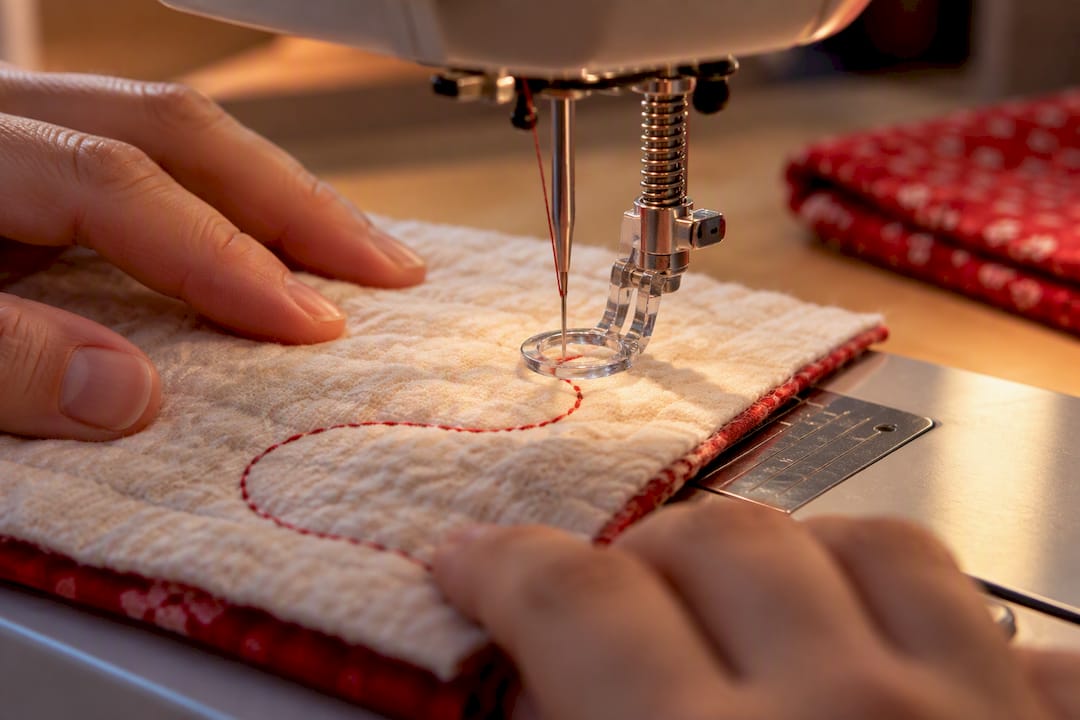
This setup is what makes free-motion quilting designs, thread sketching, and monogramming possible on a standard home machine. Drop your feed dogs (or cover them, depending on your machine), attach the darning foot, and switch to a slightly heavier needle, typically a topstitch or quilting needle, since free-motion work puts more lateral stress on the needle than straight-line sewing does.
Pro Tip: Go slower than feels natural when you’re starting out. Free-motion stitching rewards steady, even fabric movement far more than speed, and a slower pace gives you time to correct direction before a curve gets away from you.
An open-toe embroidery foot swaps the darning foot’s closed loop for a U-shaped front opening, giving you a clear sightline to the needle for decorative stitches and appliqué work where visibility matters more than fabric clearance. Keep an eye on needle strikes against either foot. A bent needle hitting a darning foot’s wire loop is a common beginner mistake, and it’s one you’ll hear before you see, so stop immediately if you notice an odd clicking sound. A low-shank darning foot compatible with Baby Lock, Brother, Janome, Elna, and Singer machines covers most home setups if you’re shopping for your first one.
Gathering, Ruffler, and Decorative Automation Feet
A gathering foot bunches fabric automatically as it feeds through, useful for ruffled trim, gathered skirts, and simple decorative edges without hand-gathering by needle and thread first. A ruffler foot goes further, using an adjustable arm and blade mechanism to create deep, evenly spaced pleats or gathers, the kind you’d see on a formal ruffled hem or a period costume.
- Gathering feet handle light gathering on lightweight to medium fabrics, like a ruffled trim on a pillowcase.
- Ruffler feet handle heavier, more dramatic gathering and pleating, and they let you adjust pleat depth and spacing with a dial.
- Pintuck feet use multiple closely spaced grooves paired with a twin needle to stitch narrow decorative folds in one pass.
- Piping/cording feet have a channel underneath that guides cord or piping snugly against a seam for a clean, corded edge.
A ruffler genuinely saves time if you’re gathering long runs of fabric regularly, like curtain projects or costume work with yards of ruffled trim. For a single small project, hand-gathering with a basting stitch and a gentle pull on the bobbin thread often gets you there just as fast without buying a specialty foot you’ll use once. Start with borrowed or rented specialty feet before committing to a full kit, since many beginners overbuy specialty accessories they end up using rarely.
Shank Types and Attachment Systems: The Compatibility Rules That Matter Most
Presser foot compatibility comes down to two things: shank height and attachment method, and getting either one wrong is the single most common reason a beginner ends up with a foot that won’t mount. Compatibility depends on shank height, low, high, or slant, and whether your machine uses snap-on or screw-on attachment, and not all feet cross over between brands even when the shank height matches.
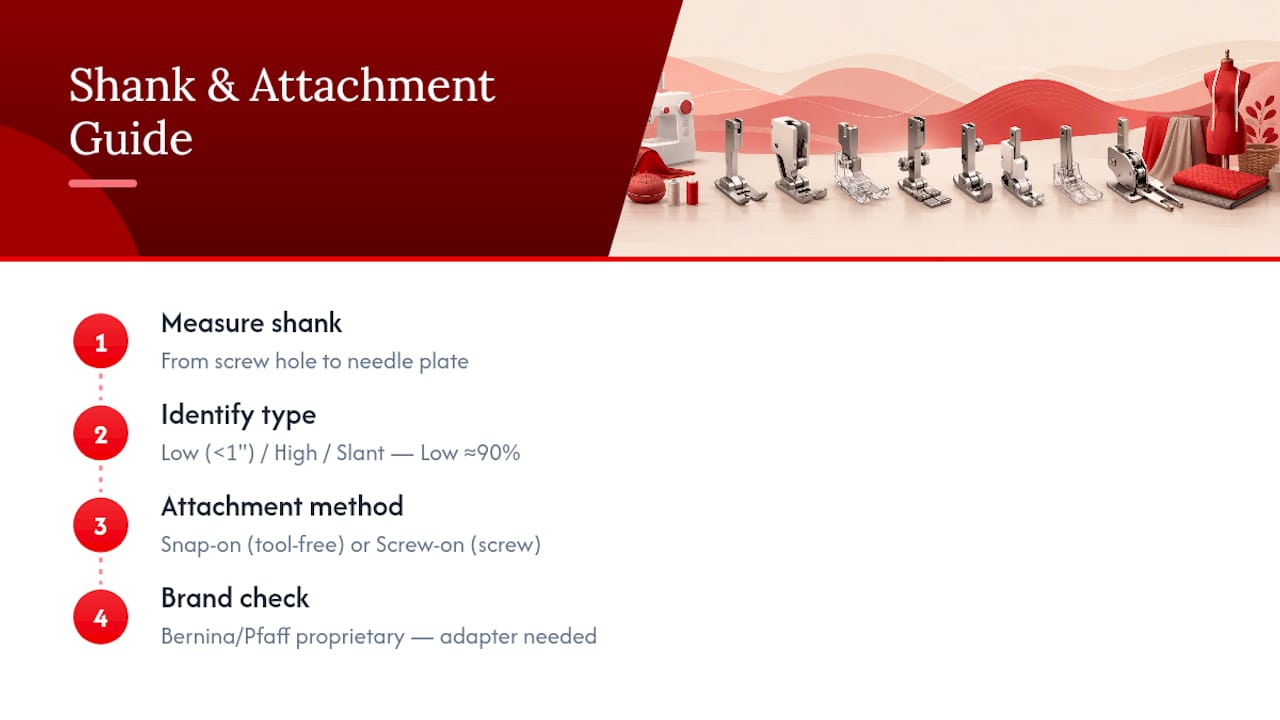
To identify your shank, lower the presser foot bar and measure from the center of the screw hole down to the needle plate. A short measurement, typically under an inch, means low shank. A taller measurement points to high shank, and an angled foot holder indicates a slant shank, common on some older Singer models.
Roughly 90% of home sewing machines use low-shank systems, which is why low-shank snap-on feet dominate retail shelves and why most beginner-friendly feet you’ll find are built for that system. If you own a low-shank machine, you’re shopping from the largest and most affordable pool of options available.
Snap-on feet click onto a shank without tools, using a spring-loaded ankle. Screw-on feet require a small screwdriver to loosen and tighten a thumbscrew holding the foot to the shank. Most snap-on feet share a common design across many machines, but Bernina, Pfaff, and some other European brands use proprietary shank systems that won’t accept generic snap-on feet without a specific adapter. If you own one of those brands, always check for a brand-specific foot or adapter before buying based on shank measurement alone.
How to Choose, Attach, and Maintain Your Presser Feet
Run through four questions before buying any specialty foot: what task are you solving (zipper, hem, quilting seam), what fabric are you using (lightweight, heavy, stretch), what shank does your machine have, and does your machine’s feed system need extra help (walking foot for slippery fabric or multiple layers). That order matters. Task and fabric determine which foot you need; shank and feed system determine which version of that foot will actually fit.
Once you have the right foot in hand, swapping it safely takes the same five steps every time:
- Raise the needle to its highest position using the hand wheel or up/down button.
- Raise the presser foot lever.
- Release the current foot, either by pressing the snap-on lever or loosening the screw with a screwdriver.
- Attach the new foot and lower the presser foot lever until it clicks or tightens into place.
- Test on a 2 to 3 inch scrap of similar fabric, checking feed and tension before moving to your actual project.
Quick fact: Roughly 9 out of 10 home sewing machines run on low-shank systems, which is worth remembering the next time you’re comparing two nearly identical presser feet online and can’t tell which one your machine actually needs.
Maintenance is simpler than most beginners expect, but one habit matters more than the rest: always raise the foot and needle before pulling fabric out from under the machine, and pull it toward the back, never forward or sideways. University extension guidance on machine maintenance confirms that improper fabric removal is a common cause of foot damage and needle bar stress. Wipe lint out from under the foot area after every few projects, and store feet in a labeled case or divided box so you’re not hunting through a junk drawer mid project.
How Sewingmachinesplus Helps You Find the Right Fit
Compatibility questions are the number one reason hobbyists get stuck before they even start a project, and that’s exactly where Sewingmachinesplus earns its reputation. The company has built its catalog around solving common shank and attachment questions, not just selling parts and hoping they fit.
When you reach out for a consultation, expect real part lookup support: a team member can confirm your machine’s shank type, cross-reference which feet or adapters will actually mount, and flag brand-specific quirks like Bernina’s proprietary system before you spend a dime.
- Wide selection across low-shank, high-shank, and brand-specific feet, adapters included.
- A price match guarantee to ensure competitive pricing.
- Free shipping on qualifying orders.
- Direct guidance on presser feet, shank types, and fit checks before you buy.
If you already know which foot you need, product pages for items like the invisible zipper foot list exact machine compatibility right on the page, so you can double check fit before checkout instead of after.
Author Tips: Small Habits That Save Real Money
Test every new foot on a scrap of your actual project fabric before committing, full stop. It takes two minutes and it catches tension issues, feed problems, or a fold that’s not sitting right against a guide before those mistakes end up in your finished piece.
Keep presser feet in a labeled case, divided by type, rather than loose in a drawer. When you’re shopping for a replacement or a new specialty foot, snap a photo of your mounted foot and the shank area first. That photo tells you (and any retailer you’re asking for help) exactly what attachment style you’re working with, without guessing from memory at the store or online.
Before buying an uncommon specialty foot like a ruffler or pintuck foot, see if a sewing friend, local guild, or fabric shop will let you borrow or test one first. A single afternoon with a borrowed foot tells you whether it’s worth owning far better than a product description ever will.
— Chris
Get the Right Presser Feet Without the Guesswork
Sewingmachinesplus turns the shank and attachment questions covered in this guide into a two-minute conversation instead of a returns headache. Rather than ordering a foot online and hoping it fits, you can get a compatibility check from a real person, backed by a price match guarantee and free shipping on orders over $49.
Start at the Sewingmachinesplus homepage to browse walking feet, 1/4" quilting feet, zipper and invisible zipper feet, and shank adapters by machine brand. If you’re not sure which category applies to your project, request a fit check through customer support before you order; it’s the fastest way to avoid buying a foot that never mounts to your machine.
Sources
The compatibility advice in this guide draws directly from established sewing references rather than guesswork.
- Will This Presser Foot Fit My Sewing Machine?
- Create and use blind hem stitching - Brother USA support
- Sewing machine maintenance and operation (NMSU extension)
Manufacturer help pages for your specific machine brand and model always take priority over general guidance when the two disagree, since mounting details can vary between product lines even within the same brand.
FAQ
Are all presser feet compatible with all sewing machines?
No. Compatibility depends on your machine’s shank height (low, high, or slant) and whether it uses snap-on or screw-on attachment, and not all feet interchange across brands even when shank height matches. Bernina, Pfaff, and some other European brands often need a brand-specific foot or adapter.
What is presser foot R used for?
Foot R is Brother’s name for its blind stitch presser foot, used to sew invisible hems on garments and home decor projects. It guides the fabric so the blind hem stitch catches only a small portion of the fold, which keeps the stitching hidden from the right side.
Which presser foot is best for a beginner to buy first?
The universal/zigzag foot that comes with your machine already covers most everyday sewing, so it isn’t usually a separate purchase. Beyond that, a walking foot and a 1/4" quilting foot tend to deliver the most practical value for hobbyists moving into quilting or garment work.
What are the different types of sewing machine feet?
The most common types include universal/zigzag, zipper, invisible zipper, buttonhole, blind hem, rolled hem, overcast, walking/even-feed, 1/4" quilting, darning/free-motion, and gathering or ruffler feet. Each one is built to solve a specific sewing task rather than replace the universal foot entirely.
How do I find presser feet that fit my specific machine?
Measure your shank height and check whether your machine uses snap-on or screw-on attachment, then match that against the foot’s listed compatibility. Sewingmachinesplus’s presser foot guide walks through this process, and its team can run a fit check if you’re unsure after measuring.
