

The fastest path to a productive sewing room is a zone based layout, cutting to sewing to pressing, arranged so your body barely has to move between steps. Set table and chair heights for your elbows, not the furniture’s default, and keep scissors, pins, and thread stored exactly where you reach for them. Everything below gives you adaptable templates and a checklist to make that real.
TL;DR:
- Efficient layouts keep essential stations within arm’s reach, with a work triangle of cutting, sewing, and pressing areas optimized for small movements.
- Height-adjusted furniture and anti-fatigue mats significantly reduce musculoskeletal strain during long sewing sessions.
- Vertical storage solutions like pegboards and wall racks maximize space, keeping tools and fabric easily accessible without cluttering floors.
- Proper lighting, including layered task lamps and natural light, improves precision and reduces eye strain, especially when outlets are planned near work zones.
- Using multi-purpose furniture and budget-friendly repurposed items can create a functional sewing room that easily adapts to different uses or space constraints.
Table of Contents
- Sewing Room Layout Ideas for Every Room Size
- Zones and Ergonomics: The Measurements That Matter
- Storage Ideas That Keep Tools Within Reach
- Lighting and Power Placement for Precision Work
- Small Sewing Space Ideas on a Tight Budget
- Building a Project Workflow That Doesn’t Fall Apart
- How to Measure and Sketch Your Layout Before You Buy
- Ventilation and Air Quality in Your Sewing Room
- Managing Noise for a Calmer Sewing Session
- Setting Up Your Machine and a Digital Station for Patterns
- Storing Fabric Bolts and Bulky Materials
- Safety Basics: Sharp Tools and Iron Placement
- Multipurpose Furniture for Rooms That Do Double Duty
- Author Perspective: What Actually Matters When You Design This Room
- Get the Machines and Furniture to Match Your Layout
- Sources
- FAQ
Sewing Room Layout Ideas for Every Room Size
The right layout depends less on square footage than on how you actually work. Here are six templates worth sketching out before you commit to furniture placement.
- Corner compact: Best for single-machine sewers in small rooms. Keep at least 30 inches of clearance behind your chair so you can push back without hitting a wall.
- Island or work island: Best for quilters juggling cutting, basting, and pressing in one project. Leave room to walk fully around it, and use the space underneath for bin storage.
- L-shaped wall lineup: Best for multi-machine setups (sewing, serger, embroidery). Plan outlets on both walls in advance so you never run an extension cord across a walkway.
- Long counter or multi-machine run: Best for production sewing or overlapping projects. Add a rubber mat or isolation pad under machines to cut vibration transfer along the counter.
- Foldaway or shared-space setup: Best for multipurpose rooms (guest room, office). Choose a table that folds flat in under a minute so the room can reset fast.
- Mobile island and cart combo: Best for flexible workflows that shift week to week. Use locking casters so the cart stays put mid-project but rolls when you need to reconfigure.
Zones and Ergonomics: The Measurements That Matter
Every efficient sewing room is built around what quilters call the sewing work triangle: cutting table, sewing machine, and pressing station arranged so you can move between them in a few steps, not a hike across the room. Unlike a kitchen work triangle, sewing-specific guidance recommends keeping these distances shorter, often just an arm’s reach or a single pivot of your chair, since you’re shuttling small pieces of fabric constantly rather than carrying pots.
Table height matters more than most people assume. Aim for a work surface at elbow height when seated, generally a moderate height suitable for most adults, and pair it with a chair that lets your knees sit at roughly 90 degrees. If you stand to cut, expect that surface to sit several inches higher.
Ergonomics guidance backs this up directly: research on sewing posture and work surface heights finds that elbow-height surfaces paired with anti-fatigue mats measurably reduce musculoskeletal strain during long sessions.
- Keep your cutting table 48 to 60 inches wide when space allows, per common sewing room planning guidance.
- Stand on an anti-fatigue mat at any station where you’re on your feet for more than 15 minutes.
- Adjust chair height before table height. Your feet should stay flat, not dangling or braced.
- Revisit your sewing table height setup any time you switch machines or add an extension table.
Storage Ideas That Keep Tools Within Reach
Vertical space is the most underused real estate in most sewing rooms. Pegboards, wall mounted thread racks, and shallow shelving units can roughly double your usable storage without eating floor space, according to organization guidance for budget sewing rooms. Anchor pegboards into studs, not just drywall, especially if you’re hanging scissors, rotary cutters, or anything with weight.
Fabric stash storage depends on how you shop and sew. Folded fabric in clear bins lets you see color and pattern at a glance; bolts stored upright on a shelf save folding time but need deeper shelving, generally 12 inches or more. Built-in floor to ceiling shelving can double capacity compared with a standard bookcase when your room allows for it.
- Mount a pegboard beside your sewing machine for scissors, seam rippers, and marking tools.
- Use a rolling cart with drawer inserts as a mobile notions station.
- Repurpose a kitchen island or IKEA cart as a cutting and pressing surface with storage underneath.
- Store thread on a wall rack organized by color, not by brand, for faster matching.
Pro Tip: Keep a small bin of “grab and go” tools, pins, chalk, a seam ripper, stationed at each zone instead of one shared toolbox. You’ll stop walking across the room mid seam.
Lighting and Power Placement for Precision Work
Sewing rooms need layered lighting, not just one overhead fixture. A gooseneck or clamp-on LED task lamp positioned 12 to 18 inches from your needle plate eliminates the shadows that cause skipped stitches and misaligned seams. Combine that with dimmable ambient lighting so the room doesn’t feel harsh during evening sessions. Guidance on budget sewing space setups points to layered lighting, natural light plus task lamps, as the combination that most reduces eye strain.
Outlet planning deserves the same attention as lighting. Map outlets before you finalize furniture placement, not after.
- Place at least one outlet within 3 feet of every machine station to avoid running cords across walkways.
- Use a surge protected power strip with an on/off switch for quick shutdown between sessions.
- Route cords along walls or under a cord cover rather than across the floor.
- Add a dedicated outlet near your pressing station for the iron, ideally on its own circuit.
Small Sewing Space Ideas on a Tight Budget
You don’t need a dedicated room to build a functional setup, and you don’t need new furniture either. A few low-cost swaps replicate most of what a full sewing studio offers.
- Use a fold down cutting mat or portable cutting table that stores flat behind a door when the room doubles as a guest space.
- Convert a rolling kitchen cart into a “sidecar” next to your machine for scissors, bobbins, and current project pieces.
- Add under-table storage bins on casters so vertical space under your work surface isn’t wasted.
- Prioritize one splurge, a proper task lamp or an ergonomic chair, over several small purchases.
- Shop IKEA’s Alex drawer units, Raskog carts, or Skadis pegboard systems, all frequently repurposed for sewing rooms because they’re inexpensive and modular.
Building a Project Workflow That Doesn’t Fall Apart
The one project, one bag system solves the most common source of sewing room chaos: half finished projects scattered across every surface. Practitioners who track work in progress organization recommend packing each active project, pattern, cut fabric, thread, needles, and notions, into its own labeled bag or bin so nothing gets lost between sessions.
Rolling carts work well as physical dividers between projects when you’re juggling more than one. Label each bin by project name or deadline rather than by fabric type, so you can grab the right one without unpacking three others first.
- Pack pattern pieces, cut fabric, matching thread, and notions together before you start sewing.
- Use a rolling cart per active project if you’re working on more than one at a time.
- Clear your work surface completely at the end of each session, even if the project isn’t finished.
Pro Tip: Keep a sticky note inside each project bag listing the next step. Future you will thank present you for skipping the “wait, where was I?” moment.
How to Measure and Sketch Your Layout Before You Buy
Skip the guesswork and measure first. A few numbers determine whether a layout will actually work once furniture is in the room.
- Measure total room dimensions, plus every door swing and window placement that could block furniture.
- Note existing outlet locations, then decide if you need an electrician to add more before buying furniture.
- Check clearance targets: a 36 inch walkway and a 48 to 60 inch wide cutting table are common planning benchmarks.
- Sketch furniture to scale on graph paper or in a free floor plan app.
- Do a walkthrough test: tape the sketch’s outlines on the actual floor and walk your typical sewing routine through the space.
Ventilation and Air Quality in Your Sewing Room
Fabric dust, thread lint, and fumes from spray adhesives or fusible webbing build up fast in a closed room, and a sewing session can run for hours without a break. Poor air circulation shows up as headaches, a stuffy feeling, or a layer of dust settling on every surface within a week of cleaning.
A window that actually opens is the simplest fix, even a few inches during pressing or basting sessions clears fumes faster than most people expect. If your room has no window, a small air purifier with a HEPA filter near your cutting and pressing stations catches airborne lint before it settles into your lungs or your machine’s tension mechanism. Ceiling fans or a simple desk fan on low keeps air moving without blowing fabric pieces off your table.
Pressing stations deserve special attention. Spray starch, fusible adhesive, and steam all release particles or moisture into the air, so position your ironing setup near a window or vent if you have one, and avoid boxing it into a closet-sized nook with no airflow.
- Crack a window or run a HEPA air purifier during long cutting or pressing sessions.
- Position pressing stations away from enclosed corners with no air movement.
- Vacuum or sweep lint buildup weekly, since it accumulates around machine feed dogs and vents.
- Avoid spraying adhesives or starch directly over your fabric stash to prevent residue buildup.
Managing Noise for a Calmer Sewing Session
A serger running at full speed, an embroidery machine’s repetitive hum, and a squeaky chair can turn a peaceful hobby into a source of household tension, especially in shared homes or apartments with thin walls. Noise management in a sewing room comes down to three levers: the floor, the walls, and the machine itself.
Start with the floor. A thick rug or interlocking foam mat under your machine table absorbs vibration and cuts down the rattling that hard floors amplify. Rubber isolation pads placed under each machine’s feet reduce the buzz that travels through a shared table, which matters most if you’re running a serger next to a conventional machine.
If the room shares a wall with a bedroom or living space, a simple door draft stopper and heavy curtains over any windows cut sound transfer more than most people expect for the cost. Acoustic foam panels are overkill for most home setups, but a bookcase or fabric stash shelving against a shared wall adds a surprising amount of sound dampening as a side effect of storage you already need.
Machine maintenance plays a role too. A poorly oiled machine or one running with a dull needle vibrates and clatters more than a well maintained one. Keep a basic cleaning and oiling schedule, since a smooth-running machine is quieter almost as a byproduct of running correctly.
- Place a rug or foam mat under your sewing table to absorb vibration.
- Use rubber isolation pads under machine feet, especially for sergers.
- Add a door draft stopper and heavy curtains if the room shares walls with living spaces.
- Keep machines oiled and needles fresh, since well-maintained machines run quieter.
Setting Up Your Machine and a Digital Station for Patterns
Your sewing machine’s placement should anchor the entire room, not get squeezed into whatever corner is left after furniture shopping. Position it so the needle area faces your main light source, with an extension table like the Dream World Sew Steady extension table expanding your work surface for free-arm and embroidery projects that need more support than the machine bed alone provides.
A dedicated screen for patterns and tutorials has become almost as essential as a good pair of scissors. Many sewists now prop a tablet on a small stand beside the machine to follow along with a video tutorial or a digital PDF pattern instead of printing every piece. This cuts down on paper clutter and lets you zoom into tricky construction steps without pausing to dig through a binder.
If you’re running embroidery software or digitizing designs, a small desk or corner setup near your embroidery machine keeps the computer close enough to transfer files without walking across the room every time you tweak a design. A basic tablet stand, a USB hub for transferring files to your machine, and a stable Wi-Fi connection cover most of what a modern digital sewing station needs.
- Position your machine so the needle area faces your primary light source.
- Use a tablet stand beside the machine for patterns, tutorials, or digital PDFs.
- Keep a small desk near embroidery equipment if you’re digitizing designs or running embroidery software.
- Add a USB hub or card reader within reach of your machine for quick file transfers.
Storing Fabric Bolts and Bulky Materials
Fat quarters and folded yardage are easy. Bolts of fabric, batting rolls, and bulky notions like cutting mats or design boards are the items that actually overwhelm most storage plans. These need dedicated space planned from the start, not squeezed into leftover shelf gaps.
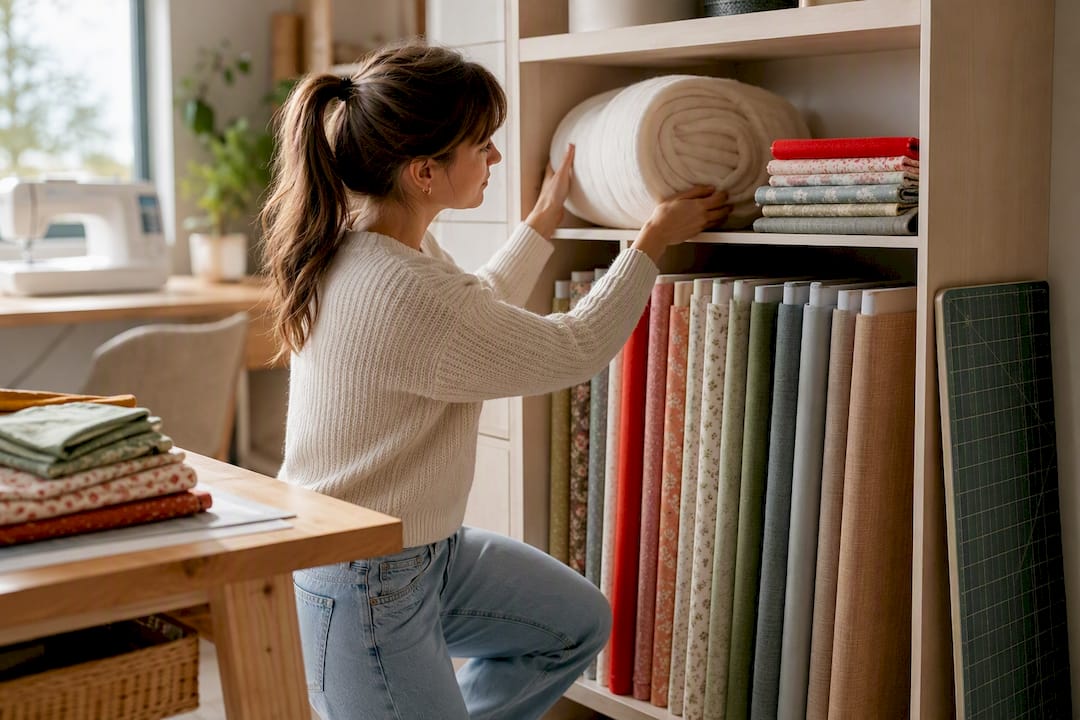
A closet rod mounted horizontally at one end of the room holds fabric bolts upright and accessible, similar to how a fabric shop displays stock. If floor space allows, a rolling garment rack with bolt-friendly hooks does the same job without permanent installation, which matters if you’re renting or sharing the room with another use. Batting rolls store well standing upright in a tall bin or laundry basket in a corner, since laying them flat wastes floor space and makes the bottom roll impossible to reach.
Large cutting mats and design boards are often the most awkward items in the room. A slim gap behind a bookcase or beside a closet door works well for sliding a mat in vertically, and some sewists mount a simple hook-and-strap system on the back of a door for the same purpose.
- Mount a horizontal closet rod for upright fabric bolt storage.
- Store batting rolls upright in a tall bin rather than laid flat.
- Slide large cutting mats vertically into a gap beside furniture or behind a door.
- Use a rolling garment rack for bulky items if the room needs to reset for other uses.
Safety Basics: Sharp Tools and Iron Placement
A sewing room accumulates sharp objects fast, rotary cutters, shears, pins, needles, seam rippers, and most safety issues come down to where these items sit when you’re not actively using them. Store rotary cutters closed or blade-retracted in a dedicated slot, never loose in a drawer where a hand could find the edge before the eye does.
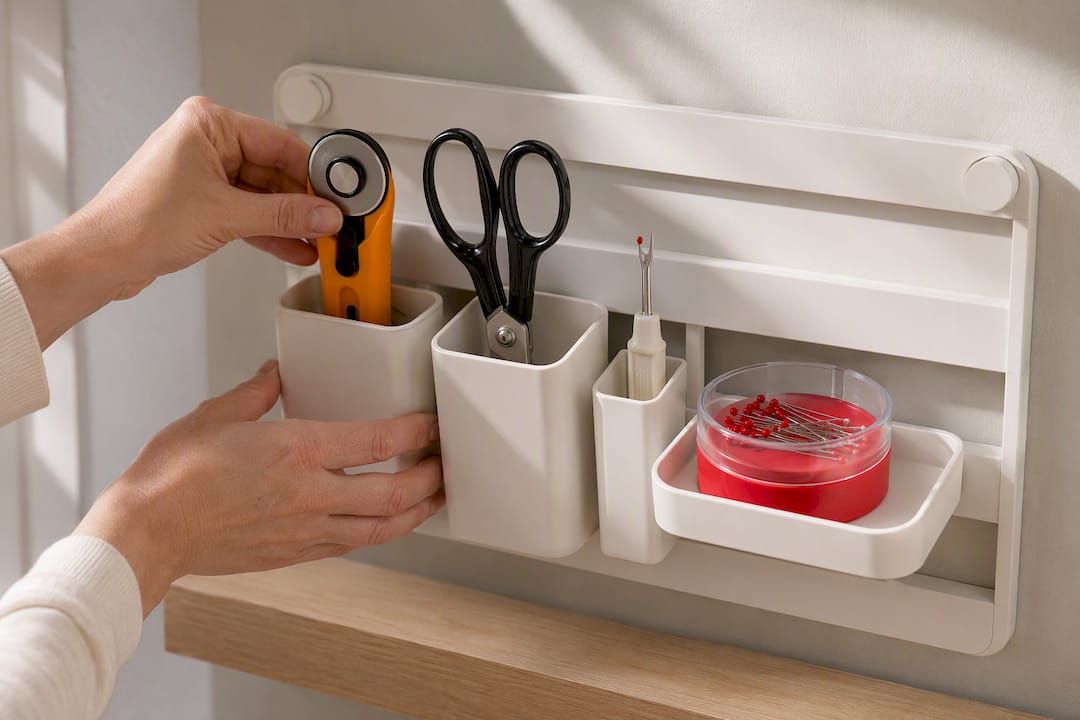
A magnetic pin holder mounted near your machine keeps loose pins off the floor and off chairs, which matters more in households with kids or pets. Needles deserve their own small labeled container, since a stray needle in carpet or upholstery is one of the more common sewing room injuries.
Iron placement deserves particular care. Position your ironing station away from the edge of a table where a cord or the iron itself could get knocked off, and use an iron with an auto shutoff feature if your current one lacks it. Never rest an iron on fabric or a project bag, even briefly, and keep the cord routed so it can’t catch on a chair or a passing arm.
- Store rotary cutters blade-retracted in a dedicated holder, not loose in a drawer.
- Mount a magnetic pin holder near your machine to keep pins off floors and chairs.
- Position your iron away from table edges, with the cord routed clear of walkways.
- Choose an iron with auto shutoff if you tend to step away mid-project.
Multipurpose Furniture for Rooms That Do Double Duty
Not every sewing room gets to stay a sewing room full time. Fold-down tables, adjustable-height surfaces, and modular carts let a space shift between a guest room, home office, or craft room without requiring you to rebuild your setup each time.
A wall-mounted fold-down table is one of the most efficient options for tight or shared spaces, since it collapses flat against the wall when not in use and frees the entire floor for other purposes. Adjustable-height tables, the kind that shift between sitting and standing positions, solve the ergonomics problem for sewists who cut standing but sew seated, without needing two separate surfaces.
Modular storage on casters pulls double duty as both organization and furniture. A rolling cart that serves as a nightstand in guest-room mode and a notions station in sewing mode means you’re not storing duplicate furniture for a room that only sometimes hosts a sewing setup.
- Choose a wall-mounted fold-down table for rooms that need to reset to zero floor clutter.
- Use an adjustable-height table if you switch between standing to cut and sitting to sew.
- Pick rolling storage units that double as furniture in the room’s other use case.
- Prioritize furniture with a clear “closed” state so the room transition takes minutes, not hours.
Author Perspective: What Actually Matters When You Design This Room
Comfort and flow beat pretty every time. Most sewists over-invest in decor before fixing the one thing that causes real fatigue: mismatched heights and tools stored too far from where they’re used. Budget and permanence are trade-offs, not failures, and a shared-space setup that folds away is still a real sewing room. Pick one zone this week, probably your cutting or pressing station, and fix it before touching anything else.
— Chris
Get the Machines and Furniture to Match Your Layout
Once your zones are sketched out, the gap between plan and reality is usually the furniture and machine setup itself. There are retailers that stock sewing and quilting machines, extension tables, and ergonomic seating that make a zone-based layout actually work, often including shipping offers and pricing guarantees. If you’re unsure which extension table fits your machine bed or which chair height suits your table setup, a personalized consultation through Sewingmachinesplus can walk you through it before you buy. Browse the SewErgo ergonomic operator chair or the Sew Steady extension table for sergers to start filling in your layout today.
Sources
- Sewing Work Triangle: Better Workflow | Making Space to Make Week 11
- Sewing Room Setup for Beginners: Step-by-Step Guide (2025)
- Ergonomics study on sewing posture and work surface heights (2023) DOI
- Top 8 IKEA Hacks for Organizing a Sewing Room on a Budget - I Love Quilting Forever
- The ultimate guide to setting up your sewing space - Seamwork
FAQ
What is the best layout for a sewing room?
A zone-based layout built around a compact work triangle, cutting, sewing, and pressing stations kept within a few steps of each other, works best for most rooms. The exact template (corner, island, or L-shaped) should match your room size and how many machines you run, as outlined in the work triangle approach.
What are some ideas for organizing my sewing room?
Store tools where you actually use them rather than in one central catch-all, and lean on vertical storage like pegboards and thread racks to keep floor space clear. A one-project-one-bag system also prevents half-finished projects from taking over every surface.
What are some good decor ideas for a sewing room?
Function should drive decor choices here more than in most rooms, so prioritize a layered lighting setup and a color-coded thread wall before adding purely decorative touches. Open shelving that displays fabric by color doubles as both storage and visual interest.
How do I organize a sewing room on a budget?
Repurposed furniture, IKEA carts, pegboard systems, and drawer units, can replicate most of what dedicated sewing furniture offers at a fraction of the cost, according to budget organization guidance. Prioritize one higher-quality purchase, like a proper task lamp or an extension table from Sewingmachinesplus, over several small ones.
