

Yes, spray starch works, and the payoff shows up the moment you cut. Starch your yardage before cutting, let it dry to damp, and press with medium heat rather than a slide. That single sequence stabilizes bias edges, sharpens seam intersections, and keeps tiny templates from wobbling under your rotary blade.
TL;DR:
- Spray starch stabilizes bias edges, small templates, and curved piecing, but using it unevenly can cause measurement issues across a quilt.
- Traditional starch provides the strongest stiffness for precision piecing, while sizing offers a lighter body, and stabilizers like Terial Magic suit appliqué and printing.
- Proper application requires fabric to be pressed dry first, sprayed evenly from 6 to 10 inches, and dried to damp before pressing with a lifting motion on medium heat.
- Homemade cornstarch spray, mixed at 1.5 tablespoons of cornstarch to 2 cups of water and strained, can perform nearly as well as commercial products if stored properly.
- Using the right tools, such as a clog-free pump sprayer and a pressing cloth, improves results and reduces residue, especially on dark fabric.
Table of Contents
- What Spray Starch Does for Quilting
- Starch vs. Sizing vs. Heavy Stabilizers: Which One Fits Your Project
- How to Apply Spray Starch for Quilting, Step by Step
- DIY Spray Starch: A Cornstarch Recipe That Actually Works
- Fixing Flaking, Iron Gunk, and Spots on Dark Fabric
- Setting Up a Workspace That Makes Starching Painless
- Why I Trust the Simple Workflow Over the Fancy Products
- Stock Your Pressing Station With the Right Tools
- Sources
- FAQ
What Spray Starch Does for Quilting
Starch works by coating individual fibers with a thin, temporary film that stiffens the weave without changing the fabric’s fiber content. That stiffness matters most where fabric wants to move: bias edges, curved piecing, and pieces cut from tiny templates that would otherwise stretch or fray before they reach your machine.
Not every project needs it. A quilt made entirely of large squares cut on the straight grain might not benefit much. But spray starch stabilizes fabric and helps with bias control, crisper seams, and easier piecing, which is exactly why it shows up so often in patterns built around:
- Bias-cut strips, like those used in Dresden plates or curved piecing
- Small or oddly shaped templates, including English paper piecing and foundation work
- Appliqué shapes that need crisp, stable edges before turning or fusing
One rule saves headaches later: starch every fabric in a quilt top the same way. Starching one fat quarter and skipping the next can cause uneven shrinkage across your blocks, throwing off measurements you thought were locked in.
Starch vs. Sizing vs. Heavy Stabilizers: Which One Fits Your Project
The three main categories serve different goals, and picking the wrong one is the most common reason quilters end up frustrated with the whole process.
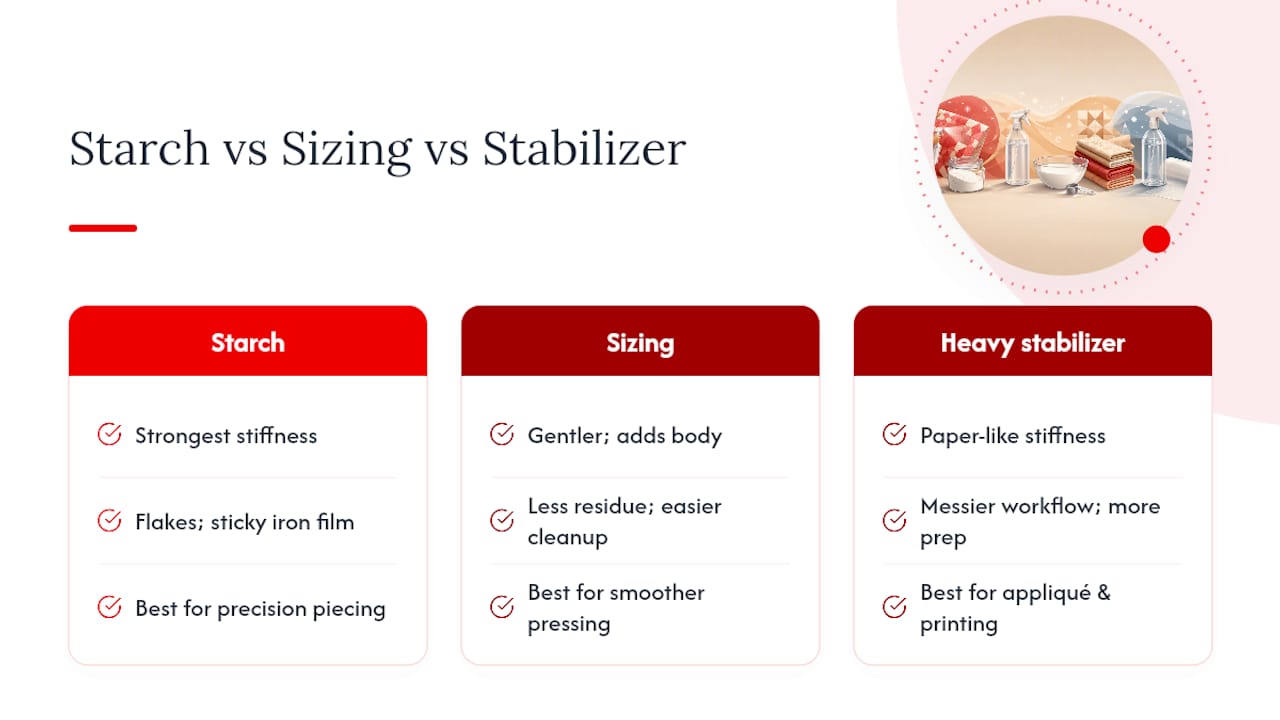
Traditional spray starch delivers the strongest stiffness of the three, which is why it remains the go-to for precision piecing. The trade-off is real: overuse can leave flakes on your fabric or a sticky film on your iron’s soleplate if you don’t dry and press it correctly.
Sizing products, sold under names like Mary Ellen’s Best Press, sit at the gentler end. They add body and help fabric behave without locking it into cardboard-like stiffness. Quilters who want smoother pressing without heavy residue often prefer this route, since sizing gives body without heavy stiffness compared to traditional starch.
Heavy-duty stabilizers, like Terial Magic, occupy a different category entirely. These give a paper-like stiffness suited to appliqué and fabric printing, but the workflow is messier. Fabric needs to be saturated nearly to dripping, hung until damp, then pressed, which asks more prep time and patience than a quick starch pass.
Match the product to what you actually need. If your priority is razor-sharp piecing accuracy, reach for starch. If you want smoother hand and less cleanup, sizing wins. If you’re stabilizing appliqué shapes for cutting or printing, a heavier stabilizer earns its extra steps.
How to Apply Spray Starch for Quilting, Step by Step
Getting consistent results comes down to sequence, not luck. Skip a step and you’ll end up chasing flakes off your iron or fighting distorted seams later.
- Press the fabric dry first. A quick pass with a hot, dry iron opens the weave slightly and helps starch absorb evenly instead of sitting on the surface.
- Spray from 6 to 10 inches away. Hold the can or pump sprayer at that distance and mist evenly across the fabric. You want it thoroughly damp, not soaked and dripping.
- Let it dry to damp, not bone dry. Drying time typically runs 30 to 60 minutes for smaller cuts, but can stretch to 4 to 8 hours for large yardage. Pressing while it’s still slightly damp helps the starch set into the fibers instead of flaking off later.
- Press with a lifting, up-and-down motion, not a slide. Sliding the iron across freshly starched fabric can distort the grain, especially on bias-cut pieces. Use medium heat and skip steam until you’re doing a final finishing press.
- Iron from the unsprayed side when you can. This keeps starch residue off your soleplate and reduces the odds of scorching.
- Reapplying mid-piecing? Heat the cut piece first, mist lightly, let it set for a minute, then press carefully. Rushing this step is the most common cause of crunchy, flaky patches.
Pro Tip: Starch your yardage the night before a cutting session. Fabric that’s had time to dry fully to a light stiffness cuts cleaner than fabric pressed the moment it stops feeling damp.
DIY Spray Starch: A Cornstarch Recipe That Actually Works
A homemade batch costs pennies compared to a can, and it performs close to commercial starch when mixed correctly. The standard ratio is 1.5 tablespoons of cornstarch to 2 cups of water, heated gently until it thickens slightly, then cooled and strained to remove any lumps before bottling.
A few details separate a batch that works from one that clogs your sprayer or does nothing at all:
- Strain the mixture through a fine mesh or cheesecloth before bottling to avoid clogging a pump sprayer.
- Shake the bottle before every use since cornstarch settles quickly.
- Use a pump sprayer or pressurized garden-style sprayer for yardage; tiny finger-trigger bottles make big projects a slow, tiring chore.
- Refrigerate leftover starch and use it within one to two weeks. Mix only what you’ll use soon, since homemade batches don’t have the preservatives of commercial cans.
- Label the bottle. Homemade starch looks a lot like plain water until you need it in a hurry.
One myth worth killing outright: vodka-only sprays do not stiffen fabric. Distillation strips out any starch content, so a vodka mist might reduce odor, but it has no fiber-stiffening effect at all.
Fixing Flaking, Iron Gunk, and Spots on Dark Fabric
Most starching problems trace back to timing, not the product itself. Pressing fabric while it’s still too wet, or letting it dry completely before pressing, are the two most common triggers for flaking and residue buildup.
- Let starch set and dry to damp, never bone dry, before you press it.
- Clean your iron’s soleplate regularly with a hot iron cleaner, and consider a pressing cloth or ironing from the unsprayed side to keep residue off the plate.
- Spots on dark fabric usually respond to a quick dab with a damp cloth; if residue persists, a full wash once the quilt top is finished usually clears it.
- Don’t stockpile starched yardage for months if pests are a concern in your storage area. Wash finished quilts before long-term storage to remove any starch residue that might attract insects.
Pro Tip: Keep a dedicated pressing cloth just for starched fabric. It catches residue before it ever reaches your iron’s soleplate, which saves you a cleaning session later.
Setting Up a Workspace That Makes Starching Painless
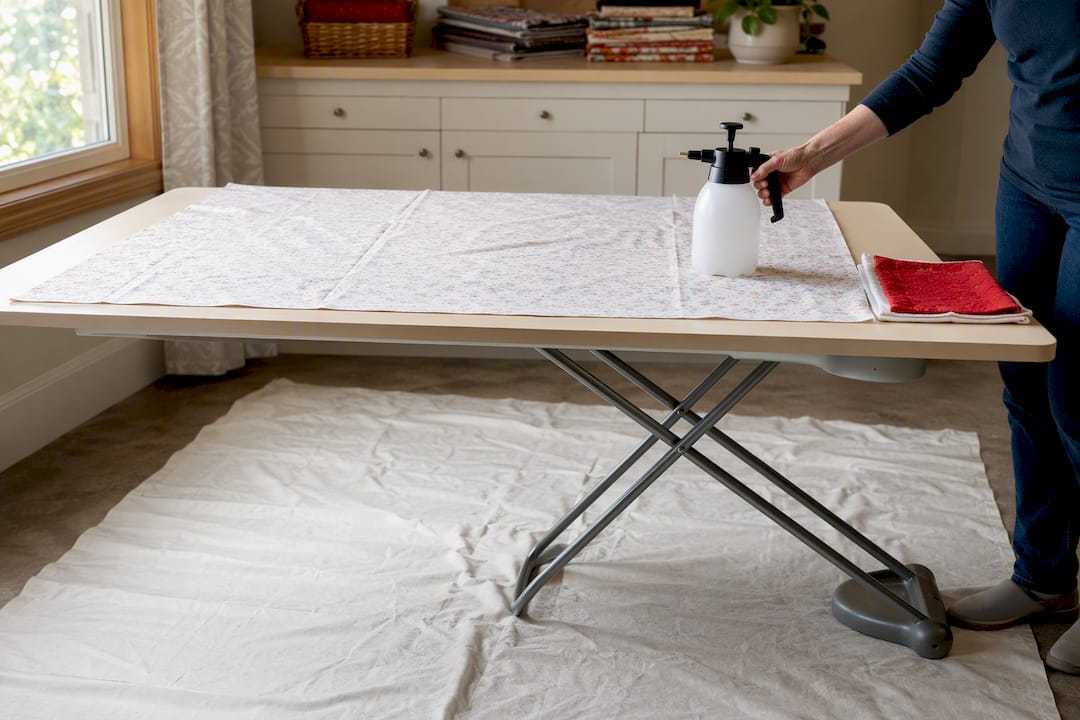
A little setup goes further than a better spray. For long yardage, laying a large flat board across your ironing board keeps fabric hanging straight while it dries instead of curving over a narrow surface. Protect your floor from overspray with an old sheet or drop cloth underneath your drying area.
For bigger projects, pump or pressurized sprayers cut down on airborne overspray compared to aerosol cans, and they save your hand from cramping through a full bolt of fabric. Keep steam switched off until your final finishing press, and protect your ironing board cover with a washable cloth you can toss when it picks up residue.
Why I Trust the Simple Workflow Over the Fancy Products
Quilters chase a lot of specialty products chasing a result that a cornstarch recipe and a bit of patience already deliver. The real variable isn’t which can you buy, it’s whether you let the fabric dry to damp before you press it. Skip that step with the priciest commercial starch on the market and you’ll still get flaking. Nail that step with a homemade batch and you’ll get results that rival anything off the shelf.
Where I’d push back on conventional wisdom: quilters overspend on heavy stabilizers like Terial Magic for projects that never needed that much stiffness in the first place. Save that product for genuine appliqué or printing work. For everyday piecing, a basic starch or sizing spray, applied with attention to drying time and press motion, solves nearly every stability problem you’ll run into at the cutting table. The technique matters more than the brand on the bottle.
— Chris
Stock Your Pressing Station With the Right Tools
Getting the technique right is only half the job. The other half is having gear that doesn’t fight you: a pump sprayer that won’t clog, a clean iron soleplate, and a pressing cloth that saves your ironing board cover from residue. Small accessories that make starching yardage less of a chore, including hot iron cleaners for residue buildup and hand-sewing tools for finishing work once your blocks are stitched, are available from specialized sewing and quilting supply retailers. Shipping policies and price match guarantees vary by retailer. Browse the full sewing and quilting supply catalog to round out your pressing station, or pick up a hot iron cleaner to keep your soleplate free of starch gunk before your next cutting session.
Sources
- DIY Spray Starch: Easy, Affordable, and Eco-Friendly Guide
- How to Starch Fabric / Mary Ellen’s Best Press Tutorial
- What type of spray starch to use for quilting? - The Crafty Quilter
- The Ultimate Guide to Starching Quilt Fabrics - The Seasoned Homemaker®
FAQ
What is the best spray starch for quilting?
It depends on your priority. Mary Ellen’s Best Press is popular for its lighter hand and less flaking, Magic Quilting & Crafting Spray gives strong stiffness for precise piecing, and Terial Magic suits appliqué or printing work that needs paper-like body.
Can I use spray starch for quilting?
Yes, spray starch is one of the most common fabric-prep steps for quilters, since it stabilizes bias edges and helps small pieces hold their shape through cutting and piecing.
How can I make homemade spray starch for quilting?
Mix 1.5 tablespoons of cornstarch with 2 cups of water, heat until slightly thickened, cool, strain, and bottle it in a pump sprayer. Refrigerate unused starch and use it within one to two weeks.
What kind of starch to use for quilting?
Cornstarch-based sprays, whether homemade or commercial, work well for general piecing. For heavier stabilization needs like appliqué, a dedicated stabilizer such as Terial Magic is a better fit than standard starch.
