

A coverstitch machine makes stretchy, factory-style hems with parallel stitching lines; a serger trims and finishes raw edges while sewing seams. Buy a serger first if you can only afford one machine, since it handles both knits and wovens across a wider range of construction tasks, then add a coverstitch once you’re hemming knit garments often enough that the difference in finish starts to matter.
TL;DR:
- A serger primarily handles seam finishing and edge trimming on both woven and knit fabrics, making it the first machine to buy for versatile sewing needs.
- A coverstitch produces stretchy hems with parallel needle lines, but it cannot replace a serger’s ability to trim and finish seams across different fabric types.
- Using a twin needle on a regular sewing machine can mimic some coverstitch effects, suitable for occasional hems on knits but less durable on high-stretch fabrics.
- Switching between serger and coverstitch functions on a combo machine requires rethreading and setup adjustments, which can slow down workflow and increase inconvenience.
- Threading looper paths and balancing tension are common challenges, so testing scrap fabrics and practicing patience are key to achieving quality stitches with both machine types.
Table of Contents
- Coverstitch vs Serger: A Quick Visual and Functional Comparison
- How Coverstitch and Serger Machines Actually Work
- When to Choose a Serger, a Coverstitch, or Both
- Getting Coverstitch-Style Results Without a Coverstitch Machine
- Are Combo Machines Worth It for Small Sewing Spaces?
- Threading and Maintenance Tips That Save You Time
- Why the Serger-First Advice Holds Up
- Ready to Compare Machines in Person?
- Sources
- FAQ
Coverstitch vs Serger: A Quick Visual and Functional Comparison
Flip a T-shirt hem right side up and you’ll see two or three parallel rows of straight stitching. That’s a coverstitch. Flip a finished seam edge over and you’ll see thread wrapped neatly around the raw edge, trimmed clean. That’s a serger. The two machines produce completely different stitch signatures because they’re built for different jobs, and confusing them is the most common mistake beginners make when shopping for their next machine.
A coverstitch produces 2 to 3 parallel needle lines on the right side and a looped chain stitch underneath, which gives hems the elasticity to stretch with the fabric instead of popping. A serger, by contrast, trims the seam allowance and wraps the edge with looper thread in a single pass, but it cannot replicate that parallel-needle hem structure. A plain sewing machine with a twin needle gets closer to the coverstitch look on top, but the bobbin thread underneath forms a zigzag instead of a chain.
| Feature | Coverstitch | Serger | Twin Needle |
|---|---|---|---|
| Right side | 2-3 parallel straight lines | Wrapped edge, no flat hem look | 2 parallel lines |
| Underside | Looper chain stitch | Overlocked, trimmed edge | Zigzag bobbin stitch |
| Best for | Knit hems, cuffs, activewear | Seam finishing, edge finishing, rolled hems | Occasional knit hems |
| Cuts fabric? | No | Yes, built-in knife | No |
If you’re hemming a stretchy tee once in a while, a twin needle is a workable stand in. If you’re finishing seams on a woven skirt, only a serger (or a flatlock variation) does that job correctly.
How Coverstitch and Serger Machines Actually Work
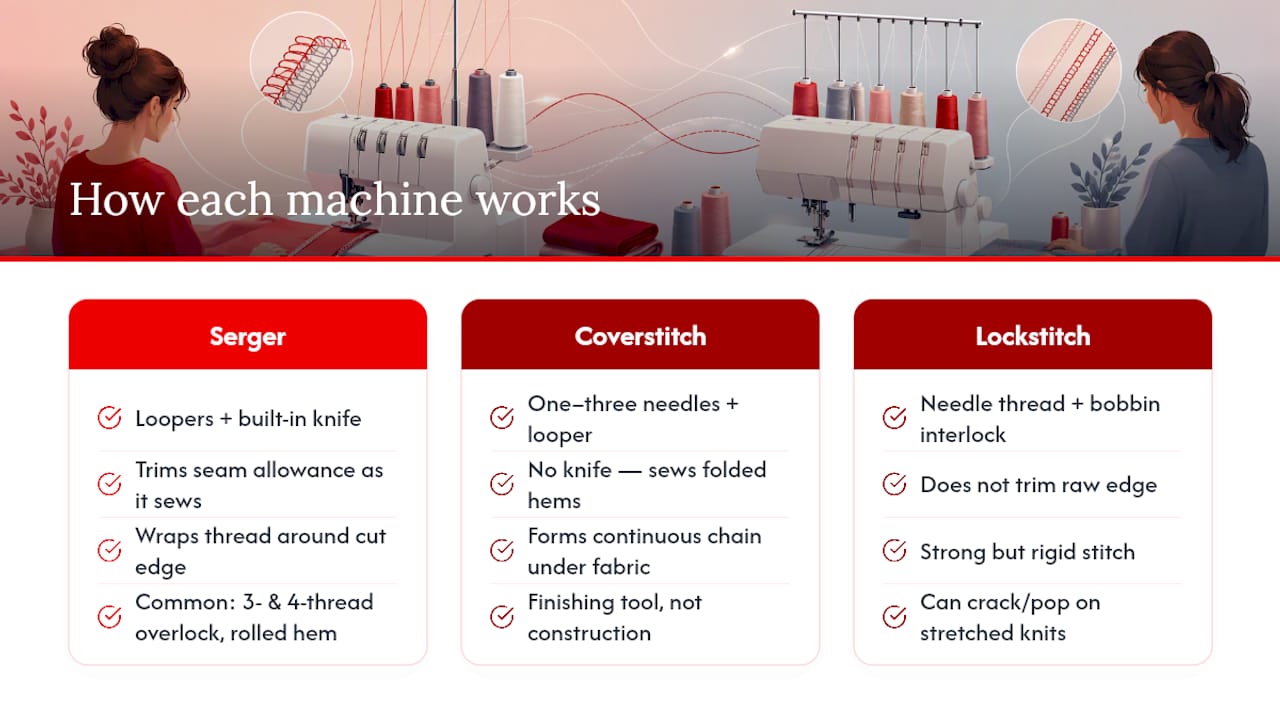
The mechanics explain everything about why these stitches look and behave so differently. A serger uses loopers plus a built-in knife, so it trims the seam allowance and wraps thread around the newly cut edge in one motion. That’s why serger seams look so clean on knit and woven fabric alike. Common serger stitch types include 3-thread and 4-thread overlock and the rolled hem, each suited to different fabric weights and finishes.
A coverstitch machine works differently. It uses one to three needles running across the top of the fabric, with a looper underneath that catches the needle threads and forms a continuous chain. There’s no knife involved, which is exactly why a coverstitch machine sews folded hems instead of raw edges. It’s a finishing tool, not a construction tool.
A regular sewing machine’s lockstitch is different still. The needle thread and bobbin thread interlock, creating a stitch that’s strong but rigid. On knit fabric, that rigidity is the problem: a lockstitch hem on a T-shirt will eventually crack or pop stitches because the thread has nowhere to give when the fabric stretches. That’s the whole reason coverstitch machines exist for knit hemming, cuffs, and activewear waistbands, where stretch recovery matters as much as appearance.
When to Choose a Serger, a Coverstitch, or Both
The decision comes down to what you actually sew, not what looks impressive in a machine ad. Ask yourself these questions before you shop:
- What percentage of your projects use knit fabric versus woven fabric?
- How often do you hem knit garments, whether for yourself, family, or to sell?
- What’s your realistic budget for a second specialized machine?
- How much table or storage space do you actually have?
If wovens dominate your sewing and knit projects are occasional, a serger alone is typically sufficient for finishing seams and edges. If you’re hemming knits weekly or monthly, especially for gifts or resale where the finish needs to look store-bought, a coverstitch starts paying for itself in saved time and fewer redone hems.
Buying two separate machines gives you full flexibility and no rethreading between tasks, but it costs more and takes up more space. A combo machine solves the space problem but adds setup friction every time you switch functions, which we’ll get into next.
Pro Tip: Before buying either machine, test a twin-needle hem on a scrap of your most frequently used knit fabric. If the stretch and appearance already satisfy you, you may not need a coverstitch machine at all.
Getting Coverstitch-Style Results Without a Coverstitch Machine
You don’t need every specialized machine to finish a project well. A few reliable workarounds cover most home sewing needs:
- Twin needle on your regular machine. This creates two parallel lines on top, though the zigzag bobbin stitch underneath is mechanically different from a true coverstitch and stretches less. It works fine for occasional hems but struggles on lightweight, high-stretch jerseys.
- Serger flatlock or rolled hem. Many sergers can flatlock a seam or roll a narrow hem, which covers some of the same visual territory as a coverstitch, though not the classic double-line T-shirt hem.
- Stabilizers and fusible tape. A strip of fusible knit stabilizer under the hemline reduces tunneling and puckering on lightweight fabrics, whether you’re using a twin needle or a coverstitch.
- Ballpoint or stretch needles. Swapping to the right needle point prevents skipped stitches on knits regardless of which machine you’re using.
These substitutes work well for occasional projects. Once you’re hemming knits often enough that tunneling and skipped stitches become a recurring headache, that’s your signal to invest in a dedicated coverstitch.
Are Combo Machines Worth It for Small Sewing Spaces?
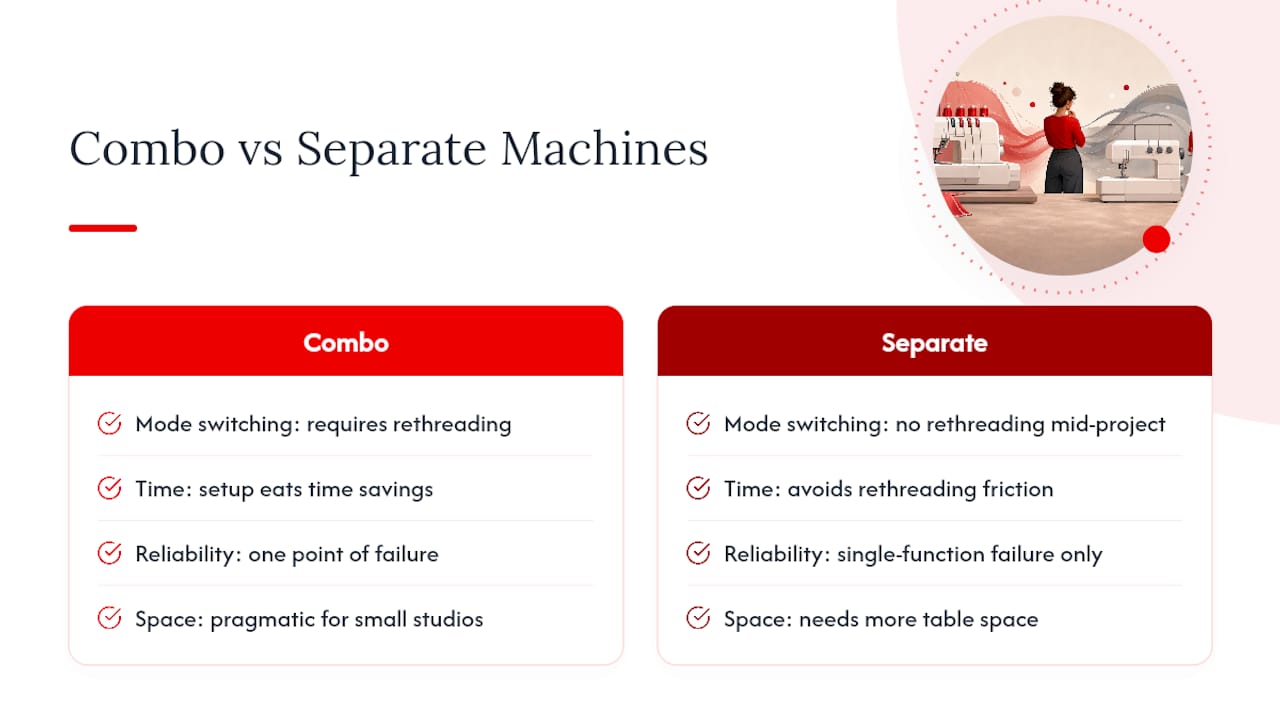
Combo machines, sometimes called coverlock machines, switch between serger and coverstitch functions on one chassis. The catch is that switching modes often requires rethreading and setup adjustments, which eats into the time savings you’d expect from owning one machine instead of two.
That trade-off matters more than it sounds. Sewists who alternate constantly between serging a seam and hemming it prefer separate machines specifically to avoid that rethreading friction mid-project. A combo also means one point of failure: if it needs service, you lose both functions at once instead of just one. For a small studio with limited table space, though, a combo remains the most pragmatic choice, especially if you don’t switch functions within the same sitting.
Threading and Maintenance Tips That Save You Time
Looper threading is where most beginners lose patience, on both sergers and coverstitch machines. Cone thread and looper-specific tension quirks are the main learning curve, and domestic coverstitch machines often lack the color-coded threading paths that make the process intuitive. Working through the threading diagram slowly the first several times, rather than rushing it, pays off in fewer skipped stitches later.
A few habits make tension troubleshooting far less painful:
- Mark each looper thread path on a fabric scrap before adjusting anything.
- Change one tension dial at a time and sew a small test swatch before moving to the next.
- Keep a dedicated set of ballpoint or stretch needles on hand for knit projects.
- Test stitch on a scrap of your actual project fabric before sewing the real seam or hem.
If tension keeps fighting you on a coverstitch machine, our tension troubleshooting guide walks through which dial affects which thread. Choosing the right thread type also cuts down on breakage during long serging or coverstitch runs.
Why the Serger-First Advice Holds Up
Most guides tell beginners to buy a serger first, and having worked through the mechanics above, that advice holds up better than it sounds on the surface. A serger touches more of your actual workflow: seam construction, edge finishing, rolled hems, and knit or woven projects alike. A coverstitch does one job extremely well, but it’s still one job.
The mistake I see most often isn’t buying the wrong machine. It’s buying a coverstitch too early, before figuring out whether you actually hem knits often enough to justify it. Test a hem on your most-used fabric with a twin needle first. If that result frustrates you consistently, you have your answer.
— Chris
Ready to Compare Machines in Person?
Reading specs online only gets you so far. Many retailers offer personalized consultations where you can talk through your actual sewing habits, knit versus woven ratio, and space constraints before spending a dollar. Options often include serger, coverstitch, and combo lineups, sometimes with price match guarantees and free shipping on qualifying orders, helping you find a machine that fits your workflow. Bring a swatch of the fabric you sew most often to your consultation, and start by browsing the full machine selection to see what’s currently in stock and compare specs side by side.
Sources
Stitch mechanics and hem structure come from Peekaboo Pattern Shop and Needle Down. Buying guidance and twin-needle limitations are drawn from QuiltersReview and Sewing With Ease. Workflow and threading notes come from Melly Sews and SewingTrip.
- Coverstitch 101: Tips and tricks for beginners — Peekaboo Pattern Shop
- Serger vs Coverstitch Machine: What Each One Actually Does | Needle Down
- Serger Vs Coverstitch Machine: Key Differences — Sewing With Ease
FAQ
Can I Use My Serger as a Coverstitch Machine?
No. A serger’s knife and looper setup trims and wraps edges, but it can’t create the parallel-needle chain stitch a coverstitch machine produces for hems.
Can a Regular Sewing Machine Do a Coverstitch?
Not a true one. A twin needle gets you two parallel lines on top, but the zigzag stitch underneath is mechanically different from a real coverstitch and stretches less on knits.
Can I Convert My Overlocker to Do Coverstitch?
Some overlockers include a chain-stitch function that approximates a coverstitch look, but most home overlockers can’t fully replicate the multi-needle coverstitch structure without a dedicated attachment.
What Are Common Problems With a Coverstitch Machine?
Looper threading and tension balancing cause the most frustration, since many domestic models lack color-coded threading paths and require testing on scraps to get a balanced stitch.
Should I Buy a Serger or a Coverstitch Machine First?
Buy a serger first if you can only afford one machine, since it handles seam construction and edge finishing on both knits and wovens, while a coverstitch is a specialized hemming tool.
