

Most skipped stitches are not a timing problem. Replace the needle and rethread the machine first, and only investigate timing if that fails and the handwheel still turns freely. If it does turn out to be timing, move on to a visual check before touching any set screws, and stop immediately if you feel hard resistance or hear metal contact.
TL;DR:
- Most skipped stitches are caused by threading or needle issues, not timing, and rethreading with a correct needle often resolves the problem.
- Visual timing checks require turning the handwheel slowly and watching the needle and hook interaction where a thread loop forms, with precise timing occurring 2 to 3 millimeters above the needle’s lowest point.
- Adjusting timing involves setting needle height to about 2.36 millimeters, fine-tuning hook rotation and clearance, and ensuring the hook tip is properly positioned, with test sewing after each step.
- If the handwheel binds, noise persists, or needle strikes no matter the adjustments, a professional technician should be consulted to prevent further damage.
- Replacing damaged parts like the hook point or bobbin case is recommended if physical damage or wear prevents proper timing adjustment.
Table of Contents
- How Do I Know if My Sewing Machine’s Timing Is Off?
- How Do You Visually Check Needle-Hook Timing?
- What Are the Exact Steps to Adjust Sewing Machine Timing?
- What Tools Do You Need to Time a Sewing Machine?
- When Should You Stop and Take Your Machine to a Technician?
- Who Wrote This Guide and Why Trust It?
- What Timing Advice Gets Overstated (and What Doesn’t)
- Where to Find Parts and Support for Timing Repairs
- Sources
- FAQ
How Do I Know if My Sewing Machine’s Timing Is Off?
Before you assume sewing machine timing is the culprit, work through a quick reset. Most machines flagged for “timing issues” are actually suffering from something far simpler, and running this checklist first can save you an hour of unnecessary disassembly. A readiness checklist approach confirms that timing problems are only likely once these basic fixes have already failed.
Work through these steps in order:
- Install a fresh, correct needle. Match the needle system to your machine (most home machines use 130/705H) and make sure it’s fully seated in the clamp with the flat side facing the right direction.
- Rethread top and bobbin from scratch. Follow your manual’s threading path exactly, including the tension disc and take up lever. A skipped guide is one of the most common causes of what looks like a timing problem.
- Reinsert the bobbin correctly. Check that it drops in with the thread pulling in the direction your manual shows, and that the bobbin case snaps or seats fully.
- Clean out lint and debris. Use a small brush around the hook race and bobbin area. Built-up lint changes how the hook and needle interact and can mimic a timing fault.
- Test on stable woven cotton. Use a straight stitch, keep the presser foot down, and sew a few inches of plain fabric rather than stretch knits or slippery synthetics.
A fresh correct needle paired with a full rethread solves a surprising share of “timing” complaints without anyone touching a screwdriver, according to Sewing Made Clear’s troubleshooting research. If skipped stitches, needle strikes on the bobbin case, or repeated needle breakage continue after all five steps, and the handwheel still turns without resistance, you’ve ruled out the easy causes. That’s your signal to move to a visual timing check. If you want a deeper breakdown of skipped-stitch causes beyond timing, this troubleshooting guide covers tension, needle damage, and fabric feed issues side by side.
How Do You Visually Check Needle-Hook Timing?
Unplug the machine before removing anything. Take off the needle plate and bobbin case according to your model’s manual, since access points vary between horizontal-hook and vertical-hook designs. With the machine unplugged and covers off, turn the handwheel toward you slowly, by hand, while you watch the needle and hook interact.
Here’s what correct timing looks like in motion:
- As the needle rises from its lowest point, watch closely once it climbs roughly 2 to 3 millimeters, about 3/32 of an inch.
- At that exact moment, the hook point should pass just above the needle’s eye and catch the loop of upper thread forming behind it, based on standard timing practice.
- If the hook arrives too early, before the needle reaches that height, the timing is advanced.
- If the hook arrives late, after the needle has already passed that point, the timing is retarded.
- Check feed timing at the same time: the feed dogs should stay below the plate while the needle is in the fabric, then rise only after the needle has fully cleared it.
Pro Tip: Mark a test needle with a fine-point permanent marker on the flat side before you start. The mark makes it much easier to see exactly where the hook passes relative to the eye when you’re squinting through a magnifier.
That 2 to 3 millimeter window is not a rough guideline. It’s the specific measurement point where the loop actually forms, and missing it by even a fraction changes whether the hook can catch the thread at all, based on detailed timing analysis from Cale Schoenberg. A magnifier and a strong flashlight make a real difference here. Domestic hook mechanisms move fast even by hand, and catching the exact pass point with the naked eye is harder than it sounds. This same slow handwheel technique, described in detail by The Quilting Room with Mel, is the standard way home sewists confirm a suspected timing fault before opening up the machine further.
What Are the Exact Steps to Adjust Sewing Machine Timing?
Timing adjustment follows a specific order, and skipping steps or doing them out of sequence is how people end up with a machine that’s worse off than before. APQS lays out four core adjustments that apply across most domestic and longarm mechanisms, even though the exact screw locations vary by model.
- Set needle bar depth first. Your target is a needle rise of about 2.36 millimeters, measured from bottom dead center. Use a fixed reference point, like the top of the needle plate opening, so your measurement doesn’t shift between checks.
- Adjust hook rotation. Loosen the hook drive set screws just enough to rotate the hook gear. Fine tune its position so the hook point meets the needle slightly above the eye at that same 2.36 millimeter rise.
- Set hook clearance. The hook should nudge the needle very slightly as it passes, with no visible air gap under a magnifier, but never hard enough to strike or deflect it. This is a delicate distinction, and it’s worth taking your time here rather than forcing it.
- Reposition the hook retaining finger. The tip should sit roughly one third of the way into the bobbin basket notch. Too shallow and thread slips past unpredictably; too deep and thread jams or drags.
Tighten every set screw you loosened, in the same order you adjusted them, then rotate the handwheel through several full revolutions by hand before plugging the machine back in. Watch for any binding as you turn.
Once everything is reassembled, sew a test line on plain woven cotton with a straight stitch. If stitches form cleanly and the needle no longer strikes the bobbin case, you’re done. If problems continue, stop and inspect the hook point and needle plate opening for burrs, scratches, or distortion under a magnifier. Physical damage from a prior needle strike can make timing adjustments ineffective no matter how precisely you set them, since a damaged hook point simply can’t catch the thread loop reliably even when its rotation is correct. In that case, you’re looking at a replacement part, not another round of adjustment.
What Tools Do You Need to Time a Sewing Machine?
Gather everything before you unplug the machine, since stopping mid adjustment to hunt for a tool increases the odds of losing track of where a part was seated.
- Two or three fresh needles in the correct system for your machine (130/705H covers most home machines)
- A small Phillips and flat head screwdriver set, plus hex keys or a torx driver if your model calls for them
- A fine-point permanent marker for marking a test needle
- A magnifier or jeweler’s loupe and a bright flashlight or headlamp
- A small piece of emery cloth, in case you find light burring on a metal part
- A clear, flat, well-lit workspace, away from lint, fabric scraps, or loose thread near the hook area
Always unplug the machine before removing any cover or handling the hook area. Vertical hook machines and horizontal hook machines have different clamp locations and access panels, so check your specific manual rather than assuming one procedure fits every brand. A quick maintenance pass, covered in this machine maintenance guide, before you start also helps you rule out lint buildup as a hidden factor.
When Should You Stop and Take Your Machine to a Technician?
Some signs mean the job has moved past a home fix, and pushing forward risks turning a simple adjustment into an expensive repair.
- The handwheel binds, resists, or feels rough when turned by hand after reassembly.
- You hear grinding or clicking noises from the hook area that weren’t there before.
- The needle continues striking metal even after confirming a correct needle and proper assembly.
- You spot visible burrs, cracks, or distortion on the hook point, bobbin case, or retaining finger.
- Skipped stitches persist on plain woven cotton even after a careful timing adjustment.
Repair costs vary widely depending on whether the issue is a simple realignment or a damaged part that needs replacing, plus labor rates in your area. When you do book a technician, bring a few sample stitches on scrap fabric and your correct bobbin so they can see the exact symptom rather than working from a description alone. Choose a technician familiar with your specific brand’s hook mechanism, since horizontal and vertical hook designs are serviced differently even when the underlying timing principle is the same.
Who Wrote This Guide and Why Trust It?
This guide was written by Chris, a contributor to Sewing Machines Plus who covers machine maintenance and troubleshooting for home sewists working through mechanical issues on their own machines. The measurements and sequence here reflect standard timing procedures used across the industry, cross checked against manufacturer guidance rather than guesswork.
The company has built a reputation supported by numerous positive customer reviews, a wide product selection, and services including free shipping on orders over $49 and personalized consultations for sewists seeking expert input before buying or repair. If a timing check reveals damaged parts, the bobbin case and hook assembly listings give you a direct path to the exact replacement component instead of guessing at compatibility.
What Timing Advice Gets Overstated (and What Doesn’t)
The internet treats sewing machine timing like it’s constantly drifting out of alignment, and that’s misleading. Factory timing on a modern machine is precise, and it rarely shifts on its own. Timing problems almost always trace back to a specific event: a needle strike, a jammed bobbin, or a foreign object caught in the hook area. If you can’t point to one of those, you’re probably chasing a threading or lint issue dressed up as a timing complaint.
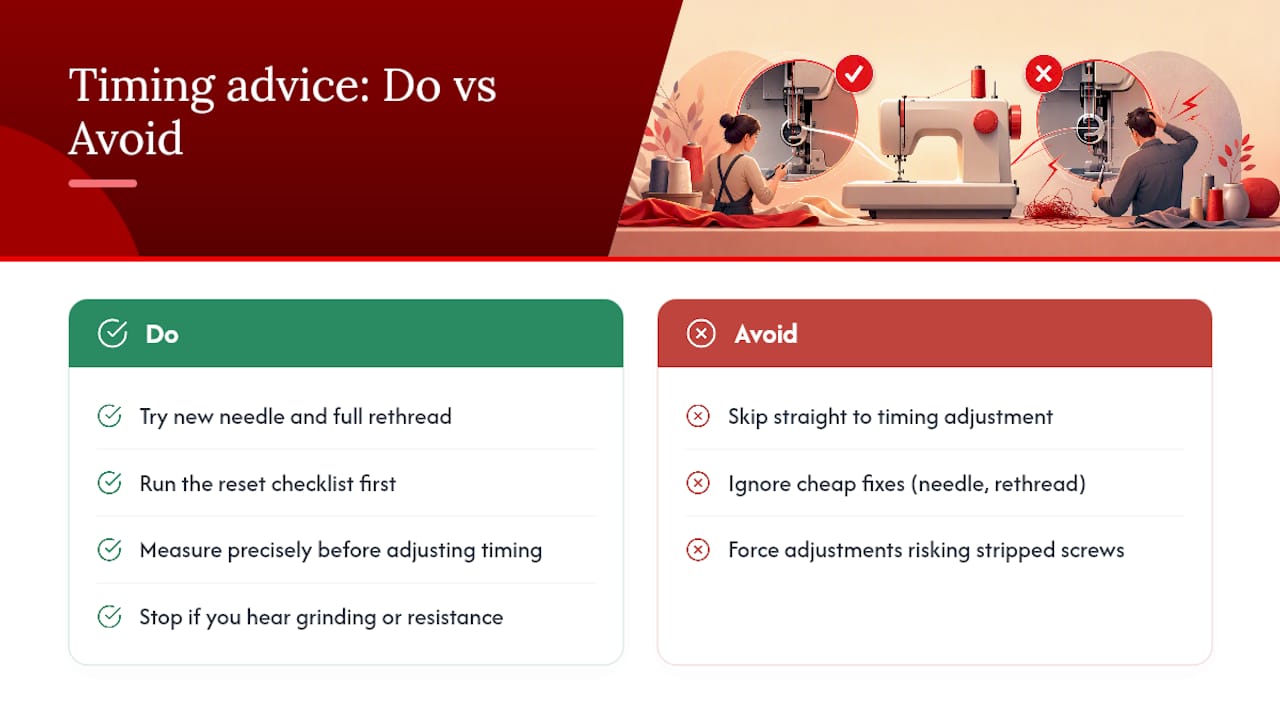
Where conventional advice falls short is skipping straight to adjustment without ruling out the cheap fixes first. A new needle and a full rethread cost you five minutes. A timing adjustment costs you an afternoon and carries real risk if you strip a screw or misjudge hook clearance.
Prioritize the reset checklist every time, measure precisely when you do need to adjust, and treat any grinding noise or hard resistance as a hard stop. The machine’s mechanical integrity matters more than finishing the job yourself in one sitting.
— Chris
Where to Find Parts and Support for Timing Repairs
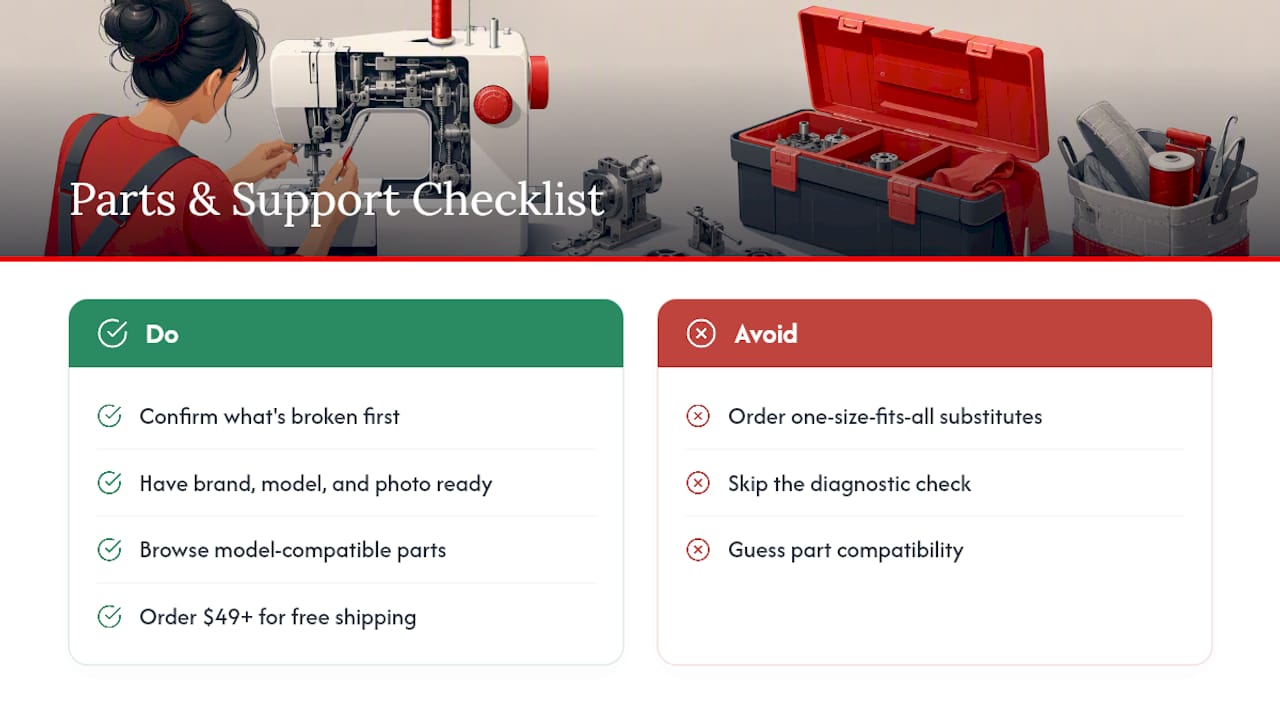
If your visual check turns up a damaged hook point, worn retaining finger, or a bobbin case that’s seen better days, Sewing Machines Plus carries the specific components you need instead of a one-size-fits-all substitute that won’t seat correctly. Their bobbin case listings are organized by model compatibility, so you’re not left guessing whether a part fits your machine before you order it.
Before reaching out for help or placing an order, have your machine’s brand, model number, and a photo of the damaged part on hand. That’s usually enough for a personalized consultation to point you toward the right component, and orders over $49 ship free. Think of Sewing Machines Plus as the place to go once you’ve confirmed what’s actually broken, not a replacement for doing the diagnostic work first. Browse the parts and accessories selection to see what’s in stock for your model.
Sources
For model-specific timing specs, always check your machine’s manual first since exact set screw locations and torque notes vary by brand. Beyond that, APQS’s timing instructions, Sewing Made Clear’s readiness checklist, and Cale Schoenberg’s timing breakdown each cover the mechanics in more depth. For bobbin-side symptoms that can mimic timing faults, this bobbin thread diagnostic checklist is worth a look too.
- Sewing Machine Timing - by Cale Schoenberg
- Sewing Machine Timing issue readiness checklist | Sewing Made Clear
- When and how should I time my APQS machine? - APQS
- Sewing Machine Timing - The Quilting Room with Mel
FAQ
How Can You Tell if Your Sewing Machine’s Timing Is Off?
Skipped stitches on plain woven cotton, the needle striking the bobbin case, or repeated needle breakage that continues after a fresh needle and full rethread are the clearest signs. A visual check, watching the hook pass the needle as it rises about 2 to 3 millimeters, confirms it.
How Much Does It Cost to Fix Sewing Machine Timing?
Cost depends on whether the fix is a simple realignment or requires replacing a damaged hook or bobbin case, plus local labor rates, so there’s no single flat number. If parts need replacing, components such as bobbin cases and hook assemblies are available by model to assist in sourcing the right part.
How Do You Reset Sewing Machine Timing?
There’s no single “reset” button. You adjust needle bar depth, hook rotation, hook clearance, and the hook retaining finger in sequence, then verify by test sewing on woven cotton, following the same four-step order technicians use.
What Should Stitch Length Be Set to When Testing for Timing Issues?
Use a standard straight stitch on plain woven cotton when testing after a reset or adjustment. Avoid stretch fabrics or very short or long stitch settings, since they can mask or exaggerate a timing symptom.
